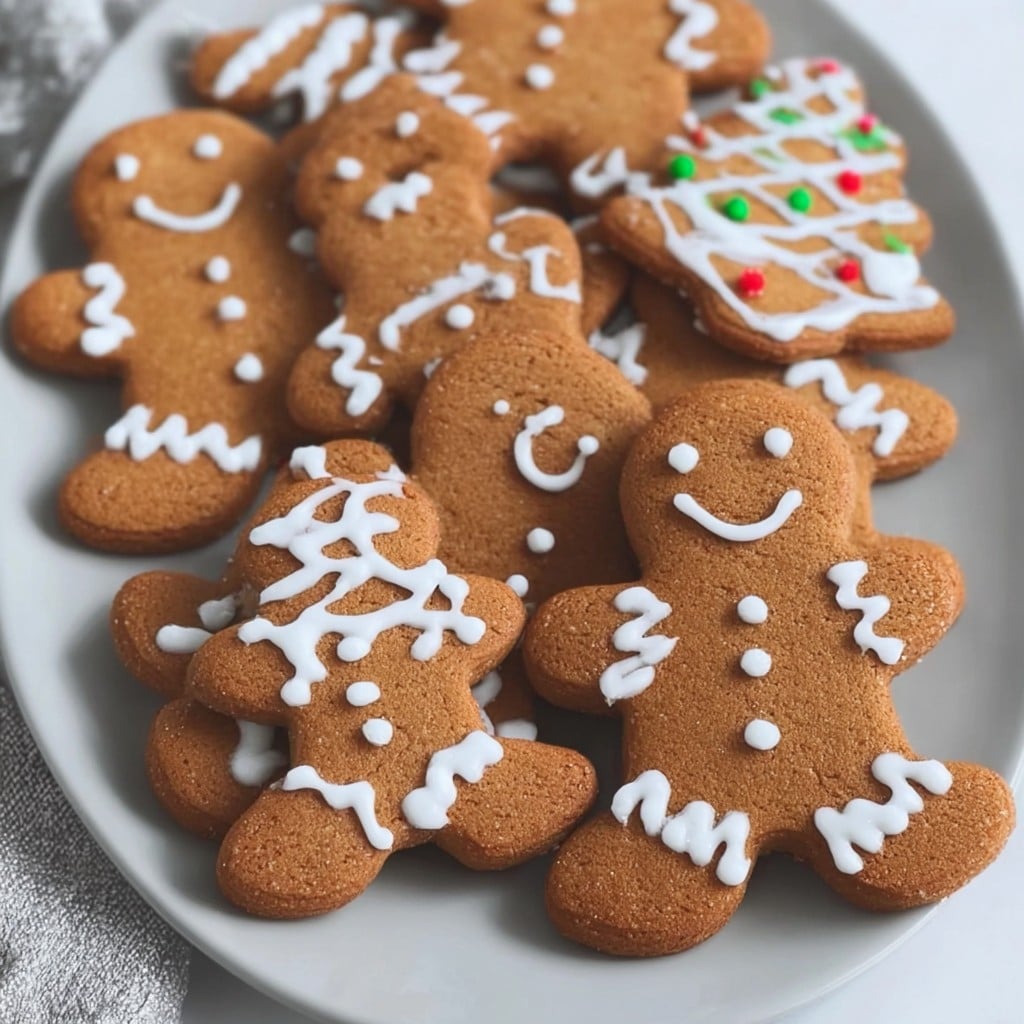
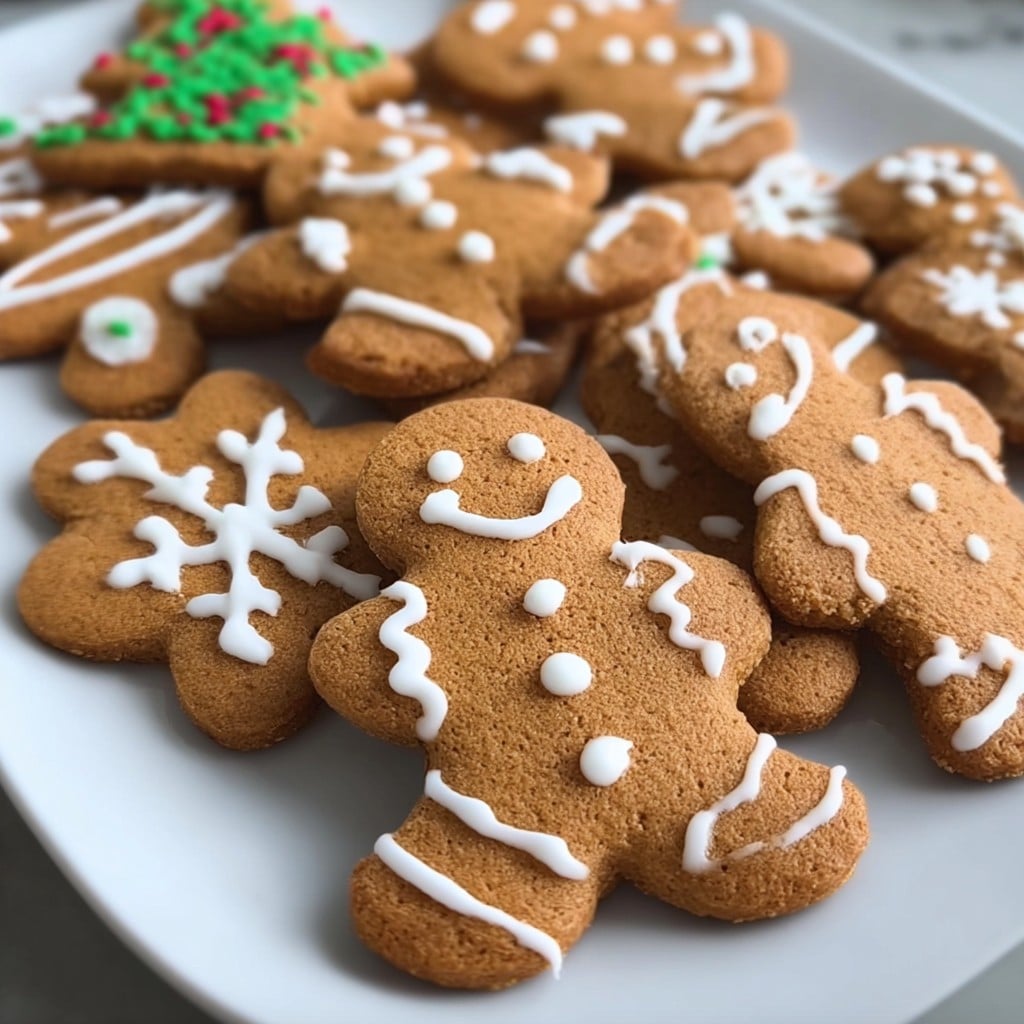
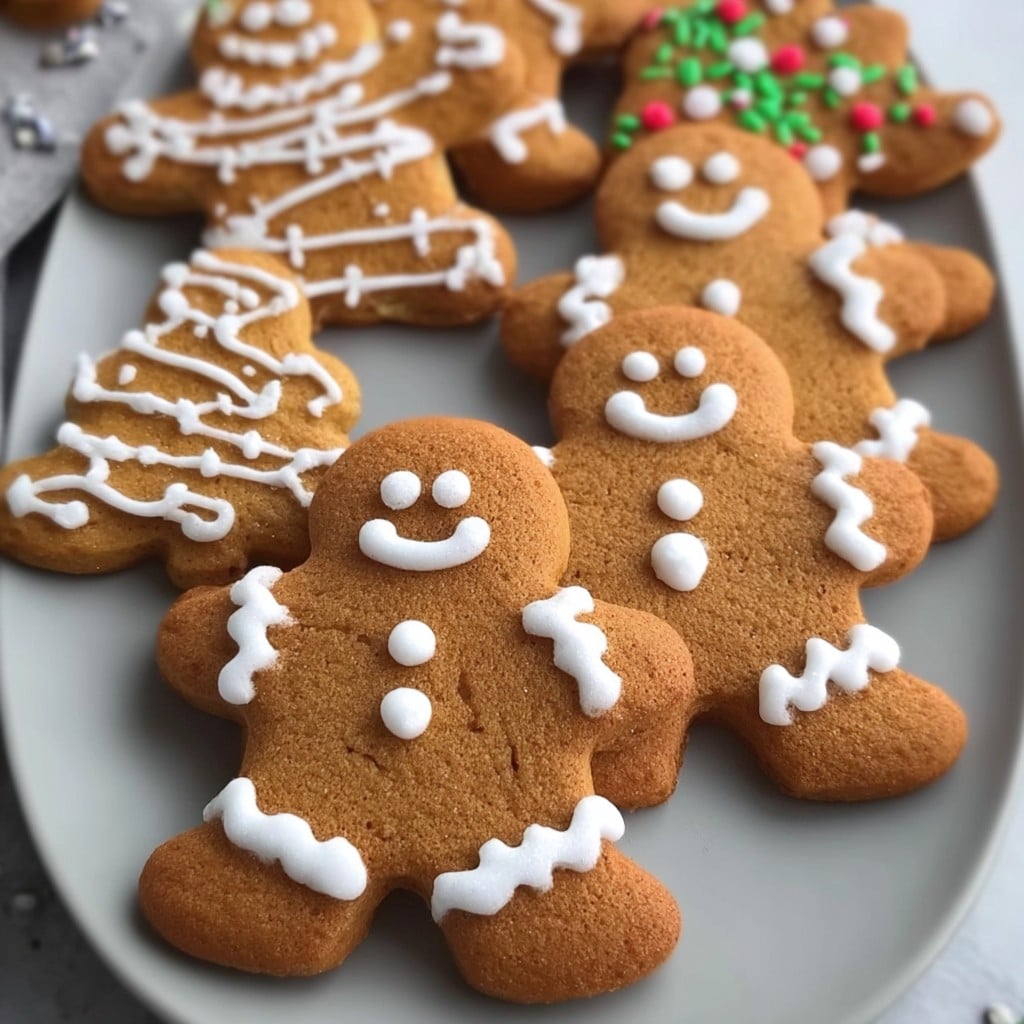
The Best Gingerbread Cookies – Fun Holiday Recipe Ideas
Alright, so gingerbread cookies. Let me tell you—a proper gingerbread session in my kitchen usually starts out all merry and bright, and, by the end, there’s flour all over the cat and the kids have eaten half the decorations (and I usually don’t mind). My mum always made it sound like rolling out dough was a magical holiday event, but no one ever told me how it kind of turns into a whole family affair—a bit like herding cats, honestly. I remember icing wonky little men and thinking my mittens would never warm up again; now, I do it every year, minus the pinky-mittens.
Why You’ll Actually Want to Make These
I usually whip up these gingerbread cookies when it’s freezing outside and the only thing that makes sense is to fill the house with spicy, sugary smells (plus, it doubles as an excuse to blast some mid-2000s Christmas music—don’t judge). My family goes a bit bananas for these—especially my niece, who somehow manages to decorate hers so they look like gingerbread Picasso went wild. And honestly, for years I avoided gingerbread, thinking it had to be soft, or perfectly crisp, or yadda yadda. Then I realised—homemade means you just make the kind you like. I have a weird thing about chewy cookies, so mine turn out halfway soft, halfway crunchy. Go with the flow, right?
What You Need (Yes, There Are Shortcuts)
- 3 cups all-purpose flour (I’ve used wholewheat in a pinch—those taste more, well, earthy. Good way to justify having two at breakfast though)
- 3/4 cup brown sugar—my grandmother swore by dark brown sugar but any will do
- 2 tsp ground ginger (sometimes I throw in an extra shake if I’m feeling dangerous)
- 1 Tbsp ground cinnamon
- 1/2 tsp ground cloves (absolutely optional, but adds a bit of magic)
- 1/2 tsp allspice (again, up to you; sometimes I just double up the cinnamon)
- 1/2 tsp salt
- 3/4 tsp baking soda
- 3/4 cup unsalted butter, room temp (salted works if that’s all you’ve got, just skip most of the added salt)
- 1 egg
- 1/2 cup molasses (don’t sub honey, I tried once—not great)
- 2 Tbsp milk (or a splash more if it feels dry—gotta listen to the dough)
Let’s Get Baking (Don’t Stress!)
- Mix your dry stuff: In a bigish bowl, whisk up flour, all your spices, salt, and baking soda. When I’m distracted, I just dump it all in and hope for the best—no shame.
- Butter & sugar next: In a mixing bowl, cream butter and brown sugar together till it’s light and fluffy—use a stand mixer if you have one, but I’ve done this by hand after forgetting to plug mine in. No biggie, just more elbow grease.
- Mighty molasses: Mix in the egg and molasses. Curious brown goo moment…don’t worry if it looks…unappetizing. It sorts itself out.
- Combine and finish: Add your dry mix in 2 or 3 goes, alternating with splashes of milk. Dough gets thick; if it’s super sticky, add a spoonful more flour. Or just stick it in the fridge and hide it until later—works for me.
- Chill it out: Wrap up dough and chill for at least an hour. Overnight is better (it’s science or habit, I’m not sure which anymore).
- Roll & cut: Lightly flour the counter and your hands—don’t skip this, trust me! Roll to about 1/4 inch (or just eyeball it), and use your favorite cutters. Classic ginger men, stars, or, come on, dinosaurs? Why not.
- Bake: Place shapes on lined tray, bake at 350°F (180°C) for 8-10 minutes. They’ll firm up as they cool. Try not to eat them hot, but…well, it’s tradition here.
- Decorate! Once cool, go wild with icing, sprinkles, crunchy little candies, or whatever survived the—let’s call it—taste-testing phase.
Notes (Stuff I Wish I’d Known Years Ago)
- If you’re short on time, freezing the dough for 25 mins instead of chilling for an hour works fine, though the cookies sometimes puff up weirdly (but still tasty)
- I’ve forgotten the allspice and honestly? No one noticed—so don’t sweat it if your spice rack is missing a bottle
- Sometimes I use parchment, sometimes just the tray—there’s really not that much difference, unless you’re baking bigger shapes which do love a nonstick surface
Things I’ve Tried…Some Better Than Others
- Swapping molasses for golden syrup—honestly, not for me. But maybe you’ll love it, so hey, experiment!
- Adding lemon zest into the dough – surprisingly good, if you want a bit less traditional taste
- Rolling the dough actually thinner than 1/4 inch – they get too crispy; good for those who like dunking in tea though
- Once I tried those silicone baking mats instead of parchment. They worked—you can check out more on Serious Eats’ guide, which actually helped when I had no clue which brand to get
What If I Don’t Have…?
No stand mixer? Use a big bowl, a sturdy spoon, and a bit of determination. I’ve even used a pint glass as a makeshift rolling pin in a pinch. Cookie cutters? Anything with a sharp-ish rim works, even a small mug or glass—creativity wins here (plus, weirder shapes get more icing, in my opinion).
How Long Do They Last? (Um…)
Alright, technically these keep for about a week in a tin, separated by baking paper. But, let’s be real—mine almost never see day three. You can also freeze the dough for up to three months; pull it out when holiday cravings hit unexpectedly. I’ve read storage tips on King Arthur Baking which are, honestly, way fancier than what I manage at home…
Serving Up Some Holiday Cheer
I love loading a plate with these and serving them with hot chocolate (with those oversized, wobbly marshmallows—yum). Every Christmas Eve, we set aside a few weirdly decorated ones for Santa, which is probably why he leaves the socks for me every year. Oh, and if you’re feeling fancy, dust a bit of icing sugar over the finished batch—Instagram-worthy, promise.
So, Pro Tips (or, “Don’t Do What I Did”)
- Don’t try to double the spice and bake faster—the cookies can taste bitter if you rush it (learnt that the hard way…tasted like a fireplace)
- Actually, chilling the dough longer really does help it roll out easier—even though I sometimes get impatient and try anyway. If it’s too soft, it just sticks everywhere…so patience pays off, shockingly
- Wash everything quick. Molasses sticks like glue if you don’t. Let’s just say my spatula once lived in the sink for two days (don’t ask)
FAQ – The Real-Life Cookie Hotline
- Can I use margarine instead of butter?
Yeah, but the flavor’s just a bit different—sometimes a bit ‘fake’ (my cousin actually prefers it, though, so you do you) - Do I really need to chill the dough?
I get it, you wanna move fast, but yeah—it stops the cookies from spreading into weird shapes; unless you want gingerbread blobs. On second thought, those could be fun… - Is blackstrap molasses okay?
Kinda harsh tasting—regular molasses is sweeter. But if that’s all ya got, maybe cut it with honey just a little - Can you decorate before baking?
I always wait until after, but my neighbor swears by baking the cookies with candies pressed on. Warning though: candies might melt into cosmic puddles - Any way to fix dough that’s too sticky?
Add a little more flour, a spoonful at a time, or toss it all back in the fridge for five minutes. Works every time (except when I’m in a hurry, and then it’s a mess!)
And, oh—did I mention how gingerbread dough is oddly satisfying to slap onto the counter? No? Just me?
Ingredients
- 3 cups all-purpose flour
- 3/4 cup unsalted butter, softened
- 3/4 cup packed brown sugar
- 1/2 cup molasses
- 1 large egg
- 1 tablespoon ground ginger
- 2 teaspoons ground cinnamon
- 1/2 teaspoon ground cloves
- 1/2 teaspoon baking soda
- 1/4 teaspoon salt
Instructions
-
1In a large bowl, beat the butter and brown sugar together until creamy. Add the molasses and egg, mixing until well combined.
-
2In a separate bowl, whisk together the flour, ginger, cinnamon, cloves, baking soda, and salt.
-
3Gradually add the dry ingredients to the wet ingredients, mixing until a dough forms. Divide the dough in half, flatten into disks, and refrigerate for 1 hour.
-
4Preheat oven to 350°F (175°C). Roll out the dough on a lightly floured surface to 1/4-inch thickness. Cut into desired shapes using cookie cutters.
-
5Place cookies 2 inches apart on a lined baking sheet. Bake for 8–10 minutes, or until the edges are firm. Cool completely before decorating.
Approximate Information for One Serving
Nutrition Disclaimers
Number of total servings shown is approximate. Actual number of servings will depend on your preferred portion sizes.
Nutritional values shown are general guidelines and reflect information for 1 serving using the ingredients listed, not including any optional ingredients. Actual macros may vary slightly depending on specific brands and types of ingredients used.
To determine the weight of one serving, prepare the recipe as instructed. Weigh the finished recipe, then divide the weight of the finished recipe (not including the weight of the container the food is in) by the desired number of servings. Result will be the weight of one serving.
Did you make this recipe?
Please consider Pinning it!!