Easy Homemade Gingerbread Cookies: My Go-To Cozy Recipe
Alright, Let’s Chat Gingerbread (with a Side of Nostalgia)
If you’ve ever craved the smell of Christmas in July—I mean, who hasn’t?—these easy homemade gingerbread cookies are the ticket. Every time I bake them, I end up covered in flour, giggling with my niece (who has a habit of sneaking tiny bits of dough). Oddly, the last time I made these, my cat tried to swipe a rolling pin. Anyway, there’s just something about gingerbread; it’s less about perfection and more about the fun. My kitchen ends up looking like a snowstorm hit, but somehow, that feels just right.
Why You’ll Be Into These Cookies
I make this recipe whenever my family wants to bake together (read: chaos), or when I need to suck up to the neighbors after borrowing their lawnmower again. These cookies come out softer than my Aunt Jean’s hugs, and honestly, they’re even better after a cold night in a tin. My family goes bonkers for the spicy, old-time vibe—someone always sneaks a piece before they even cool. If you’re looking for Instagram-perfect cookies with crisp lines, well, good luck; these have personality and a story (and possibly a fingerprint or two, but hey, that’s home baking for ya).
OK, Here’s What You’ll Need (Substitutions Welcome!)
- 2 3/4 cups all-purpose flour (whole wheat works in a pinch but tastes a bit earthier – not bad tho!)
- 2 tsp ground ginger (sometimes I use fresh, grated, but that’s a bit wild)
- 1 tsp ground cinnamon
- 1/4 tsp ground cloves (if you don’t have it, nutmeg sort of works—ish)
- 1/4 tsp salt
- 6 tbsp unsalted butter, softened (if you’re out, margarine somehow does the trick, I won’t tell)
- 1/2 cup brown sugar (light or dark, but my grandmother swore by Domino’s, which is kind of amusing)
- 1 large egg
- 1/3 cup molasses (I sometimes splash in a spoonful of golden syrup if I’m running low)
- 1 tsp vanilla extract (the cheap stuff will do—no shame)

How I Actually Make These Delightful Little Biscuits
- Mix the dry stuff: In a good-sized bowl, dump in the flour, ginger, cinnamon, cloves, and salt. Give it a stir—no need to overthink it.
- Beat the butter and sugar: So, cream your butter and sugar in a different bowl until it’s fluffy-ish. My hand mixer died once and I just mashed it together with a fork; not the same, but fine in a pinch.
- Add the wet stuff: Crack in the egg (shells are not a secret ingredient, trust me), then blend in the molasses and vanilla. If you forget the vanilla, on second thought, it still tastes good.
- Bring it all together: Chuck the dry ingredients into the wet. Stir (or, let the mixer do the heavy lifting) until it forms a soft dough. Don’t freak if it looks a bit lumpy. This is where I usually sneak a taste; don’t tell my mother.
- Chill out: Wrap the dough in cling film or cover the bowl, then let it sit in the fridge for at least an hour. If you’re impatient (like me… sometimes), a quick half hour in the freezer isn’t the end of the world. I’ve skipped chilling—big mistake. The dough turns into a sticky mess, and you’ll regret it.
- Roll and cut: Roll on a flour-dusted surface to about 1/4 inch thick. Cookie cutters are handy, but honestly, a glass rim works or even just slicing rectangles. Anything goes! My shapes have ranged from dinosaurs to ninja stars once—don’t ask.
- Bake: Pop onto a lined tray; bake at 350°F (180°C) for 8-10 minutes. If you like them softer, pull them out closer to 8. They’ll harden as they cool, so don’t panic if they look a bit underdone.
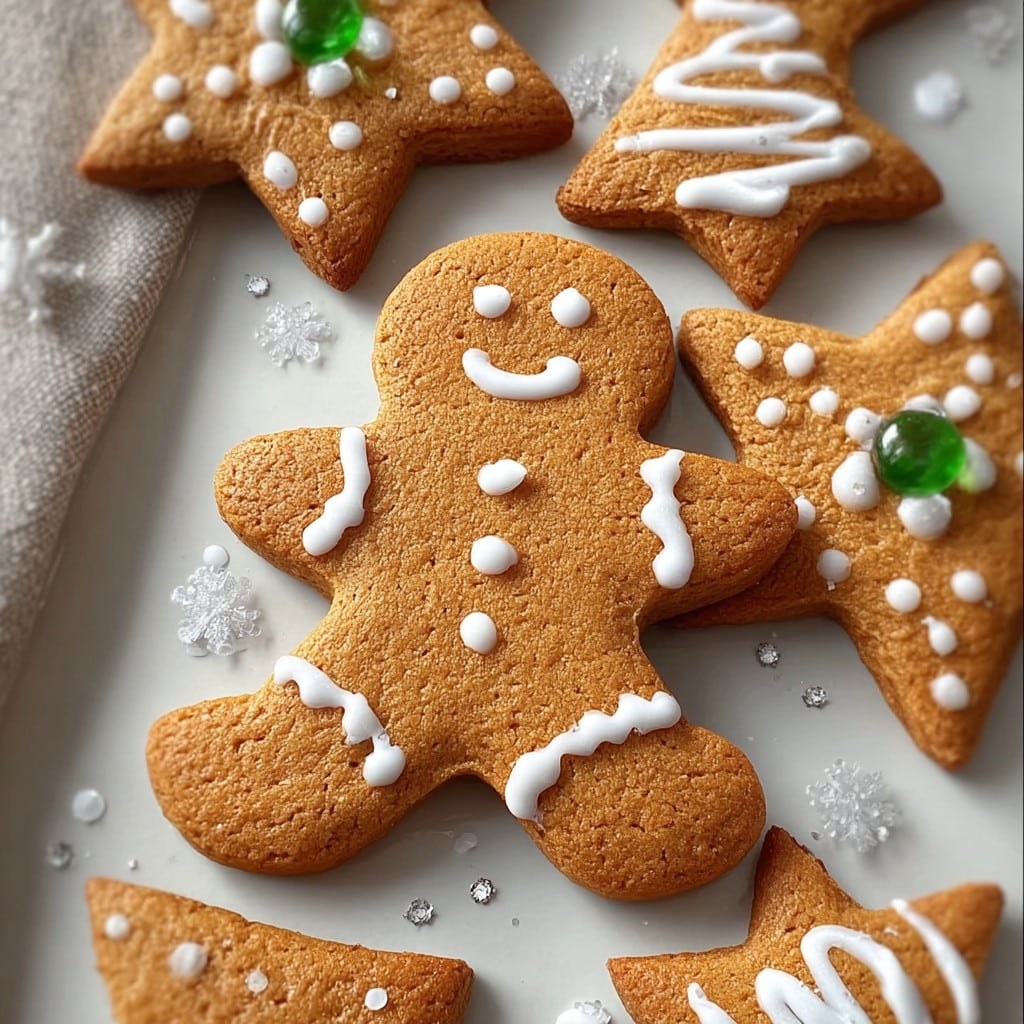
- Cool & decorate: Let them rest on a rack for 10 minutes—or as long as you can stand not nibbling. Swirl on icing, or just eat as is. Sometimes we decorate with whatever’s in the cupboard (raisins or chocolate chips work great).
A Few Notes (Straight from My Overused Oven)
- If your dough is sticky, that’s fine—dust everything with a little more flour and soldier on.
- I used to over-bake these thinking they weren’t done. Actually, pulling them a bit early gives you softer cookies. Live and learn.
- I sometimes halved the recipe when I was short on ingredients—it still works (though I do miss the extra nibble!)

Wild Variations I’ve Tried (and, Erm, One Flop)
- Added orange zest once—tasted like a Christmas candle, but I liked it
- Swapped butter for coconut oil: makes them a little tropical, a bit weird but not bad
- Tried adding cocoa powder; looked great but texture, well, let’s not talk about that
If You Don’t Have Fancy Tools…
A rolling pin is handy, but a wine bottle works fine (I learned this one night during a snow storm—don’t ask why I had wine but not a rolling pin). No cookie cutters? An upside-down cup, a jam jar lid, anything vaguely round-ish will do the trick. You can even just slice squares if you’re feeling rebellious.

How to Store ‘Em (Assuming They Last That Long)
An airtight tin or a cookie jar will keep these fresh for up to a week, maybe two? I mean, theoretically. Truthfully, they vanish within 24 hours here. If you want to freeze the dough, just wrap well and stash for a month or so. You might need to let it soften a little so you don’t bend your rolling pin—yep, did that once.
How We Actually Eat Them (Serving, My Way)
I love them with a cup of tea (builder’s, milk and sugar, please). Sometimes we smear a bit of butter on the warmest ones—sounds strange, but trust me. On holidays, everyone grabs one while decorating the tree; a few get snuck into lunchboxes, too. One year, I had the bright idea to make ice cream sandwiches—pretty wicked if you ask me.
Pro Tips I Definitely Learned the Hard Way
- Don’t over-flour the surface or you’ll get tough cookies—once I did and honestly, I could’ve used them as coasters.
- Chill the dough. I know, I’ve said it, but skipping this once meant I had to scrape gooey dough off every surface.
- Don’t walk away while they bake—the difference between perfect and a bit too ‘crunchy’ is about a minute.
FAQ, Because People Actually Email Me About These
- Can I make these vegan?
- Yeah, swap the butter for coconut oil or vegan margarine, and use a flaxseed egg. Texture’s a bit different, but it works!
- Do they keep their shape well?
- If you chill the dough enough (and don’t warm up your kitchen with a space heater like I did once), they hold okay. Soft edges, though.
- What’s the best molasses?
- I just use whatever’s at the supermarket. Blackstrap is way too strong for me, but you do you. More info here.
- Where do I find fun cookie cutters?
- I got mine here on Etsy—plus, you can always make your own shapes with a knife (just go slowly).
That’s pretty much all from my kitchen this time. If you try these, let me know how it goes—maybe don’t judge my decorative skills (I’m all shaky hands and giggles by the end). For more gingerbread ramblings, see BBC Good Food’s guide—there are loads of ways to make these your own. Happy baking, mate!
Ingredients
- 2 1/4 cups all-purpose flour
- 1/2 cup unsalted butter, softened
- 1/2 cup packed brown sugar
- 1/3 cup molasses
- 1 large egg
- 1 teaspoon ground ginger
- 1 teaspoon ground cinnamon
- 1/2 teaspoon ground cloves
- 1/2 teaspoon baking soda
- 1/4 teaspoon salt
Instructions
-
1In a large bowl, whisk together flour, ginger, cinnamon, cloves, baking soda, and salt.
-
2In another bowl, beat the butter and brown sugar until creamy, then add the molasses and egg, mixing well.
-
3Gradually add the dry ingredients to the wet ingredients, mixing until a dough forms. Chill dough for at least 1 hour.
-
4Preheat oven to 350°F (175°C). Roll out dough on a lightly floured surface to about 1/4-inch thickness and cut into shapes.
-
5Place cookies on a baking sheet lined with parchment paper and bake for 8–10 minutes or until the edges are set.
-
6Cool on a wire rack. Decorate as desired.
Approximate Information for One Serving
Nutrition Disclaimers
Number of total servings shown is approximate. Actual number of servings will depend on your preferred portion sizes.
Nutritional values shown are general guidelines and reflect information for 1 serving using the ingredients listed, not including any optional ingredients. Actual macros may vary slightly depending on specific brands and types of ingredients used.
To determine the weight of one serving, prepare the recipe as instructed. Weigh the finished recipe, then divide the weight of the finished recipe (not including the weight of the container the food is in) by the desired number of servings. Result will be the weight of one serving.
Did you make this recipe?
Please consider Pinning it!!