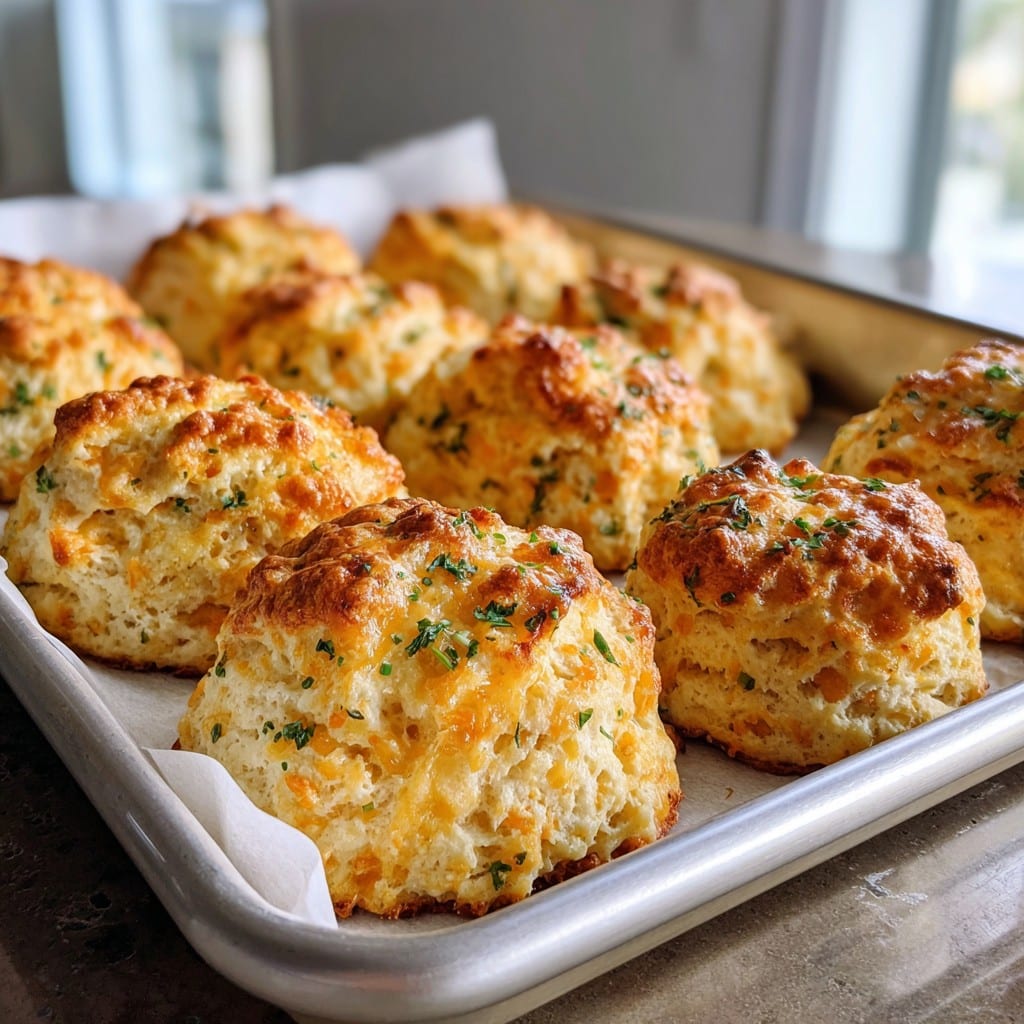
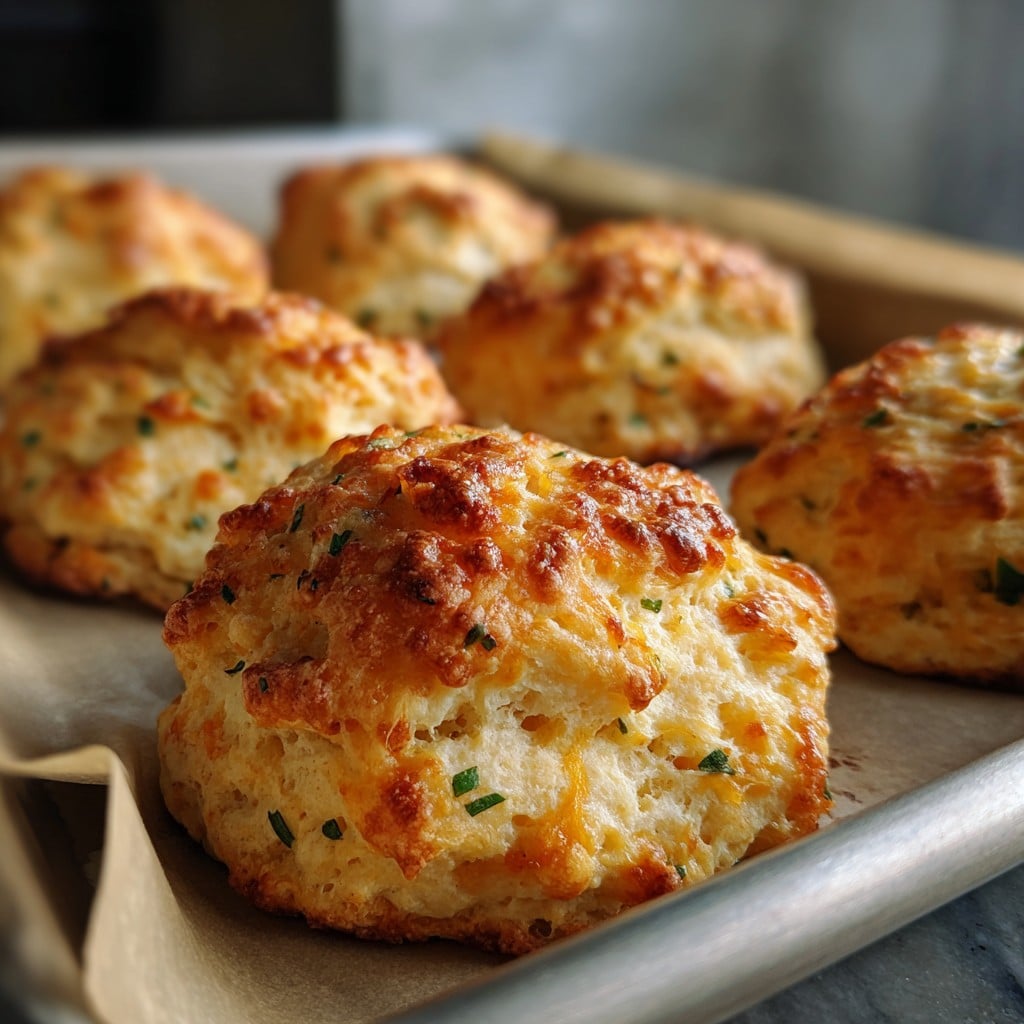
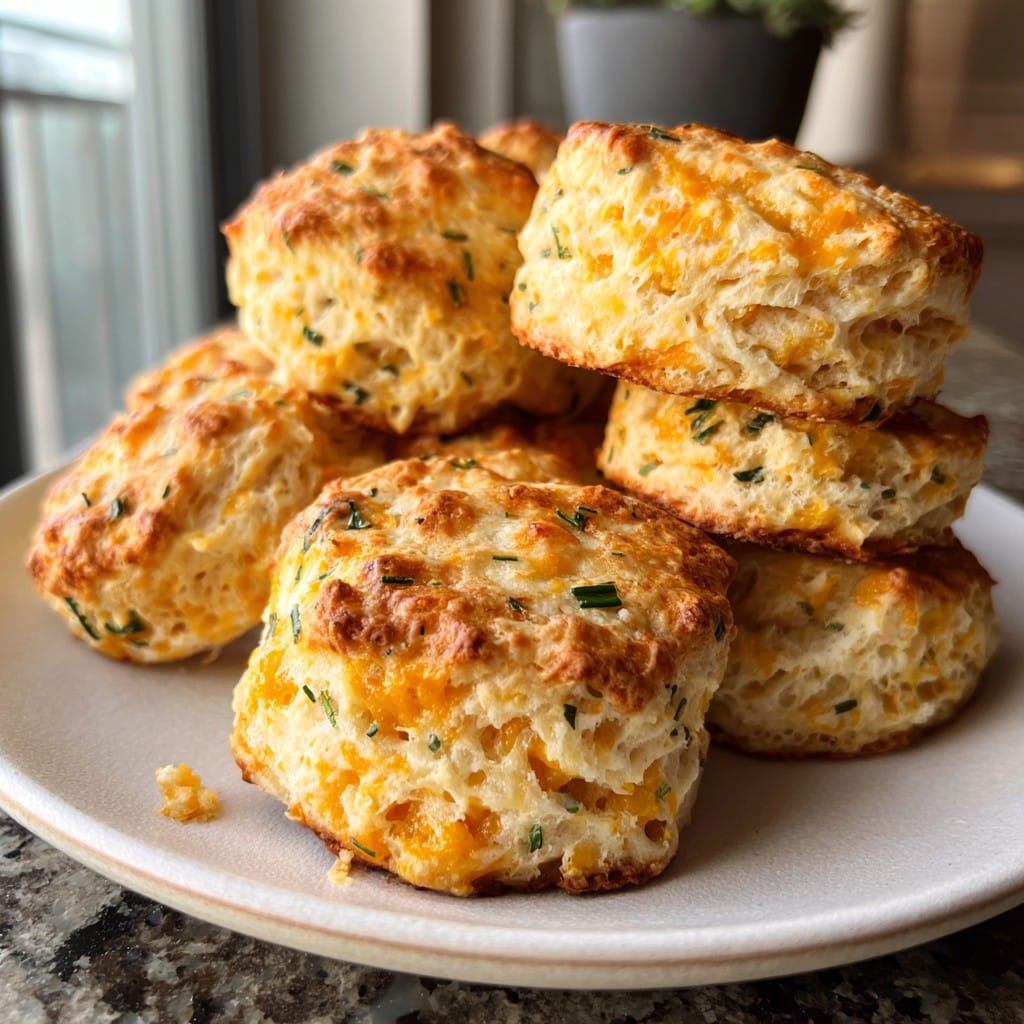
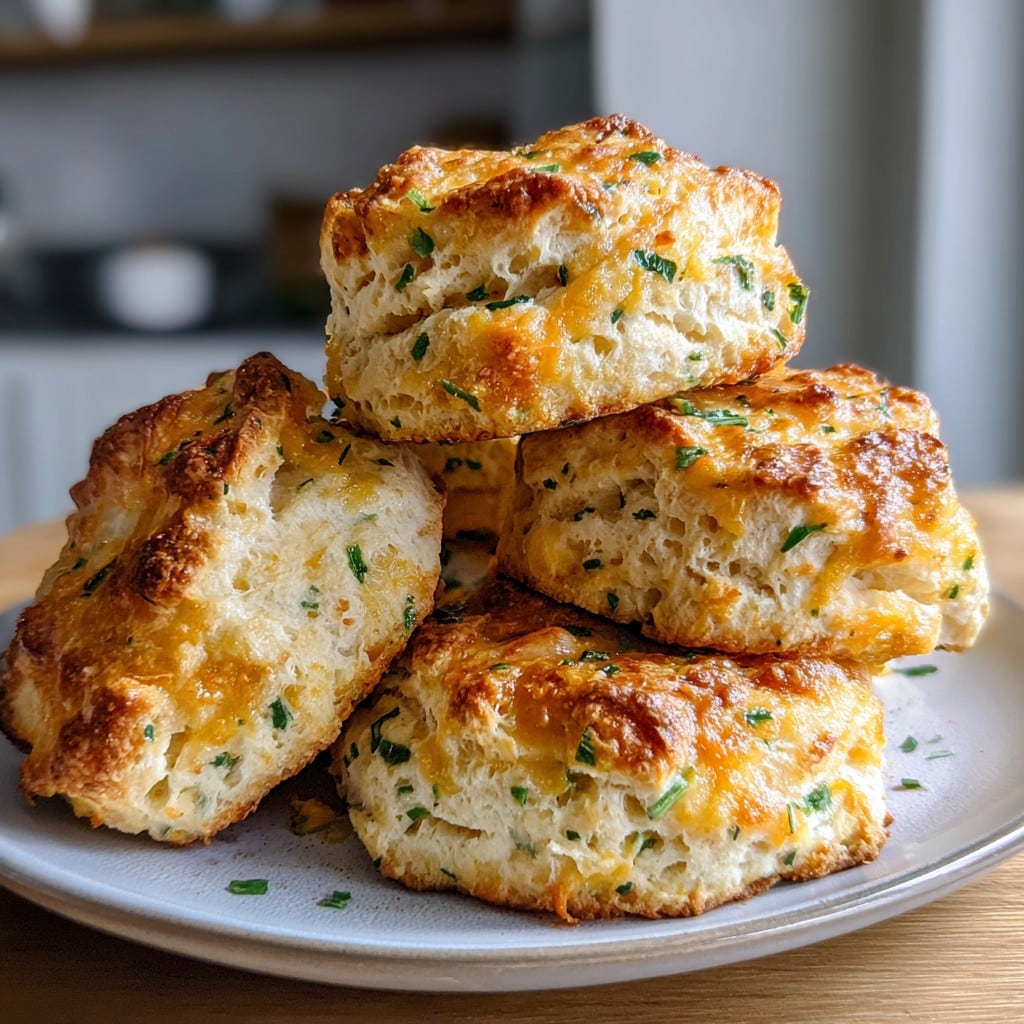
Homemade Cheddar Chive Biscuits – Perfect for Brunch or Dinner
If You Only Make One Biscuit Recipe, Let It Be This One
If I had a dollar for every batch of cheesy biscuits I’ve whipped up, I’d probably have, I dunno, enough for a week’s worth of good cheddar. Seriously though, cheddar chive biscuits have been my culinary life raft on more than one busted dinner attempt. There was this one time my dad tried grilling in a blizzard (don’t ask), and these warm, fluffy biscuits pretty much saved the meal from disaster. Cheesy, fragrant, and just the tiniest bit messy—they make you look like you know what you’re doing (even if you dropped half the flour on the dog). Oh, and sometimes I eat them cold over the sink the next day. But let’s pretend that’s classy.
Why You’ll Love Making These (Even If It Gets Messy)
I make these when Sunday brunch is somehow both super chill and a low-key competition with the in-laws. My family goes bonkers for anything with sharp cheddar and herbs. (One cousin actually tried to take a bag home.) Honestly, even if you’re not a “baker,” biscuits let you fudge things a little. Plus, if you’re like me and occasionally mess up the rolling step, nobody minds—it’s all about the flavor and that slightly unhinged, craggy texture.
Also, if you ever run out of chives (I always do), green onions work too—though my neighbor swears by a bit of dill. Whatever’s in the crisper drawer. Oh, and I’ve tried the biscuit mix shortcut; but it’s not quite the same, is it?
What You’ll Need (But Honestly, Improvise)
- 2 cups all-purpose flour (Sometimes I grab the cheaper store brand, no major difference.)
- 2 tsp baking powder
- 1/2 tsp baking soda
- 1/2 tsp salt (I use flaky sea salt when I’m feeling fancy—pro tip: don’t overdo it if your butter’s salted.)
- 1/2 cup cold unsalted butter (If all you have is salted, just dial down the added salt—learned this the hard way.)
- 1 cup (about 115g) sharp cheddar cheese, grated (Extra sharp = extra wow; pre-shredded is fine but melts a tad differently.)
- 1/3 cup chopped fresh chives (Scallions work in a pinch; have even used dried chives, it’s OK.)
- 3/4 cup buttermilk (No buttermilk? Just stir a tablespoon of lemon juice into regular milk and let it sit—classic Nana move!)
- Optional: A pinch of cayenne or cracked black pepper for extra zing.
So Here’s How I Actually Make Them
- Preheat your oven to about 220°C (425°F). Trust me, hot ovens make tall biscuits.
- Mix the dry stuff: Whisk together flour, baking powder, baking soda, salt in a big ol’ bowl. Doesn’t need to be perfect.
- Add the butter: Grate or cube it, then rub it in with your fingers (or that pastry thingie I only find every third attempt). You want it kind of pebbly, like very lumpy sand.
- Stir in cheese and chives with a light hand (this is where I usually sneak a taste and then immediately regret eating raw flour—one day I’ll learn).
- Pour in buttermilk: Mix with a fork or your hand. It’s going to look a bit shaggy—totally normal. Don’t overmix or they’ll be tough as old boots.
- Flour your counter, plop out the dough, and gently pat it to an inch thick. Sometimes I skip rolling entirely and just squish it with my hands (less washing up, honestly).
- Cut into rounds with a cutter, jar rim, or if you can’t find anything, a mug works. Or just slice into squares and call it rustic—no one has ever complained to me about a wonky biscuit.
- Arrange on a baking tray right next to each other for pillowy sides or spaced out for crispy edges (I always forget which I prefer until halfway through baking—life’s mysteries).
- Bake 13-15 minutes, until gloriously golden. And yes, peek through the oven glass—it’s half the fun.
- Let cool just enough so you don’t burn yourself. If you’re feeling wild, swipe melted butter on top while they’re hot.
Little Notes That Might Save Your Sanity
- Use super cold butter, even freeze it if your kitchen’s hot. Melty butter equals sad, flat biscuits (Found this one out the hard way mid-July).
- If dough sticks to your hands, flour them, or just pretend it’s a moisturizing hand mask.
- Actually, letting the dough rest a few minutes before cutting //does// help—probably science or magic.
Things I’ve Tried (Some are Hits… Some Not So Much)
- Add diced ham for a breakfast twist—delicious.
- Swap cheddar for feta: a bit crumbly but tasty. Gruyere was fancy but honestly overshadowed the chives.
- Tried yogurt instead of buttermilk once. Wouldn’t repeat—too dense.
- Jalapeños in place of chives = risky but great for spice fiends.
Do You Need Special Gear? Not Really
If you don’t own a pastry cutter (I lose mine constantly), just use two knives or, heck, your fingers. For the cutting, like I said—jar ring, glass, even a tuna can (washed, obviously). Sometimes I just pat the dough out and slice into squares with a butter knife. ‘Proper’ biscuit trays are nice, but your regular baking tray lined with parchment paper will do the trick just fine.
Can You Store These? Kinda…
Store cooled biscuits in an airtight tin or zip bag for up to two days, but truth? They rarely last that long (my partner literally nabs one every time they pass through the kitchen). If you DO have leftovers, pop ‘em in the toaster oven to revive the cheese meltiness. Freezing works, but they lose their edge—almost literally.
What’s the Best Way to Serve These?
We put ours out with big stews or chili—sopping up sauce is half the fun. For brunch, pile with scrambled eggs and a slice of smoked salmon (sounds posh, tastes unreal). My mom just eats them with slatherings of jam—it’s not traditional, but it’s oddly addictive. Oh, and they’re great alongside this homemade gravy if you want to go the whole nine yards. Or serve with split pea soup—comfort food squared.
Lessons Learned (So You Don’t Make My Slip-Ups)
- One time I forgot to chill the butter after microwaving it to soften—result: leaden pucks, not biscuits. Don’t do it.
- I tried skipping the buttermilk and just using water. Nope—dry, sad, never again.
- Don’t overthink the shape. Lumpy biscuits taste just as good and actually look inviting to me—perfection’s overrated.
Your Cheddar Chive Biscuit Questions (Because People Do Ask!)
- Can I make these ahead? Yes, somewhat. Bake, cool, then reheat for 5 min in the oven. Or prep the dough and chill until you’re ready to bake. Not the same, but close enough.
- What’s the best cheese? I use extra-sharp cheddar, but honestly, whatever you have on hand will work. Swiss gets a little stringy, though.
- Why are my biscuits flat? Usually warm butter or overmixing. Or, in my case once, when I forgot the baking powder. Oops.
- Can I skip the chives? Absolutely! Or swap for parsley. No one will call the biscuit police.
- Why do you bake biscuits so hot? I find the high temp gives that classic nice rise—also, I’m too impatient to wait longer anyway!
Honestly, the messier the better. Give them a go—just don’t be surprised if you get asked for the “secret” next brunch. (Spoiler: It’s lots of cheese… and not taking yourself too seriously in the kitchen.)
Ingredients
- 2 cups all-purpose flour
- 1 tablespoon baking powder
- 1/2 teaspoon baking soda
- 1 teaspoon salt
- 1/2 cup unsalted butter, cold and cubed
- 1 cup sharp cheddar cheese, shredded
- 1/4 cup fresh chives, finely chopped
- 3/4 cup buttermilk, cold
Instructions
-
1Preheat the oven to 425°F (220°C). Line a baking sheet with parchment paper.
-
2In a large bowl, mix together the flour, baking powder, baking soda, and salt.
-
3Cut in the cold butter using a pastry cutter or fingers until the mixture resembles coarse crumbs.
-
4Stir in the cheddar cheese and chopped chives. Pour in the buttermilk and mix gently until just combined.
-
5Turn the dough out onto a floured surface, gently pat to about 3/4-inch thickness, and cut out biscuits using a round cutter.
-
6Place biscuits on the prepared baking sheet and bake for 16-18 minutes until golden brown. Serve warm.
Approximate Information for One Serving
Nutrition Disclaimers
Number of total servings shown is approximate. Actual number of servings will depend on your preferred portion sizes.
Nutritional values shown are general guidelines and reflect information for 1 serving using the ingredients listed, not including any optional ingredients. Actual macros may vary slightly depending on specific brands and types of ingredients used.
To determine the weight of one serving, prepare the recipe as instructed. Weigh the finished recipe, then divide the weight of the finished recipe (not including the weight of the container the food is in) by the desired number of servings. Result will be the weight of one serving.
Did you make this recipe?
Please consider Pinning it!!