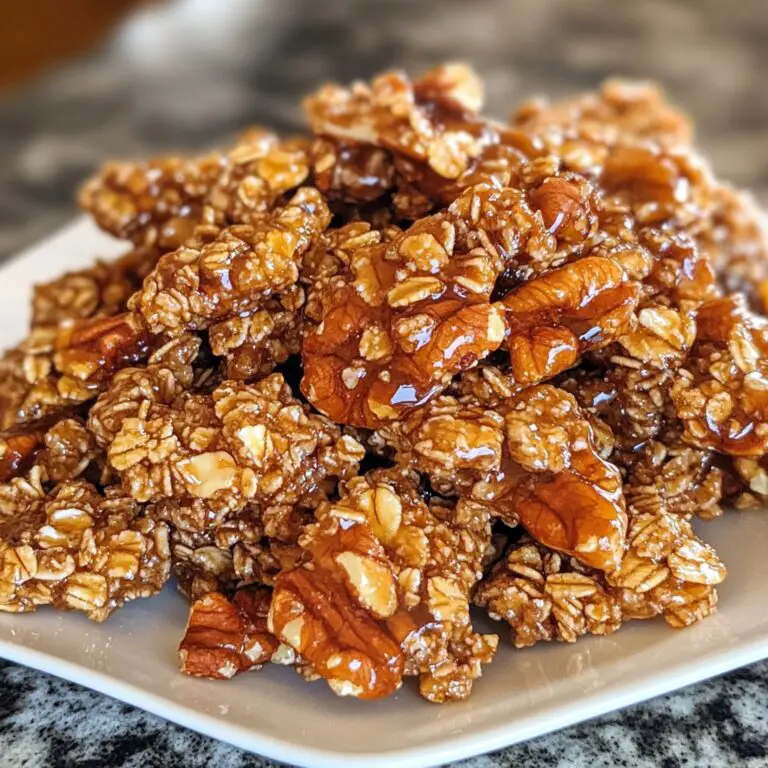
Moose Farts
Alright, story time before we get messy. The first time I made Moose Farts, I only did it because my cousin double-dog dared me to bring them to our family potluck. The name got a good laugh (my aunt nearly spat her tea), but no joke—half the tray was gone before dinner. Kids snuck back for seconds, and my uncle kept asking, “What in the world is a Moose Fart anyway?” Still haven’t come up with a straight answer. These bite-size treats are somewhere between a cookie and a candy, no oven required, and even if you slightly mess up, they still taste wicked good.
Why You’ll Love Making Moose Farts (Even If the Name Makes You Giggle)
- Honestly, I whip these up when I’m short on time (or patience!).
- They’re perfect for last-minute parties, or whenever I want to trick someone into thinking I spent hours in the kitchen. Spoiler: I didn’t.
- My family goes wild for them, especially after a day out skating or shoveling snow (I’m in Canada, so that’s like, every other day in winter).
- Oh, and if you’ve ever messed up a batch of cookies—these are practically goof-proof. That said, don’t try making them while you’re still half-asleep. (Trust me, I once mixed the coconut with flour itself. Not great!)
- Also, they’re bite-sized, so grabbing three at a go totally doesn’t count as breaking a diet. At least, that’s what I tell myself.
What You’ll Need (And Some “Substitutions” I’ve Tried)
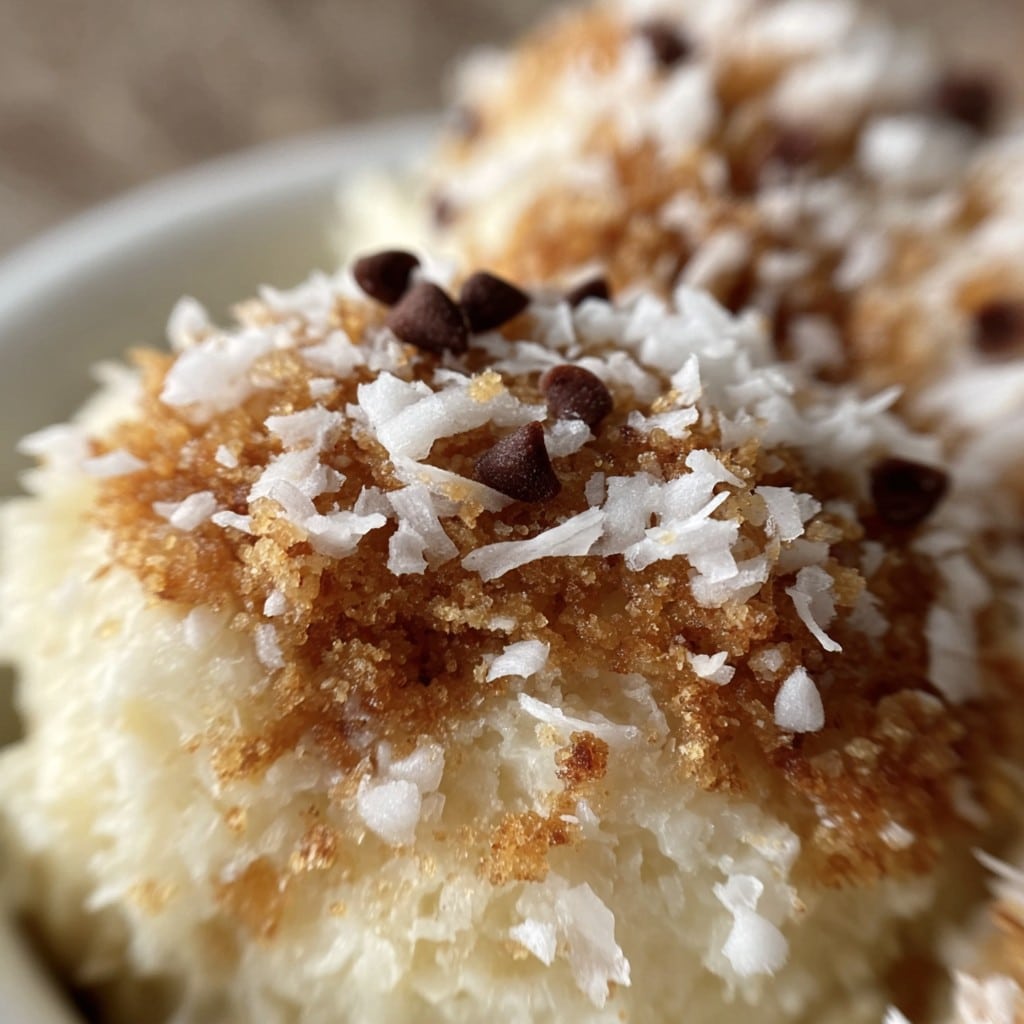
- About 2 cups graham cracker crumbs (sometimes I use digestive biscuits if I’m out, works fine; don’t stress)
- 1.5 cups shredded coconut (sweetened or unsweetened, whatever you’ve got—Mom swears by sweetened, but honestly I can’t tell the difference)
- 1 can sweetened condensed milk (the regular 14 oz / 397ml thing, but I’ve seen folks use coconut condensed milk for a vegan twist)
- Half a cup of chocolate chips (mini ones mix in best, but if you only have the big ones just chop ’em up a bit)
- Optional: a splash of vanilla or a pinch of salt. I usually forget to add these but, on the rare occasion I remember, it’s kinda nice.
- Optional: chopped nuts (pecans, walnuts, whatever’s rolling around at the bottom of your baking cupboard)
Let’s Get Rolling! (Literally)
- Grab a big bowl. Dump in the graham crumbs, coconut, and chocolate chips. Give it a good mix (I use my hands when no one’s looking—less dishes!).
- Pour over the can of condensed milk. This is where it starts to look way too sticky and gooey—don’t panic; it’s supposed to. Mix it up until everything’s coated. Actually, I find using a spatula first and then switching to hands works better. (If you have a stand mixer, go wild, but don’t feel like you need it.)
- Now comes the rolling part. I usually spoon out blobs about the size of a walnut and roll them into balls. If it’s sticking to your hands like crazy, run your hands under cold water first, or dust with a bit of graham crumbs.
- Plop each ball onto a tray or plate lined with parchment. At this stage, sneak a taste—I always do.
- Pop the tray in the fridge for at least 30 minutes (honestly, I usually can’t wait and start stealing them earlier). They firm up and set a bit, but if they smoosh, who cares?
Notes from a Moose Farts Veteran
- If your mix looks too wet, toss in a handful more crumbs. Too dry? A bit more condensed milk won’t hurt, but careful not to drown it!
- I once used toasted coconut since that’s all I had—tasted amazing. Sometimes, happy accidents are the way forward; except maybe, don’t substitute coconut entirely with cornflakes. Yeah, learned that the messy way.
- Let the kids help with the rolling if you want a kitchen that looks like a snowstorm hit it. Still, it’s fun, and memories are worth a little chaos.

Random Variations Because Why Not?
- Try stirring in a spoonful of peanut butter. I did this once when I ran low on chocolate chips, and now it’s a family favorite.
- I’ve also made a batch with crushed pretzels instead of nuts for a salty-sweet thing. Actually, come to think of it, maybe don’t add both or it gets too wild (unless you just love crunch).
- Once I tried rolling them in sprinkles. Looked fun, tasted like, well, mostly sugar and regret.
Stuff You Need (But Not Really, If You Improvise)
- A mixing bowl (if yours is lost in the depths of the cupboard, any big-ish pot works… or just the salad bowl, really)
- A spoon or spatula (or clean hands—don’t let anyone judge)
- Parchment or wax paper (I sometimes just lightly oil a plate if I’m out; works in a pinch)
How to Store Your Moose Farts (If They Survive That Long)
Pop leftovers (ha!) in an airtight tin in the fridge; they’re at their best for 3-4 days. Though honestly, in my house they don’t see sunrise—everyone sneaks one for breakfast. You can freeze them too, for a month or so, but they freeze a little soft. I actually think they taste better the next day—something about the flavors kind of mingling in the fridge?
How to Serve These (Other Than Just Gobbling Straight from the Fridge)
I like to pile them on a silly plate, maybe add a little sign saying “Beware: Moose Farts!” at family parties. Kids love it (and giggle for hours). Sometimes I dust them with extra coconut for fancy points, but usually it’s just straight-up, as-is, coffee in one hand, Moose Fart in the other. During Christmas, we throw them into our cookie tins with other classic Canadian treats.
Little Pro Tips (Learned the Hard Way…)
- Don’t rush the chill—you’ll end up with sticky hands and squished balls. I did this once for a bake sale and had to explain what they were far too many times (presentation matters sometimes!).
- If you want to double the batch, just grab someone to help roll or you’ll start resenting the process 30 balls in. Or, make giant ones and call them “Moose Sneakers.” Which, now that I think of it, is a much worse name.
- Seriously, don’t overthink the brand names on the ingredient list. I get the cheapest in the shop most days.
FAQ—Because People Have Actually Asked Me These!
- Can I use less sweetened condensed milk? Kinda, but the balls might not hold together as well. I’ve cut it back a smidge and compensated with an extra dump of coconut.
- Do these need to be cooked? Nope! That’s half the appeal. Just mix, roll, chill, snack.
- Can you use another milk for allergies? There are vegan/plant condensed milks out there—I tried this coconut-based version once and it worked a treat.
- What if I hate coconut? Good news—maybe try a mix of finely chopped nuts and oats for texture, but honestly, coconut is the soul of these little guys.
- Can I freeze them? Yeah, see above. Just let them come to room temp (or, if you’re me, nibble on one straight from the freezer because patience isn’t always my strength).
So that’s the legend (or misadventure?) of Moose Farts in my kitchen. They’re the sort of treat that makes people laugh, and then ask for the recipe. Give ’em a go—even if you’re distracted or missing an ingredient or two, I promise they’ll disappear faster than you can say, “Sorry, all out!”
Ingredients
- 1 1/2 cups graham cracker crumbs
- 1 1/2 cups unsweetened shredded coconut
- 3/4 cup mini chocolate chips
- 1/2 cup creamy peanut butter
- 1 can (300 ml) sweetened condensed milk
- 1 tsp vanilla extract
- A pinch of salt
- 1 cup melted chocolate (for coating, optional)
Instructions
-
1In a large bowl, combine graham cracker crumbs, shredded coconut, and mini chocolate chips.
-
2Add the peanut butter, sweetened condensed milk, vanilla extract, and a pinch of salt to the dry ingredients. Mix well until everything is fully incorporated.
-
3Scoop out tablespoon-sized portions of the mixture and roll into balls using your hands.
-
4If desired, dip the balls into melted chocolate to coat. Place the balls on a parchment-lined tray.
-
5Refrigerate for at least 1 hour to set before serving.
Approximate Information for One Serving
Nutrition Disclaimers
Number of total servings shown is approximate. Actual number of servings will depend on your preferred portion sizes.
Nutritional values shown are general guidelines and reflect information for 1 serving using the ingredients listed, not including any optional ingredients. Actual macros may vary slightly depending on specific brands and types of ingredients used.
To determine the weight of one serving, prepare the recipe as instructed. Weigh the finished recipe, then divide the weight of the finished recipe (not including the weight of the container the food is in) by the desired number of servings. Result will be the weight of one serving.
Did you make this recipe?
Please consider Pinning it!!