Mini Gingerbread Pudding Cups – Perfect for Holiday Parties
Mini Gingerbread Pudding Cups—Oh So Festive (and a bit of a game changer)
If you’ve ever found yourself knee-deep in tinsel, wondering whether your guests would rather nibble on cookies or something a bit cozier, well, you’re in my exact December shoes from last Christmas. These mini gingerbread pudding cups are what saved my sanity (and my reputation—Aunt Mabel still talks about them, and that’s saying something). It’s like all the best bits of the holidays squished into a cute little cup. Fun fact: my first batch was so spicy it could’ve woken Ebenezer Scrooge and the ghost of Christmas past, but we survived. Anyway, jump in with both feet—I promise it’s worth it.
Honestly, Here’s Why I’m Obsessed With These
I pull this recipe out when the weather’s dodgy and the mood is pure holiday chaos. My family goes crazy for the soft, spongy centers (even my nephew who “doesn’t like pudding,” but eats it from the fridge at midnight). Sometimes I make these just because I want something cake-y without the hassle. The best part? No one expects gingerbread in pudding form—so it feels a little special. And if you’ve ever wished for a dessert you could make ahead and sneak bites from while you’re cleaning up, this is it. Oh! Plus, you get to use those dinky little ramekins gathering dust at the back of your cupboard.
What Goes In: My ‘Take What You’ve Got’ Ingredient List
- 1 cup (110g) self-raising flour (but if you only have plain, just chuck in 1.5 tsp baking powder—you’ll live)
- 1/3 cup brown sugar (sometimes I mix in a bit of muscovado if I’m feeling posh)
- 2 tsp ground ginger (I sometimes sneak in a shake of cinnamon)
- 1 tsp mixed spice or pumpkin pie spice (but allspice will do if you’re short)
- Pinch salt (tiny! But my gran always insisted on Maldon salt, which… seems a bit OTT, but whatever works)
- 1/4 cup (60g) melted butter (or coconut oil in a real pinch, honestly not as decadent though)
- 2 tbsp golden syrup (my go-to, but honey or maple syrup works when I run out—don’t @ me)
- 1/2 cup milk (whole is best, but I’ve used almond milk; tasted fine!)
- 1 egg (any size, but if it’s a whopper maybe whisk it lightly and use 3/4)
- For the sauce:
- 3/4 cup boiling water (just from the kettle)
- 1/3 cup brown sugar
- 2 tbsp golden syrup (or, again, honey…)
- 2 tbsp butter
How To: Or, My Occasional Pudding Chaos
- If you’ve got tiny ramekins (like 6-8cm ones?), butter them up. If not, muffin tins with cupcake liners also kinda work.
- Preheat your oven to 180°C (that’s 350°F for my friends across the pond). Don’t skip this bit—cold oven pudding is just sad.
- Dump all the dry stuff (flour, brown sugar, spices, salt) in a biggish bowl. Give it a half-hearted whisk (or fork, or just your fingers if you’re in a mood). Don’t inhale too much ginger unless you want to sneeze all day.
- Pour in the melted butter, golden syrup, milk, and the egg. Stir gently, just until it comes together. (This is where I usually sneak a taste… raw egg, live a little?!)
- Spoon the batter evenly into your ramekins—shouldn’t fill more than halfway, honestly. They puff up, and if you’re like me, you’ll forget once or twice and get that volcano pudding crater look.
- Now for the magic: Mix the boiling water, brown sugar, golden syrup, and butter in a jug till butter melts. It’ll look thin and weird. That’s normal. Pour gently over each pudding (seriously, don’t panic when it floats).
- Bake on a tray for about 20-25 mins; you want the top pillowy but the sauce bubbling up around the sides. It’s like magic cake. If it jiggles in the middle, that’s perfect for me, maybe leave it in a tad longer if you want it firmer. And, if you burned your tongue tasting it straight from the oven like I once did, learn from my mistake.
Random Notes (or Things I’ve Learned the Hard Way)
- If your brown sugar’s lumped up, microwave it for 10 sec with a slice of apple—thanks to Bon Appétit for that trick.
- The sauce sometimes looks a bit too runny, but thickens a bit as it cools. Or actually, sometimes it doesn’t—it’s fine, just call it ‘extra sauce.’
- Honestly, I think these taste better the next day—if you aren’t like me and can wait that long.
Variations: Experiments, Successes, and One Epic Fail
- Chocoholic? Stir a spoonful of cocoa in the batter—kids love it (sometimes too much!)
- Lighter version: Skim milk and coconut oil make these almost breakfast, but I mean… why deprive yourself?
- Epic fail: Once tried making these ‘sugar free’ with stevia, but it tasted like a chemistry lesson gone wrong—your mileage may vary.
What You Actually Need—Or, ‘Make Do’ If You Don’t
- 6-8 small ramekins (or muffin tin with cupcake liners—kinda works in a pinch)
- Bowl, spoon, jug—no fancy mixer here, unless you feel like a kitchen workout
- Baking tray (to catch any saucey overflow—trust me, it’s a sticky nightmare otherwise)
- If you don’t have ramekins, I’ve actually used a Pyrex dish and just scooped out pudding blobs later. Not pretty, pretty tasty
Storing (But, Like, Who’s Ever Needed To?)
Keep in the fridge; covered with wrap or in a container. They’ll last about 3 days… though honestly, in my house they disappear by the next morning. If you want to keep them warm for a crowd, a low oven does the trick.
Our Favourite Ways To Serve These
I always serve with a big spoon of vanilla bean ice cream. My sister swears by whipped cream and a sprinkle of nutmeg. At Christmas, sometimes I get brandy cream sauce out—what a treat! Oh, and sometimes my cousin demands fresh berries (bless her healthy heart).
The Best (or, Oops, Worst) Tips I’ve Picked Up
- I once tried baking these ALL at once in a big dish to save time—big mistake; the middle stayed gluey but the edges crisped. Just stick with small cups or ramekins—less drama.
- Don’t rush the baking—if the middle isn’t set, just give it a few more mins. I always wish I did.
- If you overbake, add a splash of warm milk or cream to each cup when serving—it brings back the gooey magic.
Heard These Before? (FAQ Time)
- Can I make these ahead? Yup, and they taste brilliant the next day (maybe even better—don’t tell anyone I said that!).
- Could I freeze them? Err, probably, but they tend to get a bit mushy after a thaw. If you do, re-warm gently and eat soonish.
- What if I don’t have self-raising flour? Just add baking powder to plain, I do it all the time. Or check out this simple guide.
- Does it work gluten-free? Actually, yes! I’ve used a gluten-free blend. Maybe not quite as fluffy but no one noticed after second helpings.
- Kids hate ginger? Skip the extra spices and add a pinch of cinnamon, that usually does the trick.
- Can I halve the recipe? Haha, I do this all the time. But then you wish you made more.
Hope your kitchen smells as good as mine did—these pudding cups really are like a holiday hug in a mug. Or, uh, in a ramekin. If you try them let me know if your family devours them as quickly as mine does, and as always—don’t stress too much if a few come out wonky. That’s festive charm, right?
Ingredients
- 1 cup whole milk
- 1/2 cup heavy cream
- 1/3 cup packed brown sugar
- 2 tablespoons unsulphured molasses
- 2 tablespoons cornstarch
- 1/2 teaspoon ground ginger
- 1/2 teaspoon ground cinnamon
- 1/4 teaspoon ground nutmeg
- 1/8 teaspoon ground cloves
- 1/4 teaspoon salt
- 1 teaspoon vanilla extract
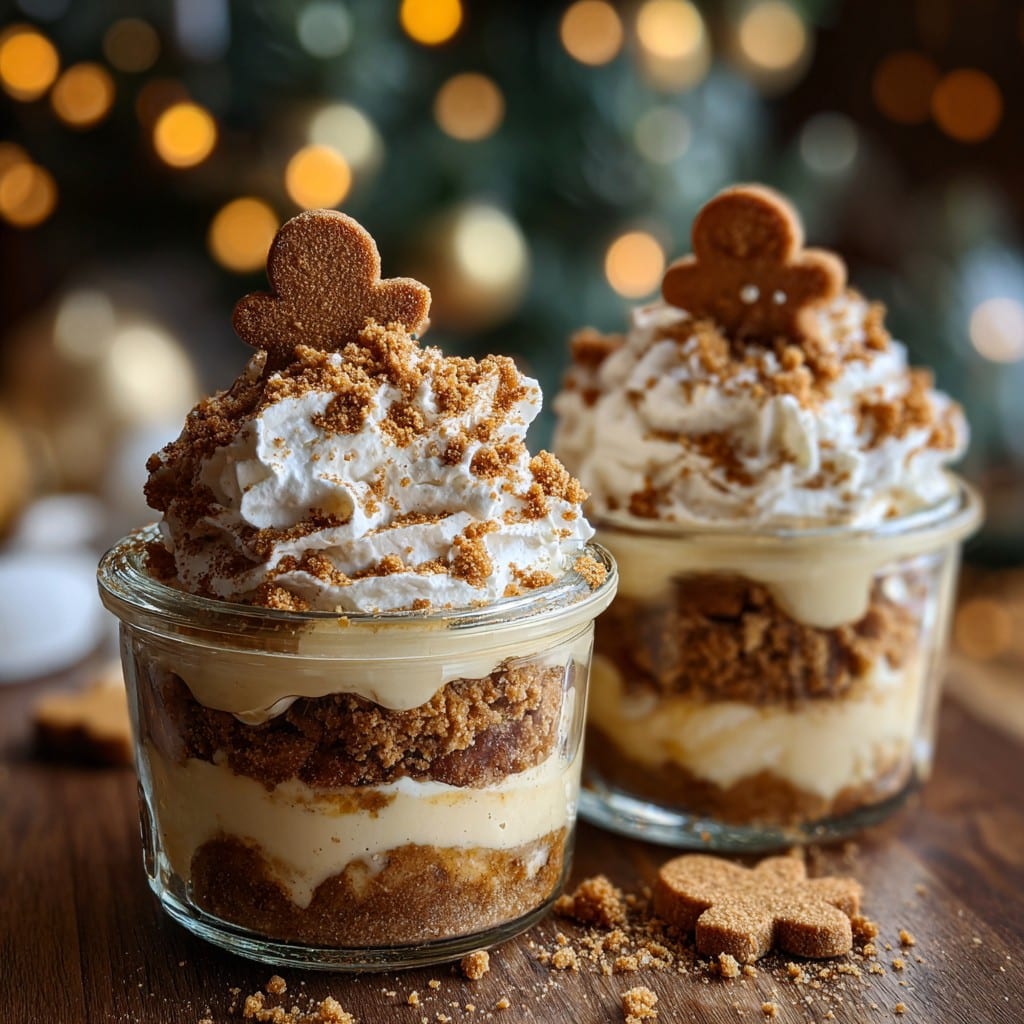
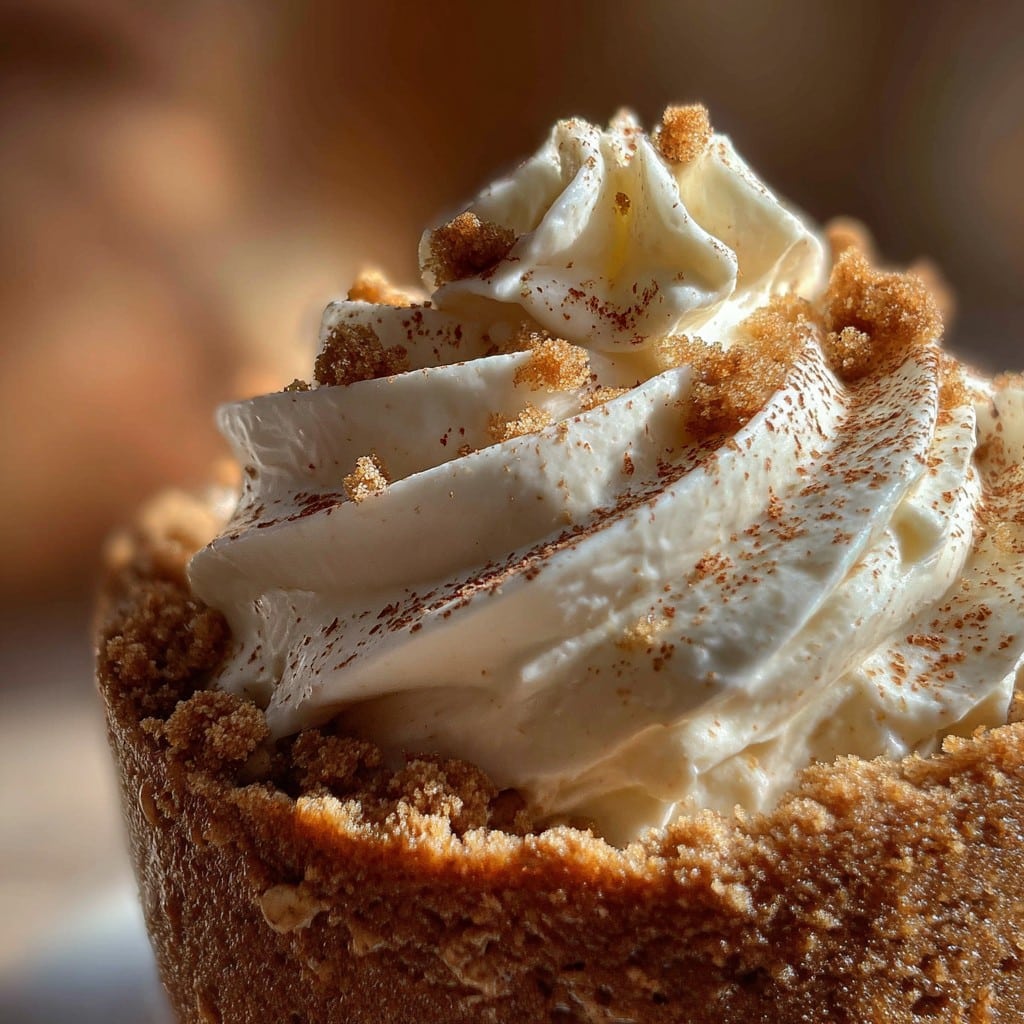
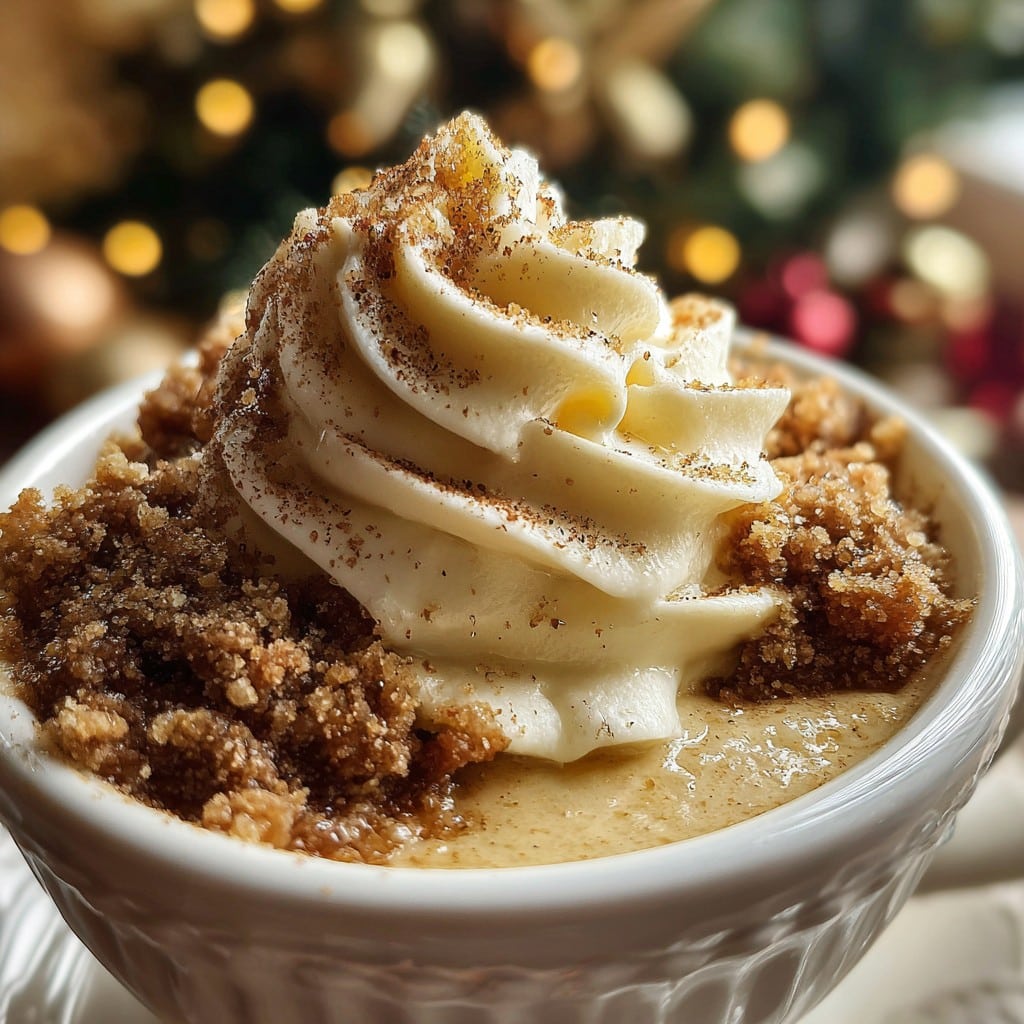
- Whipped cream, for topping
- Gingerbread cookie crumbs, for garnish
Instructions
-
1In a medium saucepan, whisk together the brown sugar, cornstarch, ground ginger, cinnamon, nutmeg, cloves, and salt.
-
2Gradually whisk in the milk, heavy cream, and molasses until fully combined and no lumps remain.
-
3Place the saucepan over medium heat and cook, whisking frequently, until the mixture thickens and begins to bubble, about 7–10 minutes.
-
4Remove from the heat and stir in the vanilla extract.
-
5Pour the pudding into mini cups or small jars. Let cool slightly before refrigerating for at least 1 hour.
-
6Before serving, top each pudding cup with whipped cream and garnish with gingerbread cookie crumbs.
Approximate Information for One Serving
Nutrition Disclaimers
Number of total servings shown is approximate. Actual number of servings will depend on your preferred portion sizes.
Nutritional values shown are general guidelines and reflect information for 1 serving using the ingredients listed, not including any optional ingredients. Actual macros may vary slightly depending on specific brands and types of ingredients used.
To determine the weight of one serving, prepare the recipe as instructed. Weigh the finished recipe, then divide the weight of the finished recipe (not including the weight of the container the food is in) by the desired number of servings. Result will be the weight of one serving.
Did you make this recipe?
Please consider Pinning it!!