Holiday Marshmallow Swirl Fudge – Quick & Delicious Recipe Idea
The Story Behind My Holiday Marshmallow Swirl Fudge
You know those recipes that just sort of happen? That was this fudge for me. One late December night (I think it was snowing but maybe I’m just imagining it), I found myself with an almost embarrassing amount of marshmallows and an even more embarrassing lack of patience to make complicated treats. Enter: Holiday Marshmallow Swirl Fudge. It’s the sort of thing my brother swipes before I can even snap a photo for Instagram. True story—he says it’s the only sweet I’d better hide unless I want to find just the empty pan left behind. Also, if you’ve ever dropped marshmallows on a hot stovetop, you’ll understand my struggle—sticky fingers for days!
Why You’ll Love This (Or Why I Do, at Least!)
I make this when I want everyone to think I’ve gone full Martha Stewart (which, trust me, is not the case). My family goes a little wild for this fudge because it’s so creamy and, let’s be honest, you get a bit of marshmallow in every single bite (unless you cut the pieces suspiciously large, like my uncle does every year). There’s no candy thermometer, no fancy techniques. Plus, if you’re like me and kind of get stressed melting stuff over the stove—this one’s practically foolproof. The only time I truly struggled was when I tried doubling the batch and almost started a kitchen disaster—not recommended, but hey, we live and learn, right?
What You’ll Need (And What I Sometimes Swap)
- 2 cups semi-sweet chocolate chips (I’ve used milk chocolate chips in a pinch, and they’re fine, but the fudge ends up sweeter—if that’s your thing!)
- 1 can (14 oz) sweetened condensed milk (Honestly, brand doesn’t really matter, despite what my grandmother claims. I grab whatever’s on sale!)
- 2 tablespoons unsalted butter (Salted works too, but you may want to skip adding extra salt later)
- 1 teaspoon vanilla extract (Real or imitation—no judgment. If you’ve got hazelnut or almond extract, a drop or two is lovely.)
- 1 1/2 cups mini marshmallows (If all you have are the big ones, just chop them—yes, it’s a sticky mess, but not impossible. Once I used the colorful fruity ones. It looked wild. Tasted like nostalgia.)
- Optional: A pinch of sea salt for the top (My sister always skips this, but I think it adds a nice touch.)

How I Actually Make It (With a Couple Quirks)
- Get your pan ready. Grab an 8×8 inch square pan, line it with parchment or foil (leave a bit over the edges so you can lift the fudge out later—trust me on this!) and give it a quick butter swipe or blast of nonstick spray.
- Melt the chocolate. Stir the chocolate chips, sweetened condensed milk, and butter together in a medium saucepan over medium-low heat. Keep stirring so nothing sticks and scorches; at some point, this is where I always wonder if I should just eat it as is—don’t, it gets better. Don’t worry if it’s not totally smooth right away, just let it all melt gently. Looks a little lumpy now, but it sorts itsef out.
- Add vanilla. Remove from heat, then stir in the vanilla extract. (This is when my kitchen smells all kinds of festive.)
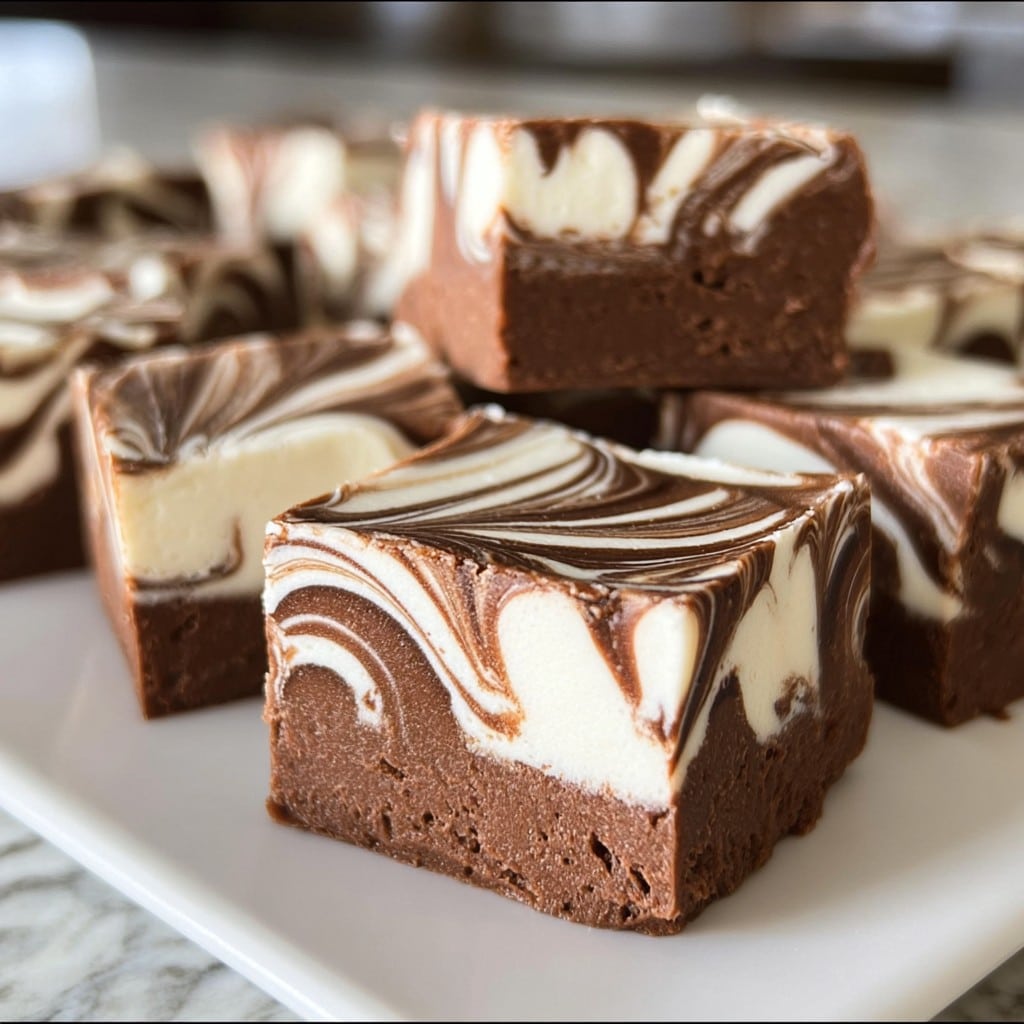
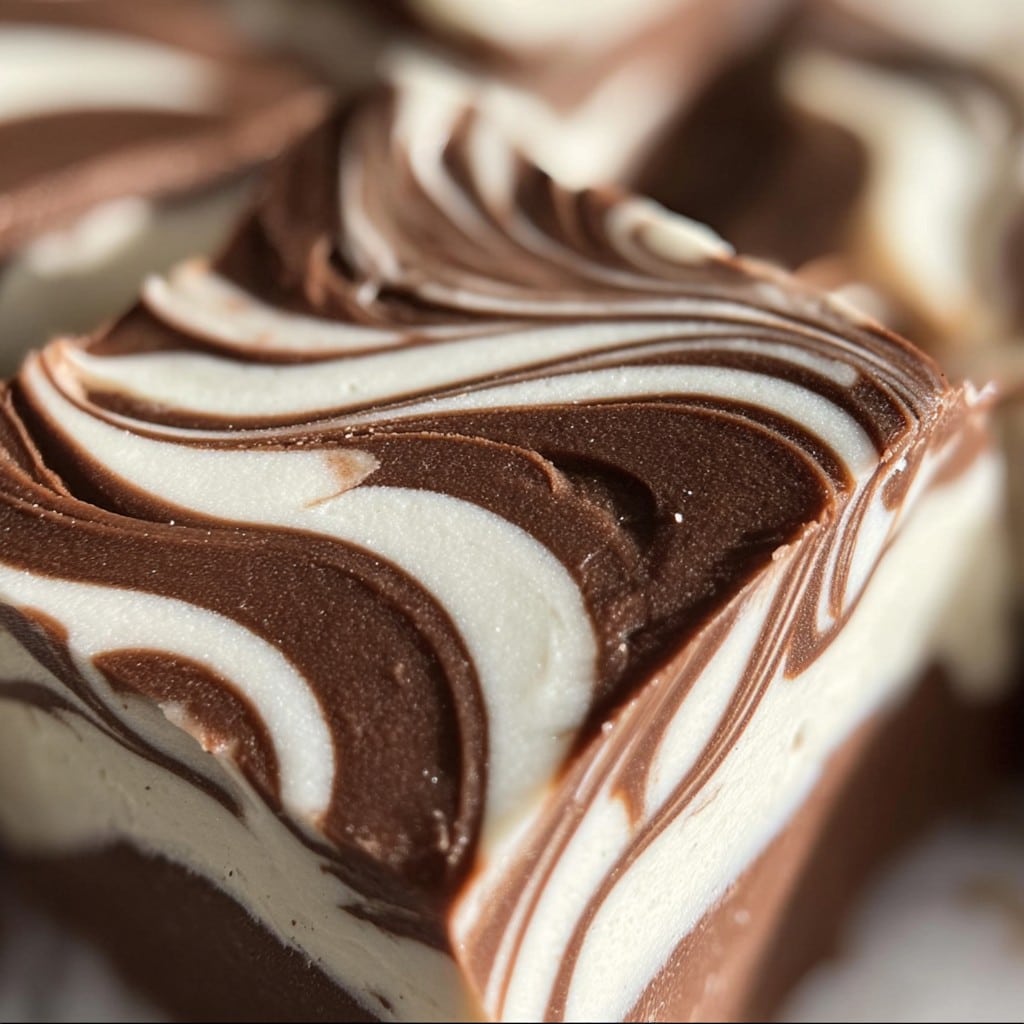
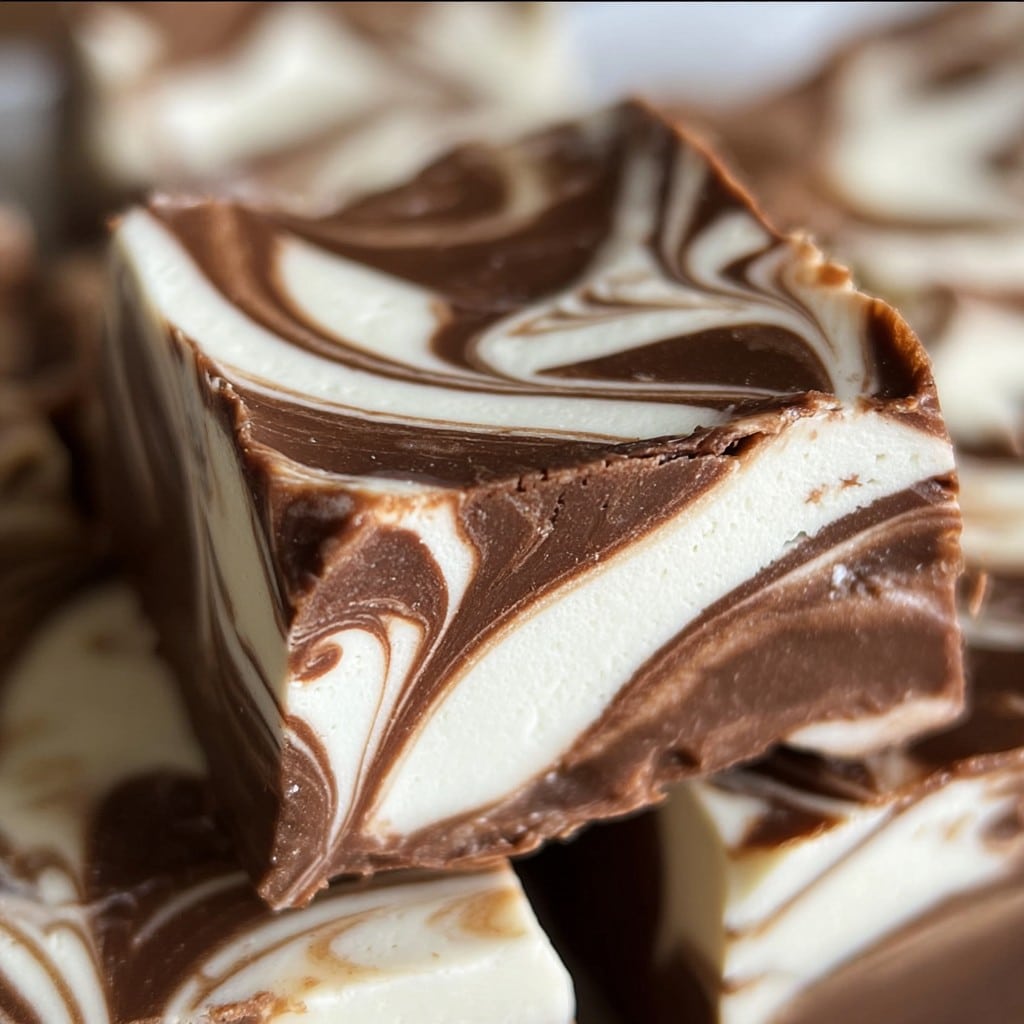
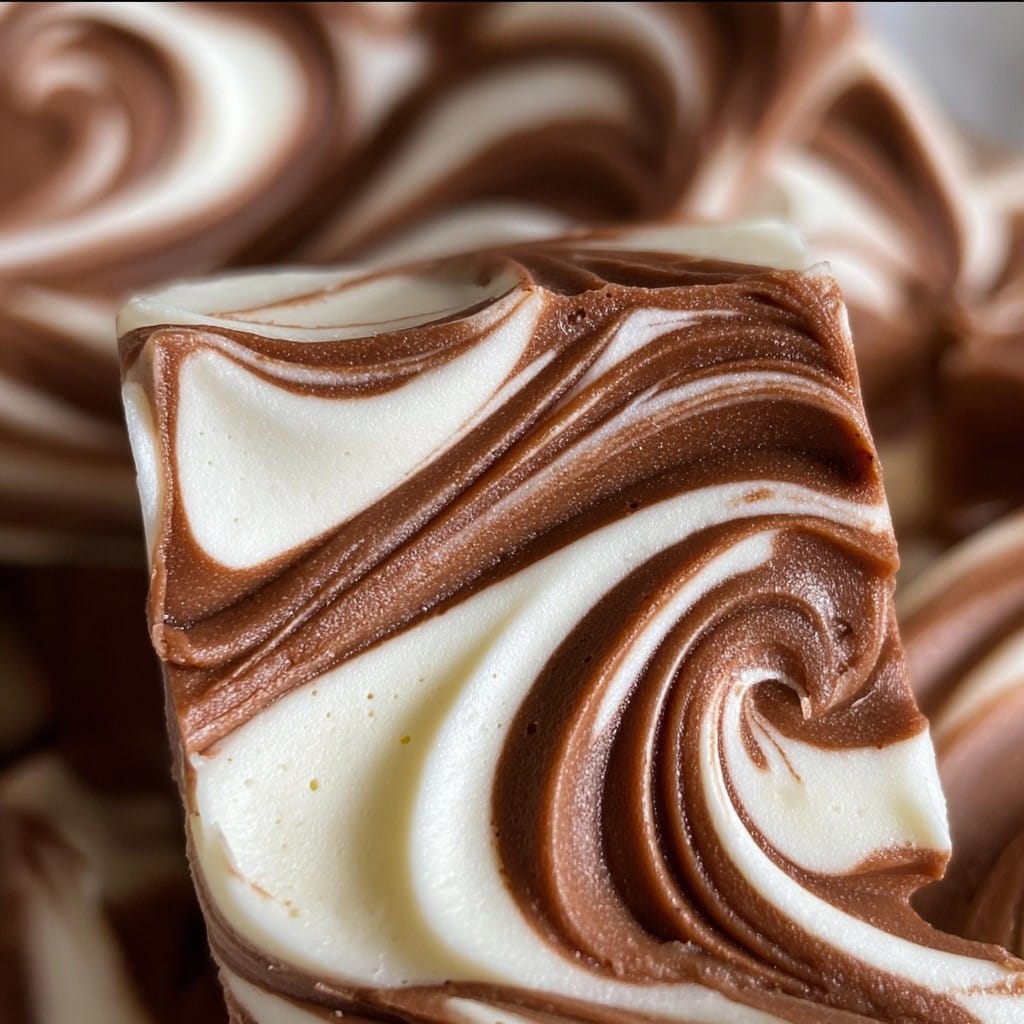
- Assemble the magic. Pour about two thirds of the mixture into your pan, then drop spoonfuls of your marshmallows all over the top. Now, take the rest of the chocolate mixture and drizzle/smear/spread it over the top, so you get that swirly goodness. Sometimes I use a chopstick to swirl the top so it looks a little fancy, but honestly, a knife works just as well—or just leave it rustic. If your swirls look more like blobs, that’s okay, too!
- Chill out. Sprinkle with a pinch of sea salt, cover, and pop the pan in the fridge for at least two hours (I know, waiting is hard). It’s ready once it’s firm enough to slice. I always poke it to check—sometimes way too early—nothing tragic has happened yet.
- Cut & enjoy! Use the parchment edges to lift the fudge out, then slice it into squares. Try not to eat half of it before serving. Or do. Who’s to judge?
Notes from My Many, Many Tries
- This fudge does get firmer the longer you chill it. I think it tastes even better the next day, but maybe that’s just me.
- If your marshmallows start to melt into the chocolate, don’t panic. Makes for gooey, delicious pockets inside the fudge. Probably my favorite accidental find.
- One time I forgot to line the pan. Let’s just say I ate it with a spoon straight from the pan. Not a disaster, just a bit unconventional (and sticky).
Turns Out You Can Mix It Up
- Peppermint extract instead of vanilla—my kids think it’s “too toothpaste-y”, but friends loved it. Go figure.
- Chopped pretzels or nuts mixed in? Yes, please, especially if you like a salty-sweet vibe.
- I do not recommend adding dried fruit. Once tried cranberries. Looked Christmassy, but turned out weirdly chewy. Live and learn.
Do You Need Any Fancy Equipment?
Honestly, not really. I use whatever saucepan I’ve got clean and a wooden spoon (except for the one with the melted handle—that’s another story). If you don’t have parchment, try well-buttered foil or just butter the pan. Slicing’s easiest with a big sharp knife, but if you only have the bread knife, no one’s judging.
How to Store (If It Lasts Longer Than a Day)
Just keep it in an airtight container in the fridge. It’ll last up to a week, supposedly, though honestly in my house it never makes it that long—someone always sneaks an extra piece, or two, or… you get the idea. You can freeze it for longer, but I’ve only done this once when I hid some from myself post-holiday.
How I Like to Serve It (Holiday Tradition or Not)
I usually stick it right in the center of the dessert table and let people dig in. Sometimes I dust some powdered sugar over the top for a snowy vibe (my niece says it looks “like Christmas exploded”). Good with hot cocoa or even homemade hot chocolate if you really want to go all out. Actually, last year we dunked a few pieces right into warm drinks—messy but kind of delicious!
Pro Tips That I Learned the Hard Way
- Don’t rush the chilling. I did that once and was left with fudge that’s more like goo, which, to be fair, was still tasty, just a bit unpresentable.
- Resist the urge to use high heat. It might seem faster but you’ll get burned chocolate—that’s a sad day.
- If your marshmallows melt entirely, just call it “mallow swirl” and hand out spoons. It still works.
Frequently Asked Questions—With Real Answers
- Can I make this ahead? Oh, for sure! In fact, I think it’s even creamier the day after. Just stash it in the fridge (assuming you can keep yourself from nibbling at it).
- Can I use regular big marshmallows? Yep, just cut ‘em up. It’s a bit of a sticky job, but it does the trick. You could even try the flavored ones if you’re feeling wild (I once did—see above!).
- Any dairy-free swaps? Honestly, I haven’t tried, but a good friend swears by coconut-based condensed milk and vegan chocolate chips. Says it works a treat, but the flavor’s a little different—more tropical, somehow?
- How do you keep your fudge from sticking? Lining the pan is the key. Or a well-buttered dish can work if you’re in a jam. I’ve also seen folks use silicone pans, like in this fudge guide, but I don’t own one.
- Do I have to swirl it? Honestly, not really. Sometimes, when I’m in a hurry, I just layer the fudge and marshmallows, and it tastes just as fab.
So there you have it—my offbeat guide to making the creamiest holiday marshmallow swirl fudge you (or your hungry relatives) will ever eat. It’s forgiving, it’s fun, and it’s—well—kind of addictive. If you want more holiday desserts (or yet another reason to eat marshmallows), you can check out epic treat lists at Smitten Kitchen. Let me know if you come up with any wilder variations than I did, but be warned: cranberry marshmallow fudge is not as fun as it sounds!
Ingredients
- 2 cups semisweet chocolate chips
- 1 can (14 oz) sweetened condensed milk
- 1/4 cup unsalted butter
- 1 tsp vanilla extract
- 1/2 tsp salt
- 1 1/2 cups mini marshmallows
- 1/2 cup white chocolate chips
- Festive sprinkles (optional)
Instructions
-
1Line an 8×8-inch square baking pan with parchment paper, leaving some overhang on the sides.
-
2In a medium saucepan over low heat, melt the semisweet chocolate chips, sweetened condensed milk, and unsalted butter, stirring constantly until smooth.
-
3Remove the saucepan from the heat. Stir in the vanilla extract and salt. Set aside.
-
4Fold in 1 cup of mini marshmallows, then pour the fudge mixture into the prepared pan and spread evenly.
-
5Melt the white chocolate chips in a microwave-safe bowl in 20-second intervals, stirring in between until smooth. Drop spoonfuls over the fudge and gently swirl with a knife.
-
6Sprinkle the remaining marshmallows and festive sprinkles on top. Chill in the refrigerator for 2 hours or until firm. Slice and serve.
Approximate Information for One Serving
Nutrition Disclaimers
Number of total servings shown is approximate. Actual number of servings will depend on your preferred portion sizes.
Nutritional values shown are general guidelines and reflect information for 1 serving using the ingredients listed, not including any optional ingredients. Actual macros may vary slightly depending on specific brands and types of ingredients used.
To determine the weight of one serving, prepare the recipe as instructed. Weigh the finished recipe, then divide the weight of the finished recipe (not including the weight of the container the food is in) by the desired number of servings. Result will be the weight of one serving.
Did you make this recipe?
Please consider Pinning it!!