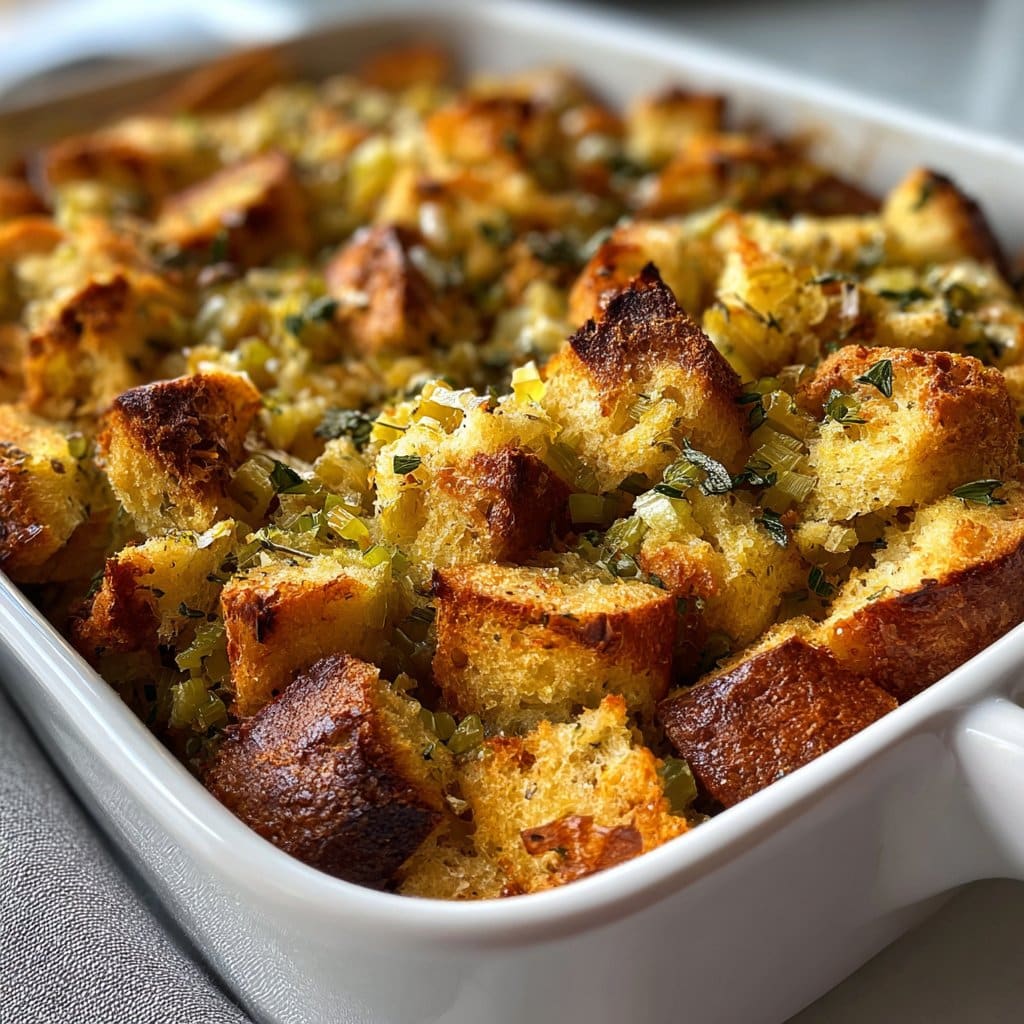
Grain-Free Sage Stuffing – A Low Carb Holiday Side
Can I Tell You About My Grain-Free Sage Stuffing Adventure?
You know what, every November I start thinking about those big holiday spreads—turkey, gravy, and, oh boy, stuffing. Except, years ago I realized I can’t deal with the carb slump that follows regular old bread stuffing. So, after a little (okay, a lot) of kitchen tinkering, I finally landed on this grain-free sage stuffing that actually makes me wish Thanksgiving happened more than once a year. One time my cousin thought it was the “real deal” until I let her in on the secret—no grains at all! She legit didn’t believe me at first. It’s become my low carb sidekick, all sage-y, cozy, and not even a bit like cardboard (which honestly, happened during a few missteps along the way…).
Why I Keep Making This Grain-Free Sage Stuffing
I whip this out for holidays—duh—but to be honest, sometimes on a random Tuesday just because I want some comfort food with, like, minimal blood sugar drama. My family gobbles it up (I have to hide a bowl if I want leftovers for breakfast). Honestly, I make this when I crave something hearty but can’t face another salad. Oh, and no one’s ever asked me where the usual bread went. Success, right? (My only gripe used to be all the chopping, but now I turn on a podcast and zone out…almost a treat!)
Here’s What I Toss In (Substitutions Encouraged!)
- 4 cups cauliflower florets (sometimes just frozen riced cauliflower if I’m in a hurry—don’t tell my grandma)
- 2 tablespoons olive oil (or, I swap in butter on chilly days for that extra love)
- 1 small onion, diced (yellow, white, shallot—honestly, whatever’s in the basket)
- 3 celery stalks, chopped (I’ve used fennel once, kind of odd, but in a pinch…)
- 2 cloves garlic, minced
- 1 teaspoon dried sage (or a small handful of fresh if I’m feeling fancy—about 2 tbsp chopped)
- 1 teaspoon dried thyme
- 1/2 teaspoon dried rosemary
- 1/2 teaspoon salt (grandma swore by Maldon but any sea salt works)
- Black pepper to taste (I like lots but you do you)
- 2 eggs, whisked (sometimes 1 egg + 1 flax egg if the carton is emptier than I thought)
- 1/3 cup chicken or veggie broth (homemade, boxed, whatever you’ve got but here’s a great stock recipe if you want to make your own)
- 1/4 cup chopped fresh parsley (or leave it out—no one noticed when I forgot it…twice)
- 1/4 cup chopped walnuts or pecans (optional) (one uncle hates nuts so, you know, not essential)
Alright, Let’s Make It (With a Few Sidetracks)
- Preheat your oven to 375F (190C). Honestly, if you forget and start at 350F, it’ll just take a bit longer, nbd.
- Chop cauliflower into pea-sized pieces (or use riced cauliflower from the store; your secret’s safe with me).
- Heat olive oil or butter in a big pan over medium heat. Add onion and celery. Stir and let them sweat it out for about 5 min til soft—not browned.
- Chucked in the garlic, sage, thyme, and rosemary. Stir until that kitchen smell makes you wanna dive in. Cook another 2 minutes.
- Add cauliflower bits and keep stirring for about 8 minutes—until it’s just tender, but not soggy (here I usually sneak a taste, sometimes two).
- Transfer all this to a mixing bowl. Let it cool a tad, or you’ll scramble the eggs. Lesson learned.
- Stir in the eggs, broth, parsley, nuts (if using), salt and pepper. Give it all a good mix. It might look a bit…weird. That’s fine.
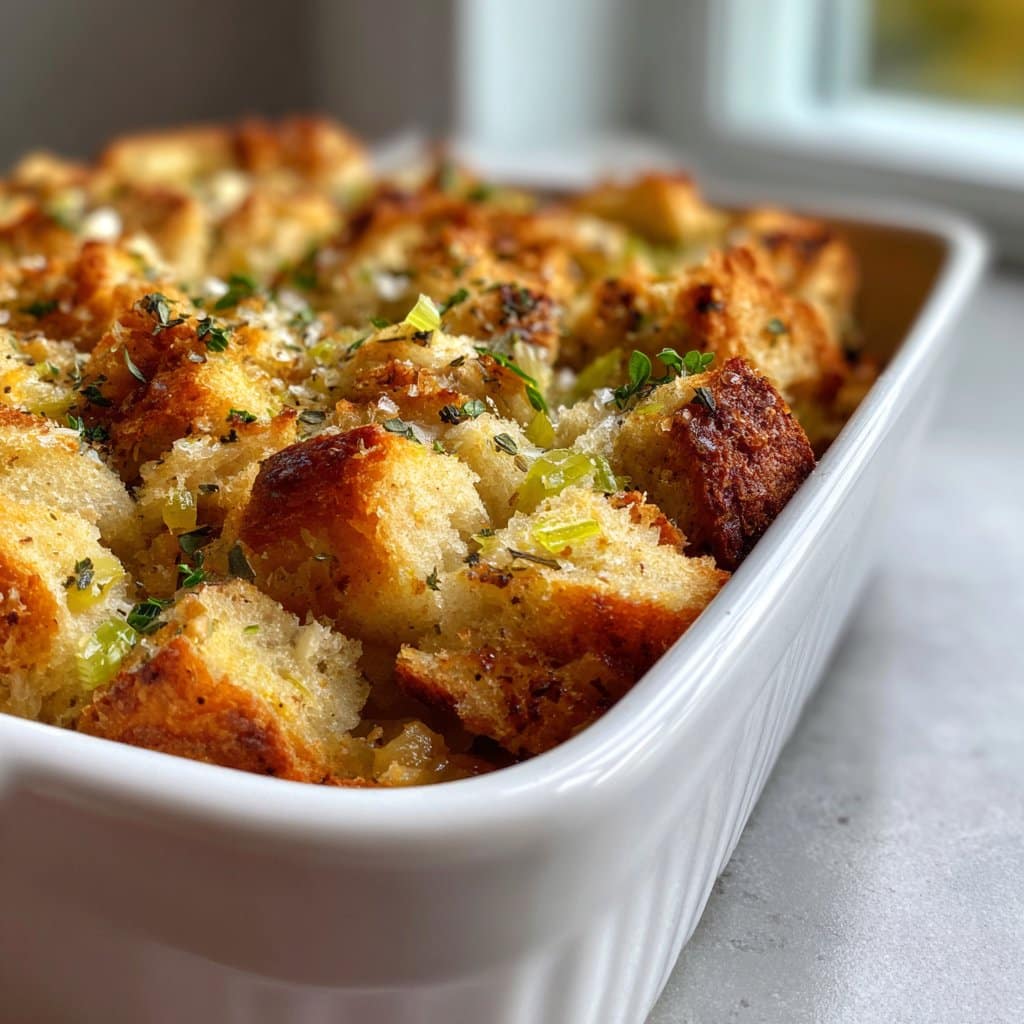
- Spoon into a greased 2-quart baking dish (I used to use a 3-quart, but it got really thin, so…smaller is better). Smooth it out a little, but don’t stress.
- Bake uncovered for 35-40 min, until golden and a bit crispy up top (sometimes I broil for 2 min at the end if I remember).
Notes I’ve Learned (Sometimes the Hard Way)
- If you use frozen cauliflower, let it thaw and give it a squeeze—nobody enjoys soggy stuffing!
- Actually, I think this tastes even better the next day… except it rarely makes it to the next day.
- I tried skipping the eggs once—didn’t hold together as well, kinda like a chunky veggie scramble. Still tasty, not quite stuffing-y.
- I keep saying to use a mixing bowl but once I mixed it right in the baking dish—total time saver (just more awkward to stir).
Variations I’ve Experimented With
- Threw in dried cranberries once—pretty festive, but my brother said it was “weirdly sweet” (he prefers savory all the way).
- Crumbled cooked sausage is great if you want extra protein, though it makes it richer, so maybe skip for vegetarians or if you’re after something lighter?
- Added mushrooms once—tasted earthy, but too much made it a bit swampy (a little is fine, loads is… questionable).
Must-Have Gear (But Improvise If Needed)
- I use a good skillet, but honestly any frying pan that isn’t warped will do.
- Biggish mixing bowl (sometimes my largest salad bowl, in a pinch)
- Baking dish (2-quart, but I’ve squeezed it into a pie plate before—worked pretty well, actually!)
- Optional: food processor if chopping isn’t your thing, or just a regular sharp knife.
How to Store Leftovers (Do You Even Get Any?)
Stick leftovers in an airtight container, fridge for up to 3 days (though, honestly, in my house it never lasts more than a day!). You can microwave or steal a sneaky cold bite straight from the fridge. Freezes well too, though it might get a tiny bit watery—just reheat in the oven to perk it back up.
Serving Ideas—How We Eat It Here
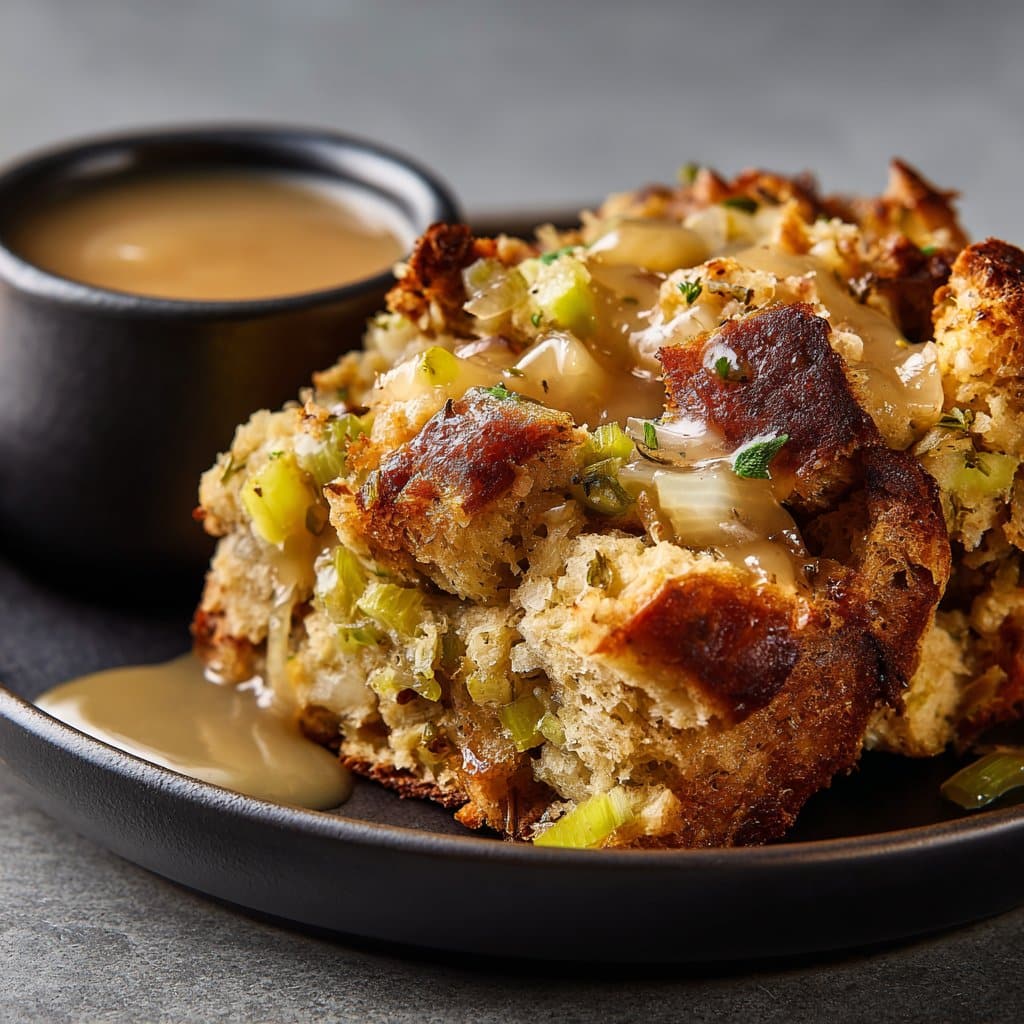
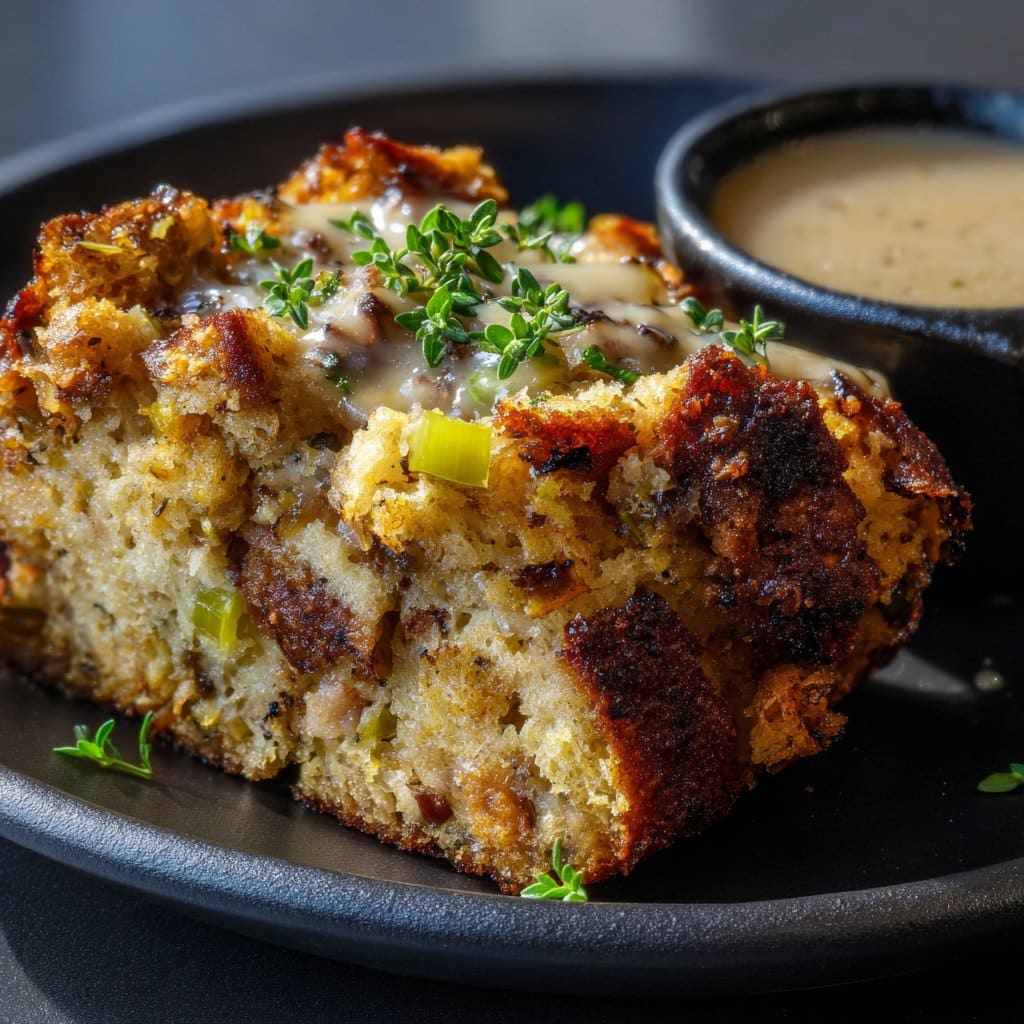
At my place, it sits right next to the turkey (or roast chicken, or sometimes just with a big salad when I’m feeling virtuous). We like a little gravy on top, but my sister dips hers in cranberry sauce (this one is my go-to recipe). Sometimes I’ll eat leftovers for breakfast with a fried egg on top—deliciously weird, highly recommended.
Pro Tips (Learned the Hard Way, Oof)
- I once tried rushing the cauliflower sauté step and ended up with raw-tasting stuffing. Give it the full time—the flavor’s worth it.
- Don’t forget to let the mixture cool a few minutes before adding eggs. Hot mix = scrambled eggs (been there; not great).
- If you want that classic stuffing browned edge, don’t cover the dish (I once did, and it came out pale and just a bit sad-looking).
Some FAQ (Because People Actually Ask Me These Stuff!)
- Q: Can I make this vegan?
A: Yeah, just swap the eggs for flax eggs and use veggie broth. It won’t bind quite as well, but taste-wise? Still awesome! - Q: Does the cauliflower taste strong?
A: Not really! It’s mild, soaks up all the good flavors. Sage and herbs do the heavy lifting here. - Q: Could I stuff my turkey with this?
A: Well, technically yes, but it’s a lot moister than bread stuffing, so maybe just serve on the side (keeps your bird from getting mushy, trust me). - Q: What if I’m out of sage?
A: Thyme and rosemary work in a pinch. Or honestly, try poultry seasoning in a bind—it’s kinda built for stuff like this.
So that’s my not-too-fancy, surprisingly crowd-pleasing, grain-free sage stuffing. If you end up making it, ping me a note or tag me on socials—I love seeing people’s tweaks (and, let’s be real, their holidays). Cozy up and enjoy!
Ingredients
- 3 cups grain-free almond flour bread, cubed and toasted
- 1 tablespoon olive oil
- 1/2 cup onion, finely diced
- 2 stalks celery, chopped
- 2 cloves garlic, minced
- 2 tablespoons fresh sage, chopped
- 1 teaspoon dried thyme
- 3/4 teaspoon salt
- 1/2 teaspoon black pepper
- 1/2 cup chicken or vegetable broth
- 2 large eggs, beaten
Instructions
-
1Preheat oven to 350°F (175°C). Grease a medium baking dish.
-
2In a large skillet, heat olive oil over medium heat. Add onion and celery, and sauté for 4-5 minutes until softened. Stir in garlic, sage, and thyme; cook for 1 more minute.
-
3In a large bowl, combine the toasted almond flour bread cubes, sautéed vegetables, salt, and black pepper. Toss gently.
-
4In a separate bowl, whisk together the chicken or vegetable broth and eggs. Pour over the stuffing mixture and stir until well combined.
-
5Transfer the mixture into the prepared baking dish. Bake uncovered for 35-40 minutes, until golden on top and set in the center.
-
6Let rest for 5 minutes before serving. Garnish with extra sage if desired.
Approximate Information for One Serving
Nutrition Disclaimers
Number of total servings shown is approximate. Actual number of servings will depend on your preferred portion sizes.
Nutritional values shown are general guidelines and reflect information for 1 serving using the ingredients listed, not including any optional ingredients. Actual macros may vary slightly depending on specific brands and types of ingredients used.
To determine the weight of one serving, prepare the recipe as instructed. Weigh the finished recipe, then divide the weight of the finished recipe (not including the weight of the container the food is in) by the desired number of servings. Result will be the weight of one serving.
Did you make this recipe?
Please consider Pinning it!!