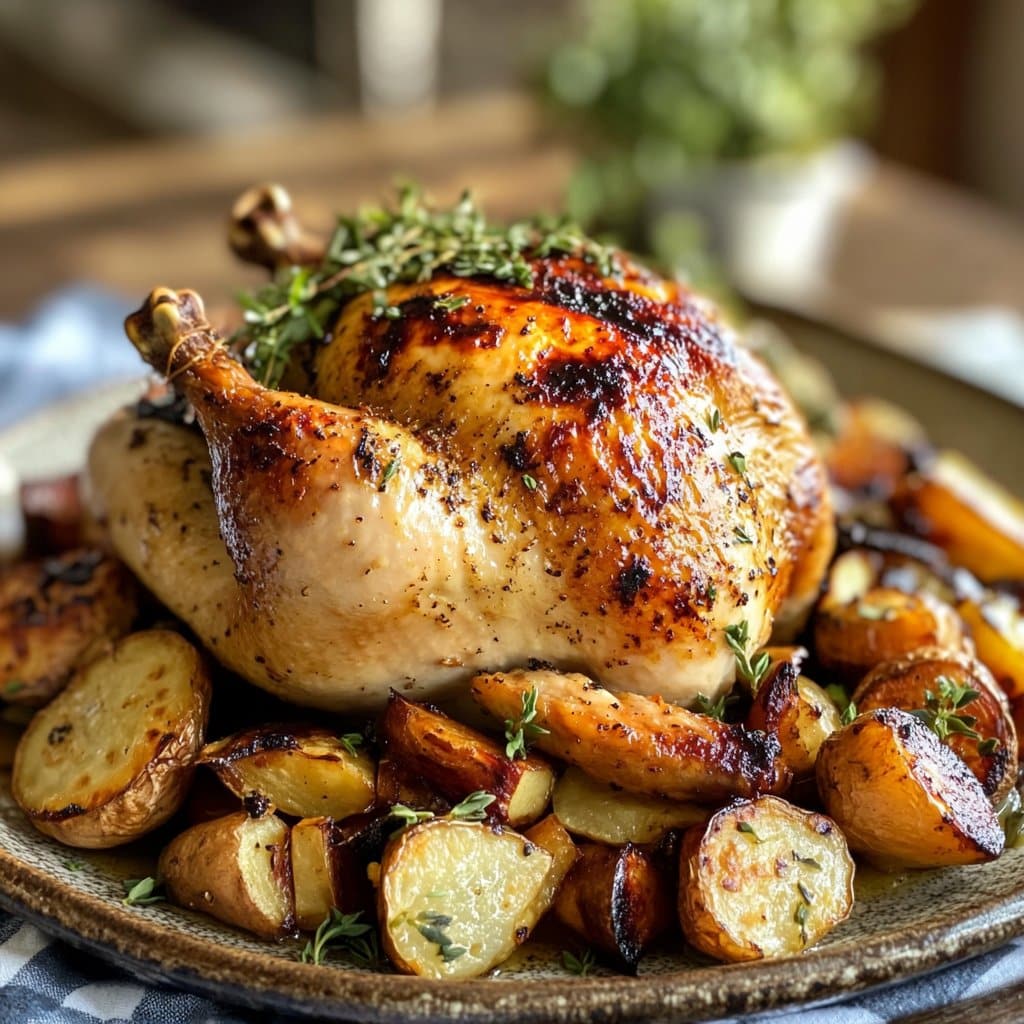
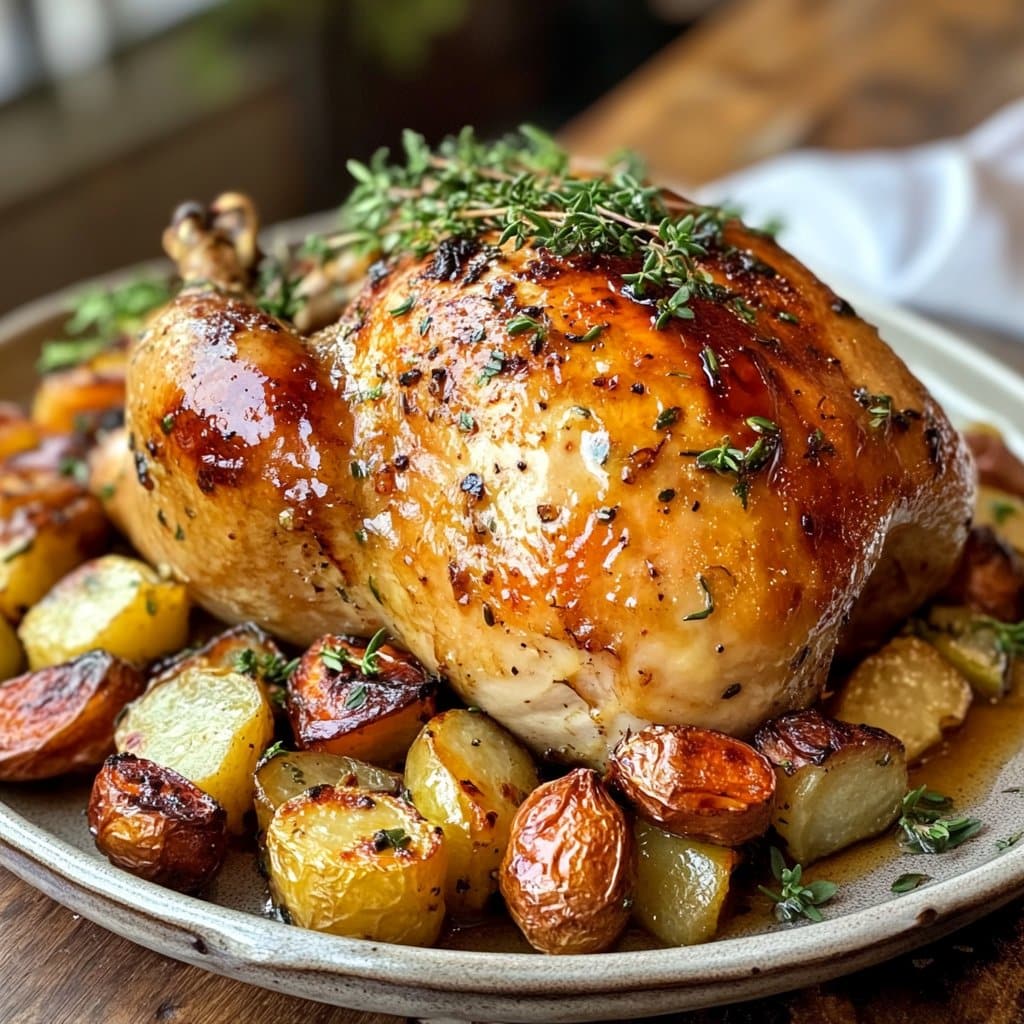
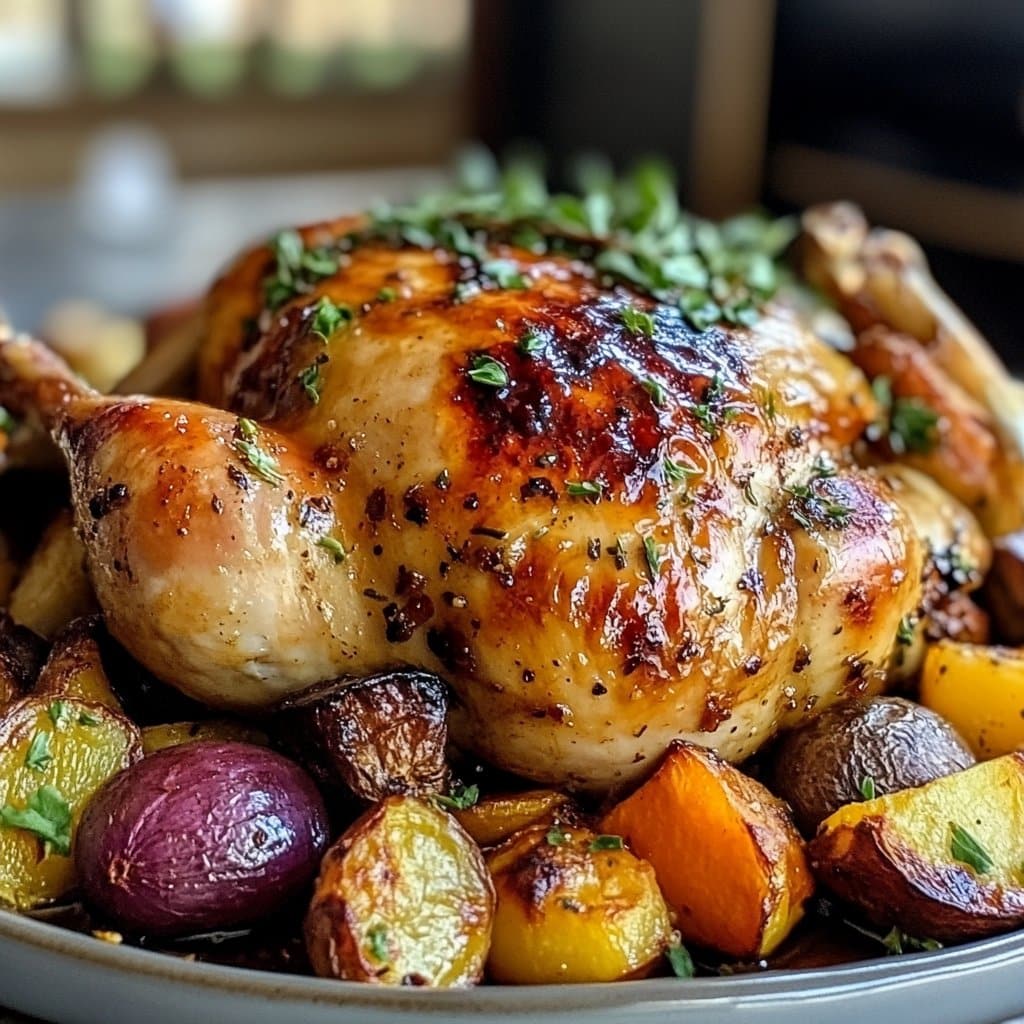
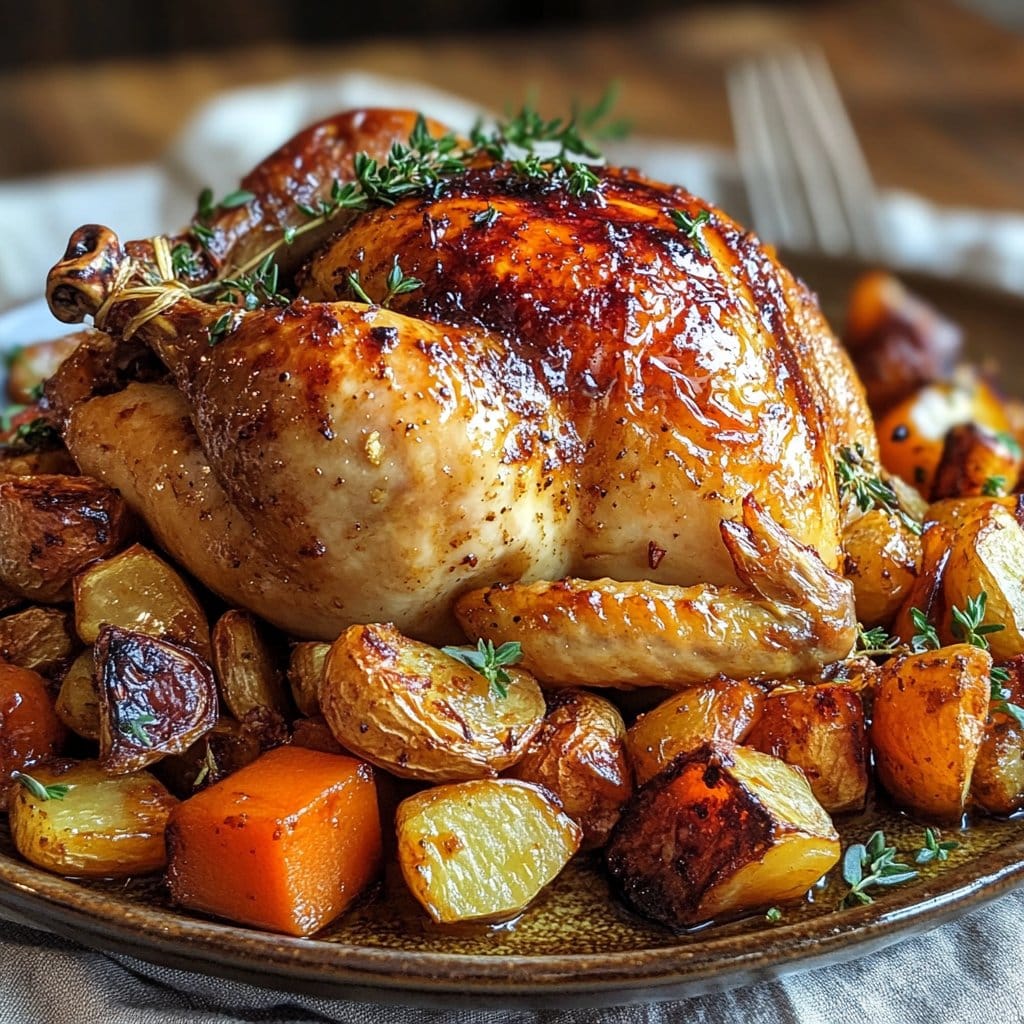
Easy Maple Glazed Roast Chicken – Sweet, Savory & Crispy
So, You Want a Chicken That’s Sweet, Savory, AND Crispy?
Okay, let’s talk about roast chicken. I’ve probably made a hundred different versions, but this maple glazed one is my go-to when I’m craving something a bit special (but not fussy). The first time I made it, I actually ruined a tea towel by spilling glaze everywhere—so now I just embrace the sticky mess. I mean, if you’re not licking your fingers at the table, did it even happen? Anyway, my family always requests this for Sunday lunch, and I’m happy to oblige since it basically cooks itself while I watch reruns of Bake Off or get distracted by that one plant I keep forgetting to water.
Why You’ll Love This Chicken (Or, Why I Keep Making It…)
I make this when I want dinner to seem a little fancy but don’t want to faff around with a million steps. My family goes absolutely bonkers for it because (a) the skin gets crispy, (b) the glaze is sticky and sweet but not too sweet, and (c) it makes the whole house smell unreal. Honestly, the only thing that trips me up is waiting for it to rest before carving. Oh, and I’ve learned the hard way not to try to speed up the glazing part—believe me, burnt maple is not the vibe you want.
What You’ll Need (But Don’t Sweat the Substitutions)
- 1 whole chicken (about 3–4 lbs or just whatever fits in your roasting tin—my local butcher swears by free-range but I’ve used supermarket birds too)
- 3 tablespoons pure maple syrup (not pancake syrup, unless you like things really sweet…)
- 2 tablespoons soy sauce (I sometimes sub in tamari or even Worcestershire if I’m out—taste changes a bit, still good)
- 2 heaping tablespoons Dijon mustard (my grandma used to insist on Grey Poupon, but honestly, Lidl’s works fine)
- 4 garlic cloves, smashed (in a pinch, garlic powder is okay, but it’s not quite the same)
- 1 lemon, halved
- A good pinch of salt and black pepper (I don’t measure, just sprinkle till it looks right)
- Handful of fresh thyme or rosemary (optional but lovely—sometimes I just use dried herbs, shh)
- 2 tablespoons olive oil or, if you’re feeling extra, a knob of butter
How To Make Maple Glazed Roast Chicken (Without Losing Your Mind)
- Preheat your oven to 200°C/400°F. Or, if you’re like me and can’t find your oven thermometer, just set it and hope for the best.
- Pat the chicken dry with paper towels (this is where crispy skin magic begins). Plonk it into a roasting tin that isn’t too snug—give it some breathing room.
- Rub the bird all over with olive oil or butter. Squeeze the lemon halves over the top, then toss the squeezed halves right inside the cavity. Sprinkle salt, pepper, and your herbs all over (and a bit inside, why not?).
- Whisk together the maple syrup, soy sauce, Dijon, and garlic in a bowl. (This is where I have to taste it—sometimes I add a dash more mustard.)
- Pour half the glaze over the chicken, brushing to get into all the nooks and crannies. Save the rest—you’ll need it later.
- Roast, uncovered, for 40 minutes. Don’t stress if it starts looking a bit pale; that’s normal.
- After 40 minutes, brush on the remaining glaze. (If the juices look a bit dark, that’s fine, just don’t let them burn or things get bitter.)
- Bake for another 20–30 minutes, or until the skin’s crisp and a thermometer in the thickest part reads 75°C/165°F. Sometimes it takes a bit longer—my oven is a wild card.
- This is the hard part: let the chicken rest for at least 10 mins before carving (I know, the wait is cruel; distract yourself by tidying, or, if you’re me, scrolling Instagram).
Notes from the Trenches
- I once tried using honey instead of maple syrup—didn’t get the same stickiness. Tasted nice, though, just different.
- If your chicken is bigger or smaller, just adjust the roasting time, and check the juices run clear. Nothing’s worse than undercooked chicken, honestly.
- The glaze thickens as it cools—don’t panic if it seems runny in the pan.
Here’s What I’ve Tried (And What I Wouldn’t Do Again)
- Swapped Dijon for whole grain mustard—loved the little pops of flavor.
- Tried drizzling a splash of balsamic in the glaze—actually, it kinda overpowered the maple, wouldn’t recommend more than a teaspoon.
- Once, I added orange zest. Was pretty good, but my kids said it tasted “like Christmas chicken.” Make of that what you will.
Do You Need Fancy Gadgets?
I always use my ancient roasting tin, but a cast iron skillet works too. If you don’t have a brush for the glaze, just use a spoon (or even your hands—just wash up after!). Meat thermometer is handy, but if you don’t have one, just check the juices are clear and the leg wiggles pretty easily. Not rocket science, really.
Stashing the Leftovers
This should keep in the fridge for a couple days, tightly wrapped. But honestly, in my house, leftovers are a myth. If you do somehow have some, it’s really good the next day, especially cold, straight from the fridge (no shame).
What To Serve With (We Always Argue Over This)
I’m partial to roast potatoes and a pile of green beans, but my sister swears by mashed sweet potatoes. Sometimes, I’ll do a big salad with bitter leaves to balance the sweetness. And oh, if you haven’t tried these crispy roasties from Serious Eats, you’re missing out, mate.
Pro Tips I Learned the Hard Way
- I once tried rushing the resting step and the juices went everywhere. Now, I just wait (or pretend I’m waiting and sneak a little bit).
- Keep an eye on the glaze—if your oven runs hot, tent the chicken with foil for the last 10 minutes or so.
- Don’t skip drying the skin first; otherwise, it just won’t crisp up like it should, and you’ll wonder where you went wrong (I did, anyway).
Wait, Can I Ask…? (Real Questions Folks Have Texted Me)
- Can I use chicken pieces instead of a whole chicken? Yep, just cut down the roasting time—maybe 30–40 minutes total. Keep an eye on them!
- What if I don’t have maple syrup? Agave or golden syrup works in a pinch, but it’s not quite the same. Honey, as I mentioned, is fine, just a bit runnier.
- Is this super sweet? Not really! The mustard and soy help balance it. But if you’re worried, reduce the maple by a tablespoon.
- What’s the best way to reheat leftovers? Oven’s best, 180°C/350°F for about 15 minutes. Microwaving is okay, though the skin loses its crisp (but at that point, who cares?).
- Can I add veggies to the pan? Absolutely! Chunky carrots, onions, or even parsnips roast nicely underneath. Just maybe don’t crowd the pan.
- Where do you buy your maple syrup? Lately, I’ve been using the one from Aldi; it’s affordable and does the trick. If you want to splurge, go Canadian!
Random aside: once, I completely forgot to buy lemons and used a sad little lime from the bottom of the fridge. The result was…strange but not awful. So, you know, improvise as needed!
Ingredients
- 1 whole chicken (about 3.5-4 lbs)
- 1/3 cup pure maple syrup
- 2 tablespoons Dijon mustard
- 2 tablespoons olive oil
- 1 tablespoon soy sauce
- 3 garlic cloves, minced
- 1 teaspoon dried thyme
- 1 teaspoon salt
- 1/2 teaspoon black pepper
Instructions
-
1Preheat your oven to 400°F (200°C). Pat the chicken dry with paper towels and place it in a roasting pan.
-
2In a small bowl, whisk together maple syrup, Dijon mustard, olive oil, soy sauce, minced garlic, dried thyme, salt, and black pepper.
-
3Brush half of the maple glaze all over the chicken, making sure to coat it evenly.
-
4Roast the chicken in the preheated oven for 45 minutes. Remove from oven and brush with the remaining glaze.
-
5Return the chicken to the oven and roast for an additional 25 minutes, or until the skin is crispy and a thermometer inserted into the thickest part reads 165°F (74°C).
-
6Let the chicken rest for 10 minutes before carving. Serve warm and enjoy!
Approximate Information for One Serving
Nutrition Disclaimers
Number of total servings shown is approximate. Actual number of servings will depend on your preferred portion sizes.
Nutritional values shown are general guidelines and reflect information for 1 serving using the ingredients listed, not including any optional ingredients. Actual macros may vary slightly depending on specific brands and types of ingredients used.
To determine the weight of one serving, prepare the recipe as instructed. Weigh the finished recipe, then divide the weight of the finished recipe (not including the weight of the container the food is in) by the desired number of servings. Result will be the weight of one serving.
Did you make this recipe?
Please consider Pinning it!!