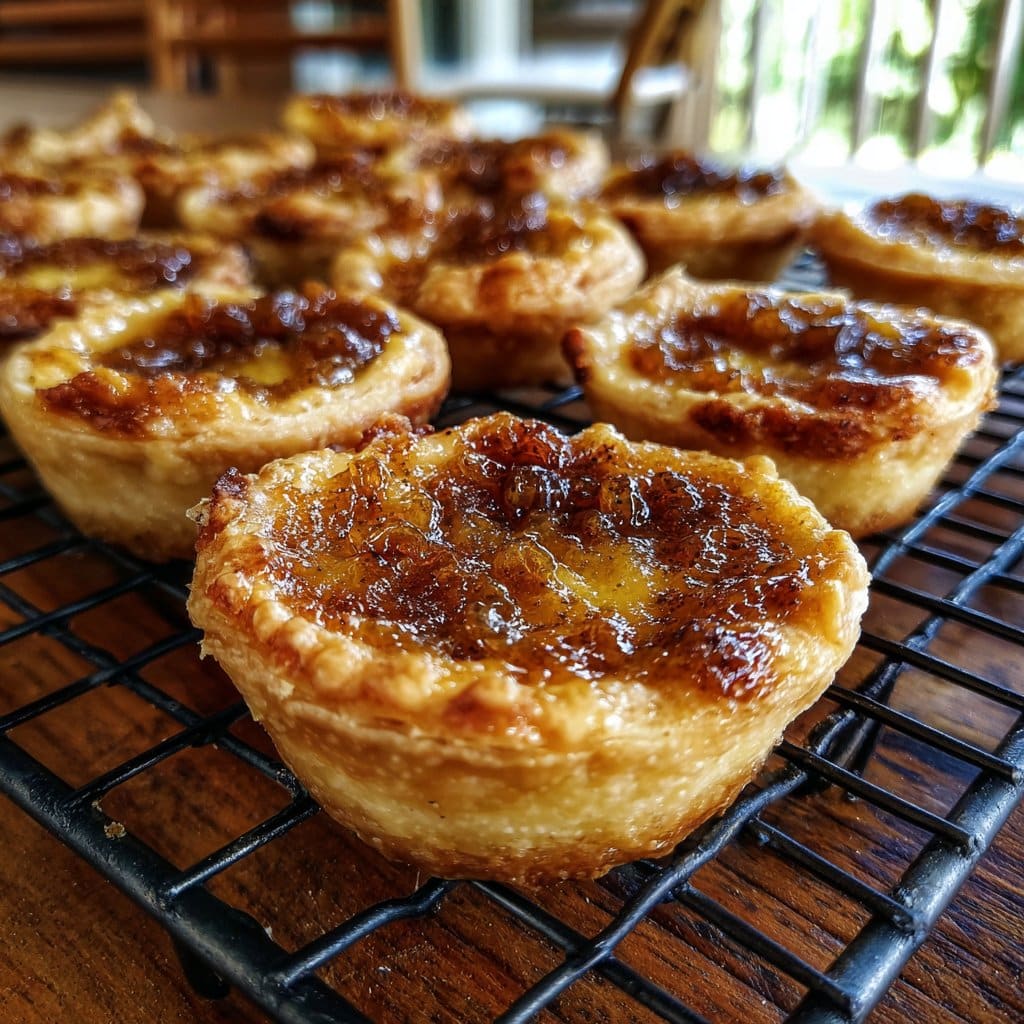
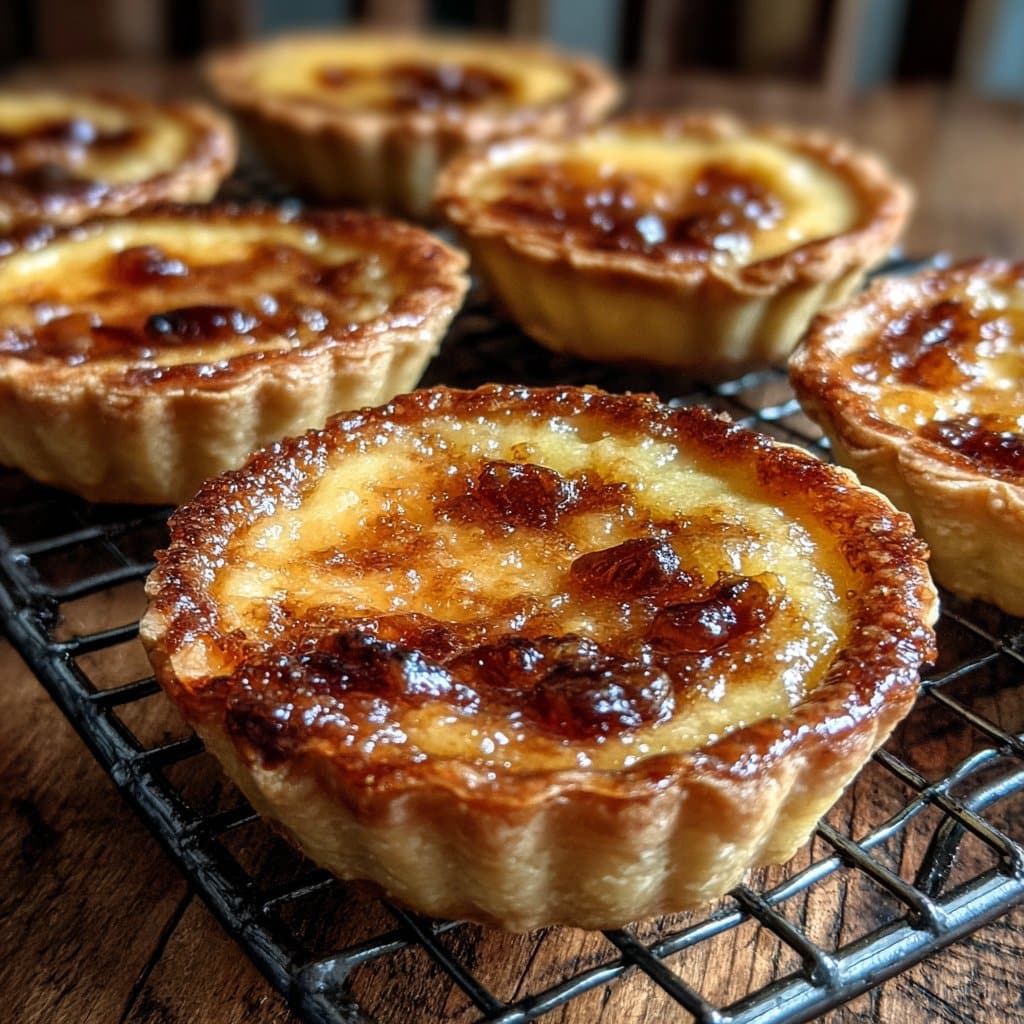
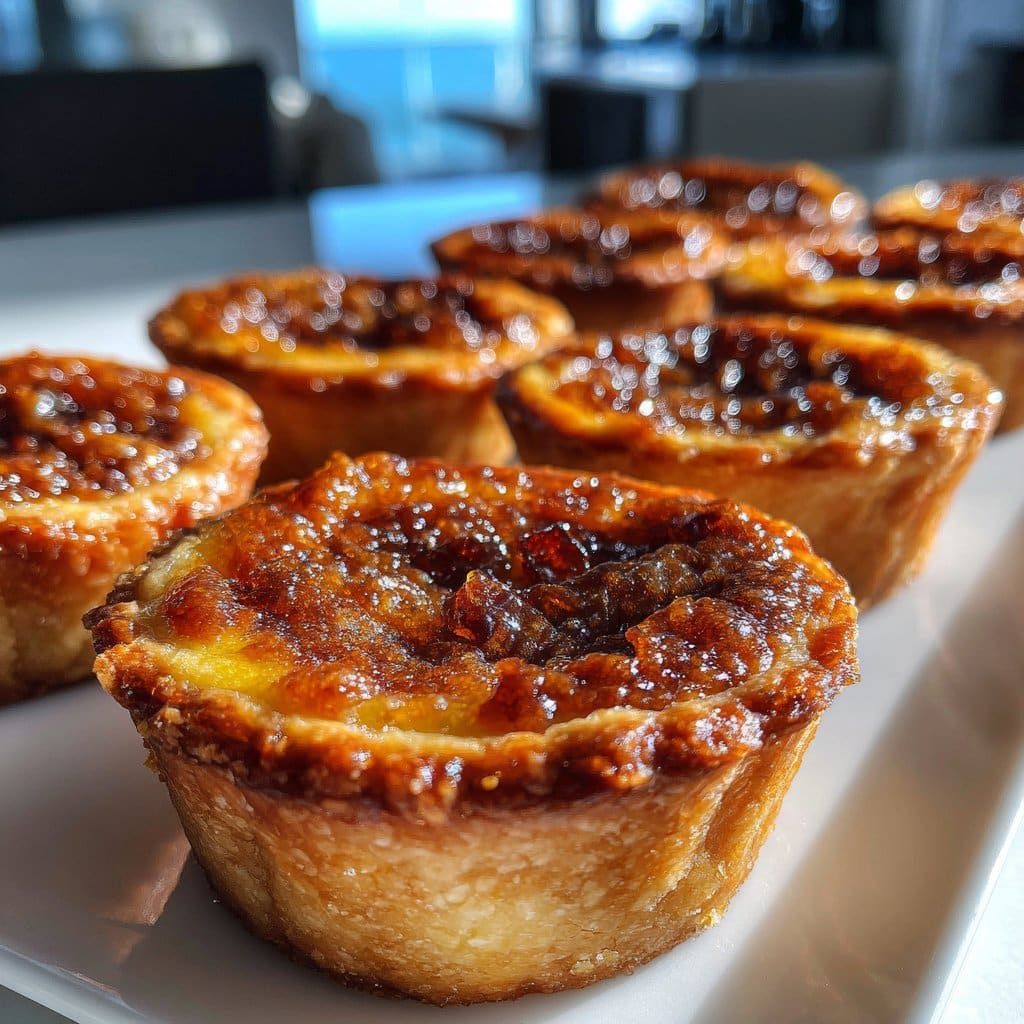
Easy Butter Tarts – Sweet, Sticky & Perfectly Flaky
Let Me Tell You About These Easy Butter Tarts
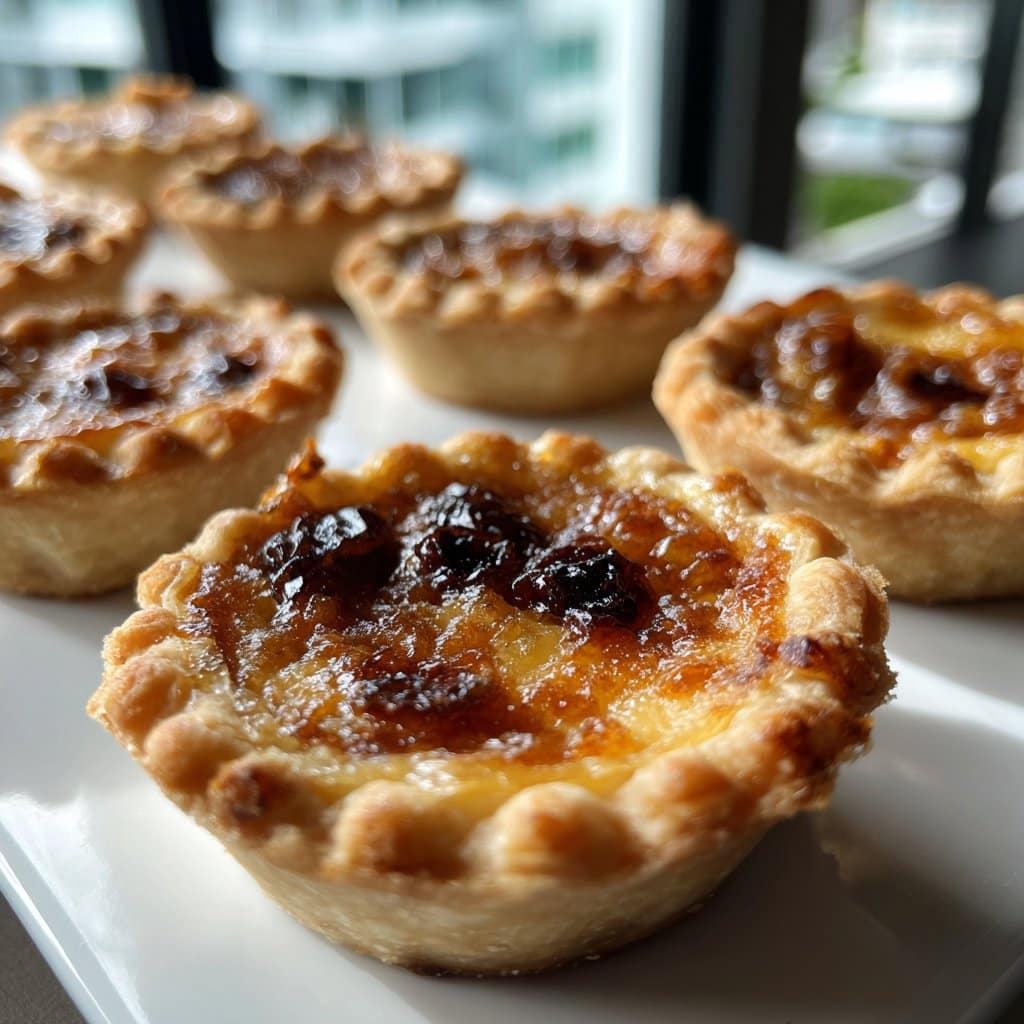
Alright, friend, pull up a chair—we need to talk seriously about butter tarts. I’ve been baking these (way more often than I’m willing to admit) ever since that one “oops, I spilled extra syrup” incident made them even gooier. Honestly, every time I make a batch, I remember my Aunt Barb’s kitchen—she’d let us kids lick the spoon, but only after warning us not to touch the hot trays (I did anyway, once, and learned my lesson). Butter tarts are like the edible hug of the Canadian dessert world, and if you haven’t tried making them at home, mate, you’re missing out. Plus, they’re just messy enough that you know nobody’s judging your pastry skills. Or your willpower.
Why I Always Come Back to This Recipe
I make this whenever I’m in need of some proper comfort food—like when it’s rainy and the dog won’t stop shedding on the couch. My family goes bonkers for these tarts, especially my youngest, who claims any crumbling bits as her “tax.” (Honestly, that’s just smart economics.) I used to dread making pastry from scratch, partly because of a particularly sticky disaster involving a rolling pin and my old kitchen wallpaper—don’t ask—but now I just embrace the chaos. And there’s something outrageously satisfying about biting into that flaky crust and getting syrup on your chin. Also, if you don’t like raisins, don’t worry, you’re not alone… more on that later.
What You’ll Need (Substitutions Welcome!)
- 1 box store-bought frozen tart shells (okay, homemade is best, but let’s be real; ready-made saves time and honestly, who’s judging?)
- 1/2 cup unsalted butter, melted (sometimes I use salted butter if that’s all I’ve got, just skip the pinch of salt later)
- 1 cup packed brown sugar (light or dark—my grandma swore by Rogers, but anything’s fine, really)
- 2 large eggs
- 1/4 cup maple syrup (if you run out, golden syrup or even honey works in a pinch, but, yeah, it’s not quite the same)
- 2 tbsp heavy cream (milk works, but the filling’s runnier; I learned that the sticky way)
- 1 tsp vanilla extract
- 1/2 cup raisins (or currants, or skip them entirely if you’re Team No Raisin)
- Pinch of salt (unless you used salted butter, then just wink at the recipe and move on)
Here’s How I Actually Make Them
- Preheat your oven to 400°F (200°C). Lay out your tart shells on a baking tray. Seriously, don’t wait until step five for this (like I always do).
- In a big bowl, whisk together the melted butter and brown sugar until it’s all smooth and kind of glossy. This is where I usually sneak a tiny taste. For quality control, obviously.
- Add eggs, maple syrup, cream, vanilla, and salt. Whisk again—and if your arms get tired, that just means you’re doing it right. Or use an electric mixer, nobody’s checking.
- Fold in the raisins (or not, if you’re in a mood). Pour the filling into your tart shells—don’t overfill, though, unless you want to clean sticky stuff off your oven floor. Trust me, it’s not as fun as it sounds.
- Bake for 12-15 minutes, until the pastry is golden and the filling is bubbling and a little puffed up. It’ll deflate as it cools. Don’t worry if some spill over—that’s practically tradition in my book.
- Let them sit in the tray for 5-10 minutes before moving to a rack. (If you try to rush them out, they’ll fall apart like my New Year’s resolutions.)
Notes From My Kitchen (AKA Lessons Learned the Hard Way)
- If your tarts stick, just use a butter knife to gently pry them out. Or just eat the pieces—no shame.
- Don’t overbake thinking they’ll firm up—they set as they cool. Once I left a batch in for 20+ minutes and they tasted like regret and burnt caramel.
- If you want super-gooey filling, pull them out at the 12-minute mark. A bit longer for firmer tarts (my uncle prefers them this way, for dunking in tea, which I find a bit odd, but…)
Variations I’ve Actually Tried
- With chopped pecans: Adds a bit of crunch—nice, if you like that sort of thing. I do, sometimes.
- No raisins, extra maple syrup: Sweeter and stickier, and honestly, sometimes it’s just what you need.
- Chocolate chips instead of raisins: Good, but the chips sink to the bottom and sort of make a mess (but a tasty mess, so… worth it?).
- Once tried coconut flakes: Wouldn’t recommend. Texture was weird and my kids protested. Never again.
Equipment (And Some Handy Workarounds)
- Muffin tin or tart tin (but I’ve just used a baking sheet with the tart shells spaced out when I couldn’t find my tin—worked fine, just watch for tipping)
- Mixing bowl (any decent size)
- Whisk (or a fork if you can’t be bothered)
- Cooling rack (or just a clean dish towel—nobody’s judging)
How I (Try to) Store Them
Butter tarts keep in an airtight container at room temp for about 2 days, maybe 3 if you’re lucky. You can pop them in the fridge for up to a week, but they’ll lose a bit of that magic (I reckon they taste better at room temp, but that’s me). Freezer? Yep, up to a couple months, but honestly, in my house they never last more than a day!
How We Like to Serve These
I love them warm, with a scoop of vanilla ice cream, or sometimes just with a cup of tea (not in it, Uncle Pete). My partner claims they’re best cold; I think that’s just to keep me form eating them all straight out of the oven. Sometimes, if I’m feeling fancy, I’ll sprinkle a bit of flaky salt on top before serving. Try it at least once!
Pro Tips (Learned the Hard Way)
- Don’t try to shortcut the cooling step—I once tried to eat one straight from the tin and, well, still have the battle scars.
- If you’re making your own pastry, chill it longer than you think. I used to rush this step and almost always ended up with shrinking, sad tarts.
- Using golden syrup instead of maple? Actually, I find it works better if you use less sugar to balance it out.
FAQ (Because People Always Ask!)
- Can I use puff pastry instead?—Mate, you can, but it gets messy and doesn’t hold the filling as well. But if that’s what you’ve got, go for it. Just watch for overflow.
- What’s the secret to extra-flaky pastry?—Cold butter. And don’t overwork it. Actually, on second thought, using store-bought shells is my secret (don’t tell the purists).
- Why did my tarts overflow?—Probably overfilled, or the oven temp was a bit high. But hey, those caramelized edges are the best part anyway!
- Can I make these ahead?—Sure, but I think they taste best the next day. The flavours meld, and the filling gets that perfect set (science? magic?).
- Where’d you get your tart shells?—Honestly, I just grab what’s on offer at the local store. If you want to make your own, this pie crust recipe is spot-on. For more tart inspiration, check out Chatelaine’s classic version.
Wait, One Last Thing
If you’re baking with kids, just accept that the kitchen will look like a flour bomb went off. That’s half the fun. And if you ever get a tart that leaks so much syrup it glues itself to the tin? Just call it a chef’s treat and eat it with a spoon. Life’s too short to worry about perfect pastry edges.
Ingredients
- 1 package (14 oz) refrigerated pie pastry
- 1/2 cup unsalted butter, softened
- 1 cup packed brown sugar
- 2 large eggs
- 2 tablespoons milk
- 1 teaspoon vanilla extract
- 1/2 cup raisins (optional)
- 1/4 teaspoon salt
Instructions
-
1Preheat oven to 375°F (190°C). Grease a 12-cup muffin tin or line with paper liners.
-
2Roll out the pie pastry and cut into 12 circles to fit the muffin tin. Gently press each circle into the cups to form tart shells.
-
3In a medium bowl, cream together the softened butter and brown sugar until smooth. Beat in eggs, milk, vanilla extract, and salt until well combined.
-
4Divide raisins evenly among the tart shells, if using. Spoon the filling mixture over the raisins, filling each shell about two-thirds full.
-
5Bake for 20-22 minutes, or until the pastry is golden and the filling is set but still slightly jiggly in the center.
-
6Let the butter tarts cool in the pan for 10 minutes before transferring to a wire rack to cool completely. Enjoy!
Approximate Information for One Serving
Nutrition Disclaimers
Number of total servings shown is approximate. Actual number of servings will depend on your preferred portion sizes.
Nutritional values shown are general guidelines and reflect information for 1 serving using the ingredients listed, not including any optional ingredients. Actual macros may vary slightly depending on specific brands and types of ingredients used.
To determine the weight of one serving, prepare the recipe as instructed. Weigh the finished recipe, then divide the weight of the finished recipe (not including the weight of the container the food is in) by the desired number of servings. Result will be the weight of one serving.
Did you make this recipe?
Please consider Pinning it!!