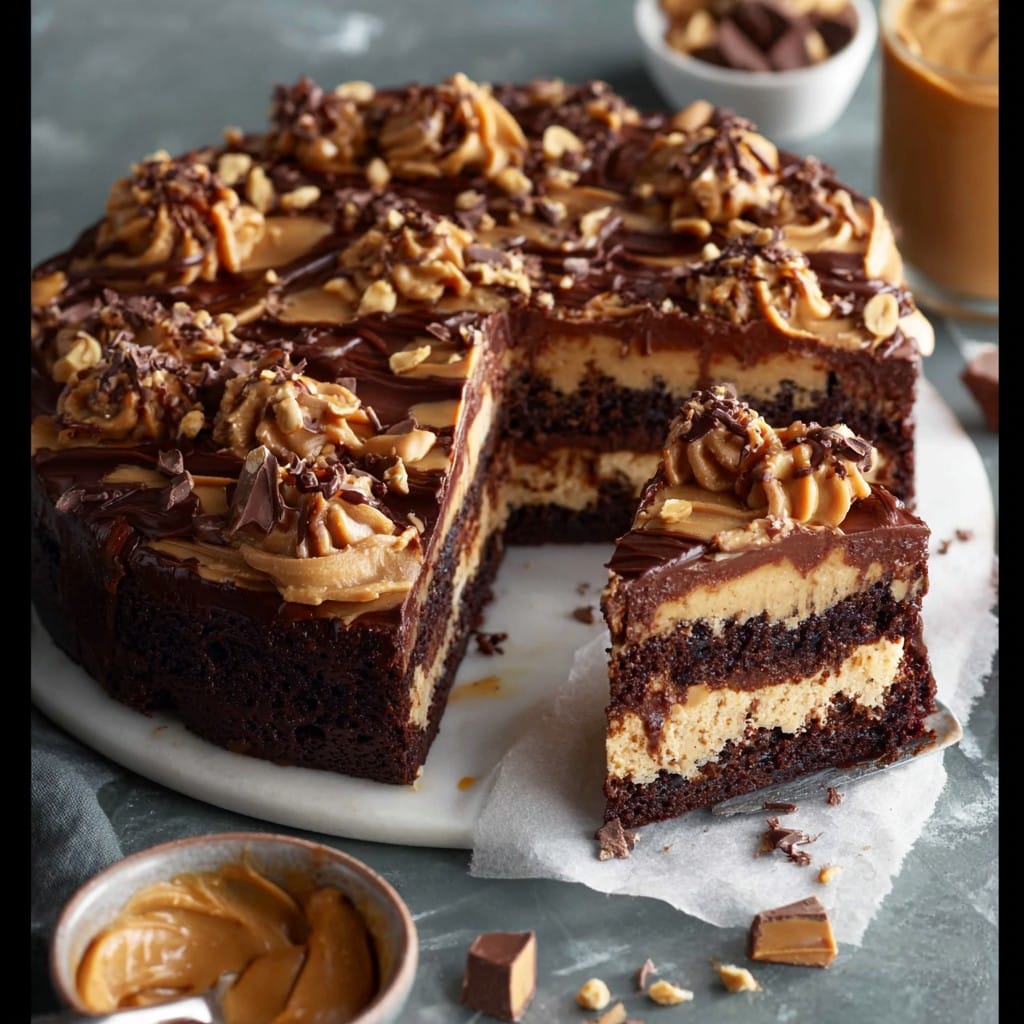
Chocolate Peanut Butter Cake: My Addictive (Messy!) Home Recipe
So Here’s the Scoop: Why I’m Obsessed With This Cake
You know how sometimes you just get a craving that punches you right in the sweet tooth? That’s sort of how Chocolate Peanut Butter Cake invaded my kitchen, and honestly, my entire family’s waistlines. The first time I made this, my roommate (back in uni days) walked in on me literally licking the frosting off the spatula—zero shame. Plus, there’s something about the combo of chocolate and peanut butter—like the culinary version of your two best mates teaming up for an even wilder party. And, well, if there’s any left by the next morning, I think it tastes even better (but don’t quote me, since the evidence usually disappears fast).
Why You’ll Love This (At Least I Hope You Do!)
I whip this up when I want to bribe my kids to clean their rooms. Kidding. (Mostly.) Actually, I tend to make this cake when somebody needs cheering up, or when I just want an excuse to eat frosting with a spoon. My family goes properly bonkers for this because it’s rich, a bit gooey, and ridiculously chocolatey. Honestly, I used to think peanut butter in cakes sounded a bit daft, but my mate Clara convinced me, and now, well, here we are. The only catch? The kitchen’s a sticky mess when I’m done—my spatula’s seen better days, I’ll tell you that much.
Stuff You’ll Need (Aka Ingredients: Please Improvise!)
- 1 1/2 cups (about 190g) all-purpose flour (I’ve swapped half for whole wheat before, and you can sort of tell, but it works)
- 1 cup granulated sugar (sometimes I just use a bit less, especially if the peanut butter is sweetened)
- 1/2 cup unsweetened cocoa powder (Dutch processed works, but I’ve used regular, too. Honest oppinion: use what you’ve got)
- 1 teaspoon baking powder
- 1/2 teaspoon baking soda
- 1/2 teaspoon salt (my granny loves Maldon’s flakes but table salt’s grand too)
- 2 large eggs
- 3/4 cup plain yogurt (or use sour cream if that’s what’s lurking in the fridge)
- 1/2 cup milk (I go with whole, but any kind will do—oat milk is surprisingly tasty here)
- 1/2 cup melted butter (I’ve also swapped in neutral oil once; didn’t hate it)
- 2 teaspoons vanilla extract (I’ve used cheap supermarket stuff in a pinch, honestly can’t taste the difference when there’s that much chocolate)
- 1/2 cup creamy peanut butter (chunky is… interesting, but it’ll work)
- 3/4 cup hot coffee or strong tea (boosts the chocolate flavor; don’t worry, it won’t taste like your morning cuppa)
For the Frosting:
- 1 cup creamy peanut butter
- 1/2 cup unsalted butter, very soft (room temp is key!)
- 2 cups powdered sugar (sometimes I get lazy and just use 1 1/2 cups)
- 2-4 tablespoons milk
- 1 teaspoon vanilla extract
- Pinch of salt (I use more if I want it a bit savory)
- Optional: handful chopped peanuts or chocolate chips for topping
How I Make It (Warts and All)
- First things first—preheat your oven to 350°F (180°C). Grease an 8- or 9-inch round cake pan, or just line it with parchment if you can be bothered. Sometimes I just give the pan a good spray and hope for the best. Don’t stress.
- In a biggish mixing bowl, whisk together the flour, sugar, cocoa powder, baking powder, baking soda, and salt. This is where I always spill a little cocoa. Every. Time.
- In another bowl, beat together eggs, yogurt, milk, melted butter, and vanilla until smooth. Add in that glorious peanut butter—it’ll look a bit lumpy and gooey, don’t panic. Actually, I find it works better if the PB is just a touch warm, so it blends.
- Pour the wet stuff into the dry stuff, scrape like mad with a spatula (or wooden spoon if you’re old school like me). Pour in the hot coffee and gently stir it all together; don’t overmix or the cake might get tough. This is also where it usually looks like something went wrong, but keep the faith. It comes together.
- Chuck it all in the prepared pan and bang it in the oven. Bake for 32-38 minutes—start poking it at 32, but honestly it often goes to 38 in my place. A toothpick (or thin knife, whatever) should come out clean-ish, a few crumbs are fine.
- Let it cool in the pan for 10 minutes, then flip it out onto a rack. I always get nervous here but it usually survives the operation. While it cools, make the frosting.
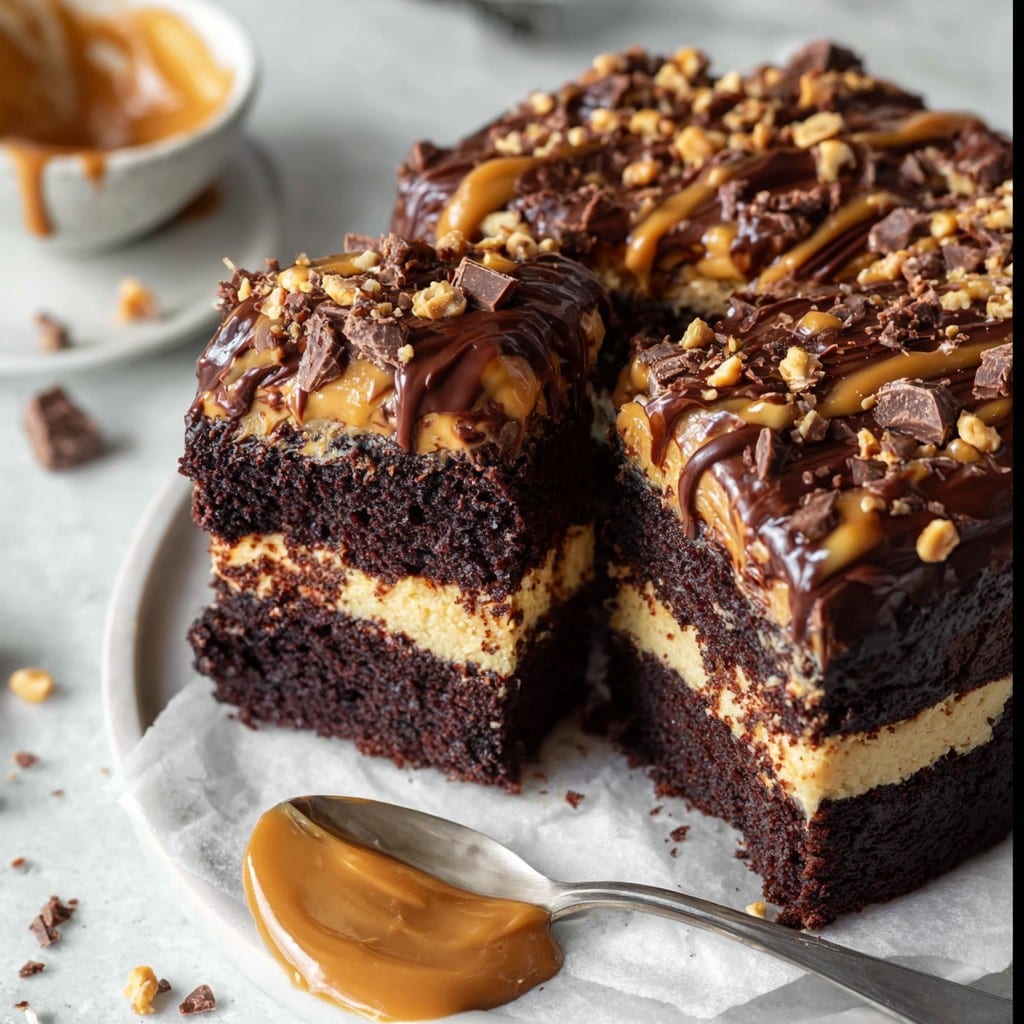
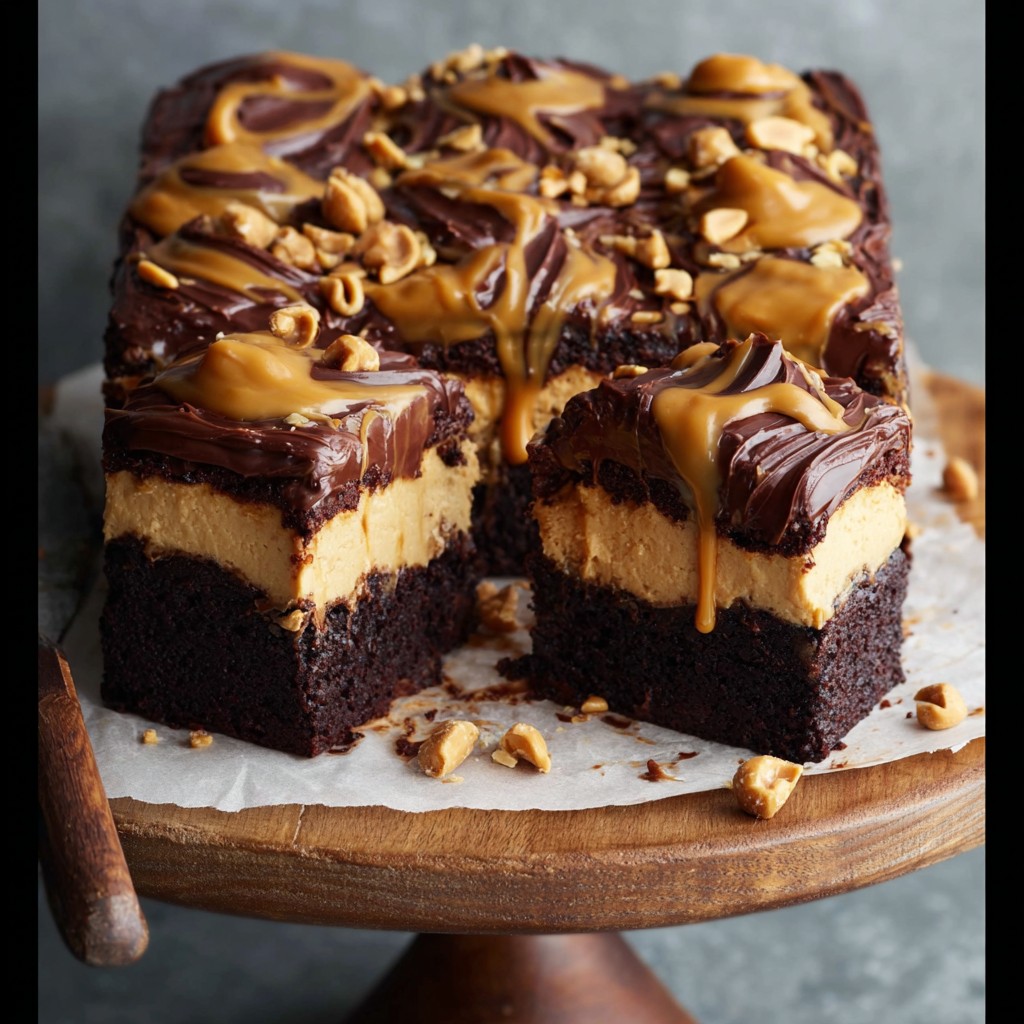
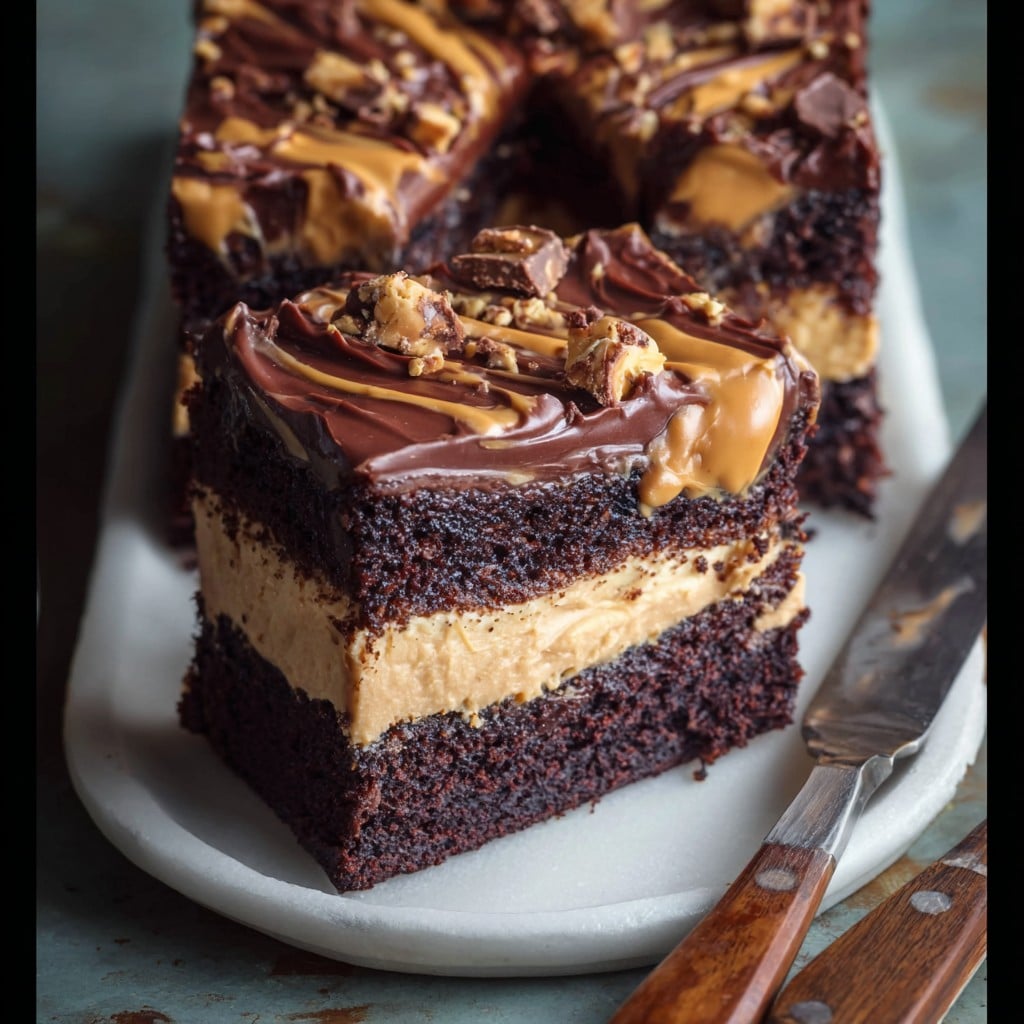
- For the frosting, beat the peanut butter and butter together until nice and fluffy, then slowly add powdered sugar. Splash in milk as needed until it’s smooth and spreadable—don’t make it soupy. Mix in vanilla and salt. Taste it (obviously). Actually, at this point I tend to sneak a spoonful. Then, slather it all over the cooled cake. Decorate with chopped peanuts or whatever else your heart desires. Or leave it messy, nobody minds.
Quick Notes (Or: What I Bumbled into While Testing)
- If you forget to bring your butter to room temperature, just cube it and zap it briefly in the microwave. Don’t melt it totally though—learned that the hard way.
- The hot coffee gives a deeper chocolate flavor—half the time nobody guesses it’s in there, though once my mate swore she could taste tea, I think she was pulling my leg.
- If your frosting tears up the cake, just warm your spatula in hot water for a sec. I act like I heard this on a fancy cooking show, but it was a happy accident.
Variations I Actually Tried (Some Genius, Some Not)
- Mocha vibe: Toss a handful of chocolate chips into the batter. Extra gooey, sticks to your teeth. Good times.
- Vegan-ish version: Use flax eggs, plant milk, and a vegan butter. Works, but I found the cake a touch denser. Not bad though.
- Jelly swirl: Dollop and swirl a little jam into the batter before baking (like a PB&J situation) — honestly, this was a bit much, but give it a go if you’re feeling wild.
What If You Don’t Have All the Fancy Equipment?
I mean, technically a stand mixer makes life easier, but if you’re like me and sometimes can’t be bothered to drag it out/get it washed, a good sturdy whisk and a bit of elbow grease works. Don’t have a wire rack? Just cool the cake on an upside-down muffin tin. Or leave it in the pan, and risk sticky-bottom syndrome. Up to you!
About Storing This Cake (Aka Where Did It All Go?)
Pop leftovers in an airtight tin or wrap with cling film. It keeps well at room temp for a day or two, or chuck it in the fridge for up to 4 days (though, honestly, in my house it never lasts more than a day! Someone always nicks a hunk when my back is turned). I’ve even frozen slices—defrosts fine, though sometimes the frosting looks a bit odd after.
How We Like to Serve It (Family Oddities Alert)
Cuts perfectly for afternoon tea with a cheeky dollop of whipped cream on the side. Or a scoop of vanilla ice cream if you’re feeling flash. Someone in my family (naming no names, but it’s my son) loves it for breakfast on his birthday, paired with a cold glass of milk. Not strictly ‘approved,’ but hey.
Things I’ve Learned (So You Don’t Mess Up Like Me)
- Don’t rush letting the cake cool. I once tried to frost it when it was barely warm (impatient much?)—ended up with a slidey, sticky mess. Still tasted great. Just… not pretty.
- Sift the powdered sugar for the frosting if you want it truly smooth—I always say I will, but half the time I don’t, and, well, sometimes there’s a lump or two. Meh.
- Use parchment if you’ve got it. Saves you from that heart-stopping moment when half the cake wants to stay in the pan. Been there, done that.
Quick FAQ (Because People Actually Ask Me These!)
- Can I use natural peanut butter? Sure can! But give it a good stir first so it’s not all oily—actually, the cake might be a bit denser. Still yummy.
- Do I have to use coffee in the batter? Nope. Just use hot water, or yeah, even black tea. The flavor is subtle (unless you pour in a double shot of espresso, in which case, more power to you!).
- Freezes well? Yup—slices freeze better than the whole cake, but as above, frosting might get a little weird. Taste’s fine, looks a bit odd.
- Why did my cake sink? Ooof, looks like you beat the batter too long, or maybe opened the oven too early? It happens. Still edible—just call it a rustic look.
- Other cakes for PB fans? Oh, definitely. You gotta check out Sally’s Peanut Butter Cake. For the record, that’s where I got the confidence to try more peanut butter in baking. Also love this wild chocolate cake round-up—have lost hours browsing.
Right, think that covers my ramblings! If you try this, let me know how you get on (and especially what messes you make along the way). More cake wisdom here, if you’re curious. Happy baking!
Ingredients
- 1 3/4 cups all-purpose flour
- 3/4 cup unsweetened cocoa powder
- 2 cups granulated sugar
- 1 1/2 teaspoons baking powder
- 1 1/2 teaspoons baking soda
- 1/2 teaspoon salt
- 2 large eggs
- 1 cup whole milk
- 1/2 cup vegetable oil
- 2 teaspoons vanilla extract
- 1 cup boiling water
- 1 cup creamy peanut butter
- 1/2 cup unsalted butter, softened
- 2 cups powdered sugar
- 2-3 tablespoons milk
Instructions
-
1Preheat oven to 350°F (175°C). Grease and flour two 9-inch round cake pans.
-
2In a large bowl, whisk together flour, cocoa powder, sugar, baking powder, baking soda, and salt.
-
3Add eggs, milk, oil, and vanilla extract. Beat on medium speed for 2 minutes. Stir in boiling water until batter is smooth.
-
4Divide batter evenly between prepared pans and bake for 35-40 minutes, or until a toothpick inserted in the center comes out clean.
-
5Let cakes cool in pans for 10 minutes, then transfer to wire racks to cool completely.
-
6For the frosting, beat together peanut butter and softened butter until creamy. Gradually add powdered sugar and 2-3 tablespoons milk, beating until smooth and spreadable. Frost cooled cakes and assemble.
Approximate Information for One Serving
Nutrition Disclaimers
Number of total servings shown is approximate. Actual number of servings will depend on your preferred portion sizes.
Nutritional values shown are general guidelines and reflect information for 1 serving using the ingredients listed, not including any optional ingredients. Actual macros may vary slightly depending on specific brands and types of ingredients used.
To determine the weight of one serving, prepare the recipe as instructed. Weigh the finished recipe, then divide the weight of the finished recipe (not including the weight of the container the food is in) by the desired number of servings. Result will be the weight of one serving.
Did you make this recipe?
Please consider Pinning it!!