Blueberry Grilled Cheese Sandwich – Brunch or Lunch Comfort Idea
Okay, You Have to Hear About This Blueberry Grilled Cheese Thing
You ever make something that sounds a bit bonkers and then it turns out so stupidly good? That’s what happened the first time I slapped blueberries (of all things) into a grilled cheese. I’d run out of tomatoes. My kid wanted “fancy cheese toast” for lunch, and the only fruit in the house was blueberries—so, why not? I was probably a little too hungry, to be fair. Anyway, that first bite? Oh man. Jilly (my youngest) yelled, “This tastes like summer!” and I don’t think we’ve looked back. It’s brunch, it’s lunch, it never lasts—a true kitchen accident gone legendary. I even got my neighbor hooked (she’s still skeptical about pineapple on pizza but admitted this works). Honestly, the only tragedy is sometimes the bread gets just a bit too brown if the phone rings—ignore it, trust me!
Why You’ll Love This: Real Talk
I make this whenever I want to feel like I’ve got my life together (even if I definitely don’t). My family, which is—let’s be real—pretty picky, scarfs this down every time. Perfect for those “meant to go grocery shopping yesterday” afternoons. It’s sweet, gooey, salty. Plus, blueberries are healthy, right? So that cancels out the cheese; science. (Actually, don’t quote me on that.) If you’ve ever been stuck between craving something fancy and not wanting to cook a whole meal, this hits the spot. Oh, and you don’t need to fuss about measurements, which is part of what makes it magic; just slap it together with what you’ve got, toast it until melty, and before you know it, brunch is sorted.
What Goes In—Ingredients (And My Swaps)
- 2 thick slices of brioche or sourdough (or honestly, whatever bread isn’t rock hard—I’ve even used burger buns in a pinch)
- 1/2 cup fresh blueberries (once used frozen and yes, it kind of leaked everywhere but still tasted good)
- Generous slice (or a handful of shreds) of sharp cheddar (Gruyère is lovely, but regular old cheddar does the trick—my grandma’s go-to was Cracker Barrel but, in reality, any cheese you like melts fine)
- 1–2 tablespoons cream cheese (optional; some days I skip it and don’t really miss it)
- Butter—enough to slather the bread (I sometimes reach for olive oil if I’m feeling “fancy healthy”)
- Pinch of sea salt (I’ve forgotten it; it’s better with)
- Black pepper, to taste (maybe a crack or two, don’t go wild unless you love heat)
- Optional: little bit of honey or lemon zest if you want to really mess with people’s heads

How To Make It (Directions)
- Get stuff ready. Gather your ingredients on the counter. Plug in your panini press or set your big ol’ skillet on medium. (Side note: if your stovetop is lopsided like mine, prop one side with a spatula; wonky but effective.)
- Butter time. Slather butter on one side of each slice of bread (this is the outside; trust me, I’ve gotten it wrong before—sad).
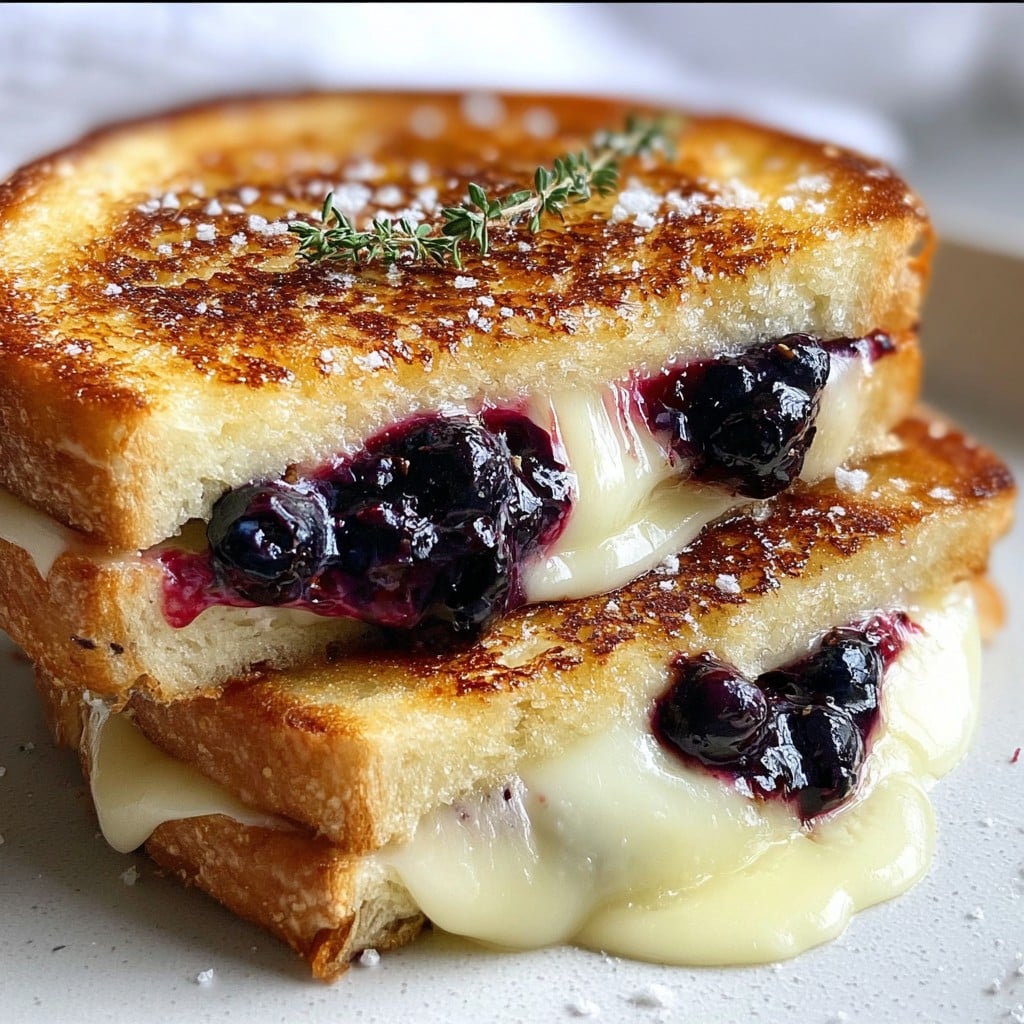
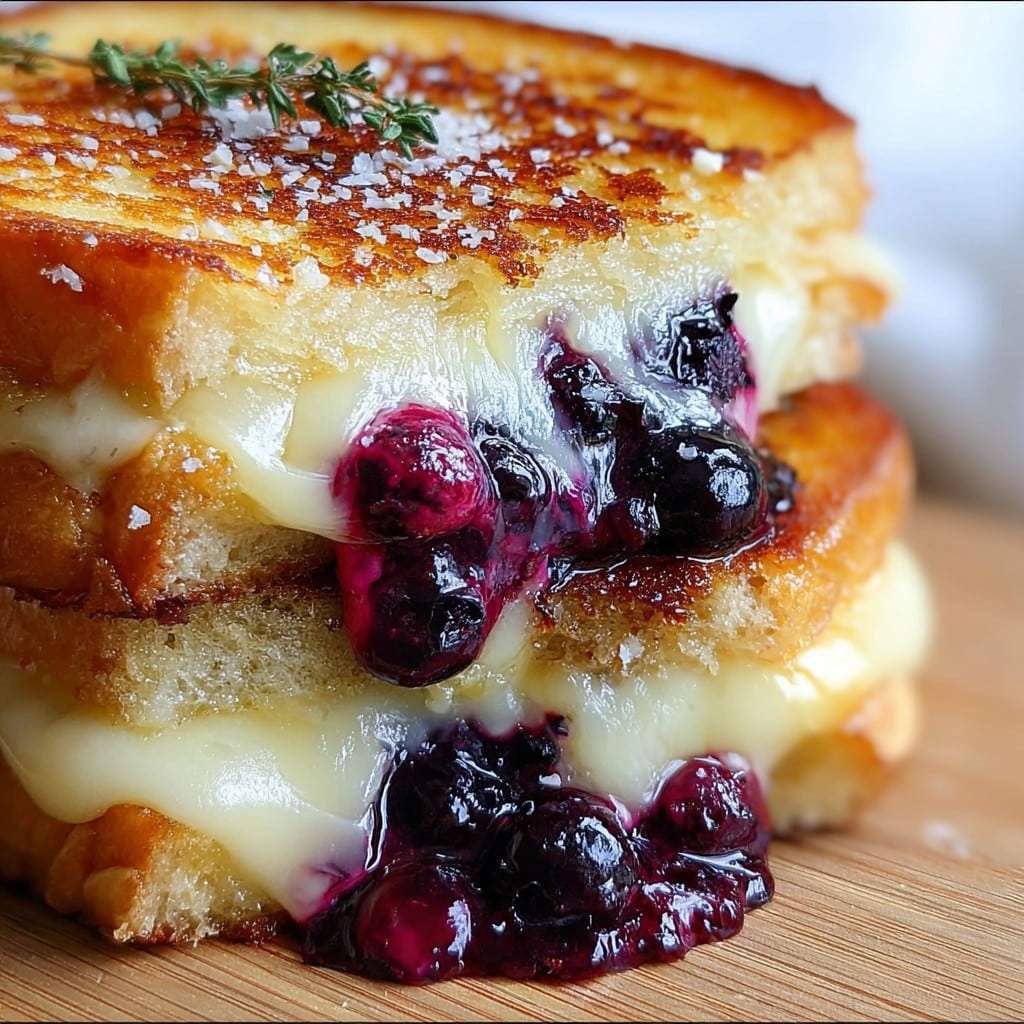
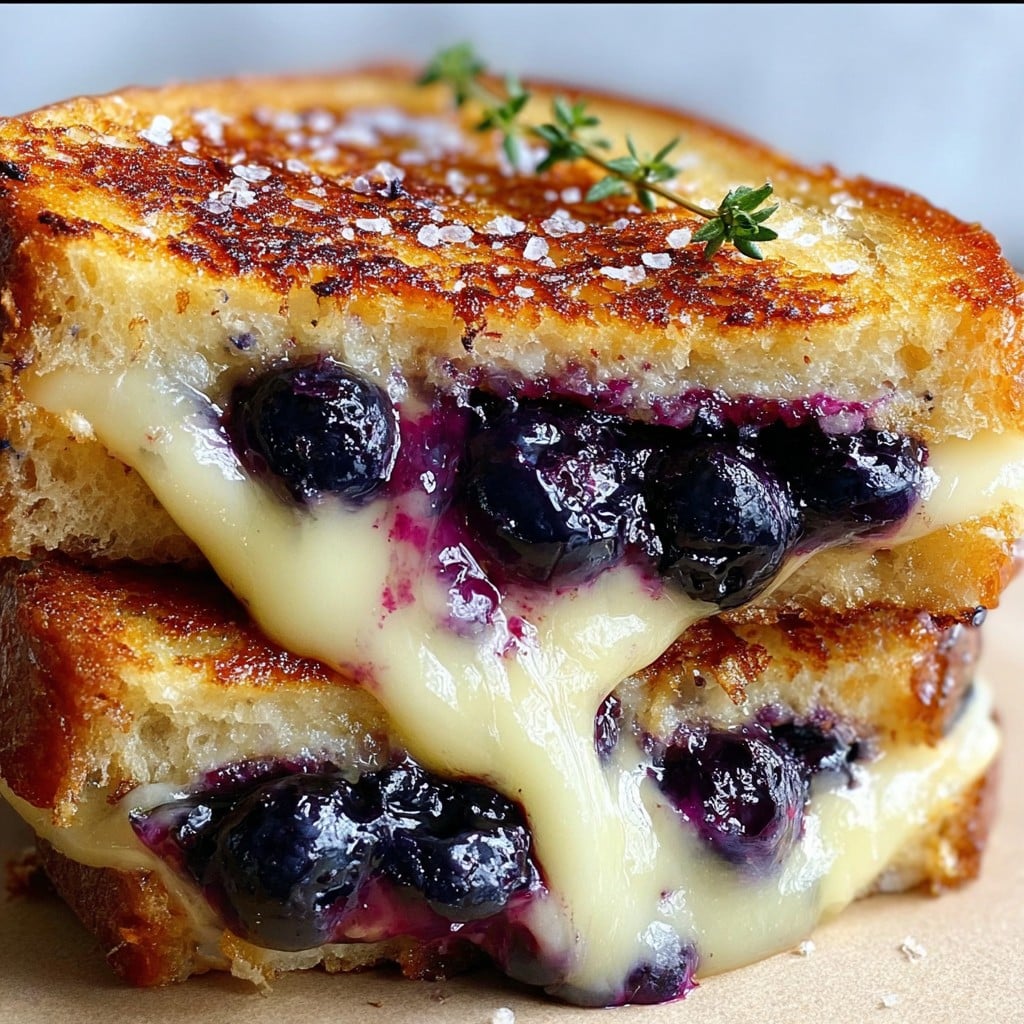
- Layer up. On the unbuttered side of one slice, spread cream cheese (if using). Then pile on the cheddar (make a mini-mountain, life’s short), scatter blueberries all over, then add a little sprinkle of salt and pepper. Hit it with honey or zest if you’re feeling adventurous.
- Sandwich it. Top with the other slice, buttered side out. Press a bit to squish the berries. Don’t panic if they burst—honestly, that purple cheese ooze is the best bit.
- Cook. Pop the sandwich in your pan. I use medium heat (high just burns the outside; ask my smoke alarm). Cook for about 2–3 minutes, until it smells amazing and gets that golden color. Actually, lift a little with the spatula—no shame in checking. Flip, repeat. Gooey cheese trying to escape? Welcome to the club.
- Rest (briefly) and slice. Let it sit for a hot second before slicing—unless you like melted cheese on your fingers, which maybe you do. This is where I sneak a taste of the little crispy bits that fall off. None of this is textbook, obviously, but it’s delicious.
Notes I Wish I Knew Sooner
- Brioche is extra buttery and honestly gets a bit floppy if you overdo the fillings; sourdough holds up better (but no need to be a bread snob).
- I’ve tried pre-toasting the blueberries in the pan—don’t bother, just get on with it.
- You do not need expensive cheese for this. Actually, the cheap stuff melts really well. Outrageous but true.
- If the sandwich slides around when flipping, just chase it with your spatula; it’ll be fine.
Variations I’ve Messed With (The Good and the “Never Again”)
- Goat cheese instead of cream cheese: total winner—tangy and fancy-feeling.
- Added fresh basil once (because I saw someone online do it); was weird, but not bad. Wouldn’t serve to a crowd, though.
- Tried with camembert; was a bit too rich for me. Probably great if you love that sort of thing.
- Once went overboard and added raspberry jam too—regretted immediately (too sweet, like candy on bread). Keep it simple!
No Fancy Equipment? No Drama
If you don’t have a panini maker (which, honestly, I only use at Christmas), just use a regular frying pan and smash the sandwich down with another smaller pan or even a jar. Works a treat. I read somewhere that a waffle iron could stand in—haven’t tried it, but if you do, holler at me on this grilled cheese Reddit thread. Curiosity’s killing me.
About Storing The Leftovers (If There Are Any)
I’ll be honest—these rarely hang around. But if you manage to have leftovers (I salute your self-control), wrap the sandwich in foil and pop it in the fridge. Reheat in the skillet to get the crunch back. It’s still tasty eaten cold, kinda like next-day pizza, but cheese won’t be as gooey. That’s my only warning. And don’t freeze unless you love soggy bread—not worth it, believe me.
This Is How We Eat It (Serving Suggestions From My Kitchen)
If I’m eating solo, I just grab the sandwich and some napkins and eat by the window with a mug of coffee. For a “fancier” brunch (read: family over and I need to look like I tried), I’ll slice it into triangles and serve with a salad of arugula, walnuts, and a squeeze of lemon. My kids dunk theirs in tomato soup—no idea why, but it’s become a thing. Oh, and don’t skip the napkins. Purple cheese is basically a paint.
Things I Learned The…Er, Hard Way (Pro Tips)
- I tried to rush the cheese melting once—ended up with burnt bread, cold cheese. Not ideal. Take it slow, the cheese needs time to get gooey.
- Watch the heat—if it smells toasty but not burnt, it’s probably ready to flip. Trust your nose.
- Don’t pile so many blueberries that the sandwich won’t close; did that, and everything started escaping like blueberries running from bathwater.
- I tend to think it tastes even better after ten minutes, but good luck making it last that long.
Got Questions? FAQ (Because Everyone Asks)
- Q: Can I use frozen blueberries?
Yup! Just maybe thaw and blot ’em dry first if you hate leaks. But honestly, I don’t mind the extra juice. Smells even better. - Q: Is this good for breakfast or just lunch?
Honestly, it’s good both times. I’ve had it at midnight, too. No judgement round here. - Q: What’s the best cheese?
Cheddar is classic in my house, though my friend swears by Havarti. I guess just don’t use anything that doesn’t melt, like feta (tried it, was weirdly crumbly). - Q: Can I make it vegan?
I haven’t tried all the options, but a friend likes homemade vegan cheese and vegan butter—she says it works fine! You’ll have to experiment. Let me know how it goes. - Q: What should I serve this with?
I say arugula salad, but chips are totally allowed. And a pickle on the side is, surprisingly, AMAZING. Don’t knock it.
If you end up loving this as much as my crew does, I’d love to hear about your little tweaks. Or, you know, your cautionary tales. Either way, happy (slightly messy) sandwich-making!
Ingredients
- 4 slices of sourdough bread
- 2 tablespoons unsalted butter, softened
- 1 cup fresh blueberries
- 2 teaspoons honey or maple syrup
- 1/2 cup shredded mozzarella cheese
- 1/2 cup cream cheese, softened
- 1/4 teaspoon ground black pepper
- Pinch of salt
Instructions
-
1In a small bowl, mix blueberries with honey or maple syrup. Lightly mash some of the berries to release their juices.
-
2Spread a thin layer of cream cheese on one side of each bread slice. Sprinkle mozzarella cheese evenly over two slices, then top with the blueberry mixture. Season with a pinch of salt and black pepper.
-
3Place the remaining cream cheese-spread bread slices on top to make sandwiches, with the cheese and blueberries inside.
-
4Butter the outsides of both sandwiches.
-
5Heat a nonstick skillet or griddle over medium heat. Cook sandwiches for 3–4 minutes per side, pressing gently, until bread is golden brown and cheese is melted.
-
6Slice in half and serve warm. Enjoy your blueberry grilled cheese for brunch or lunch!
Approximate Information for One Serving
Nutrition Disclaimers
Number of total servings shown is approximate. Actual number of servings will depend on your preferred portion sizes.
Nutritional values shown are general guidelines and reflect information for 1 serving using the ingredients listed, not including any optional ingredients. Actual macros may vary slightly depending on specific brands and types of ingredients used.
To determine the weight of one serving, prepare the recipe as instructed. Weigh the finished recipe, then divide the weight of the finished recipe (not including the weight of the container the food is in) by the desired number of servings. Result will be the weight of one serving.
Did you make this recipe?
Please consider Pinning it!!