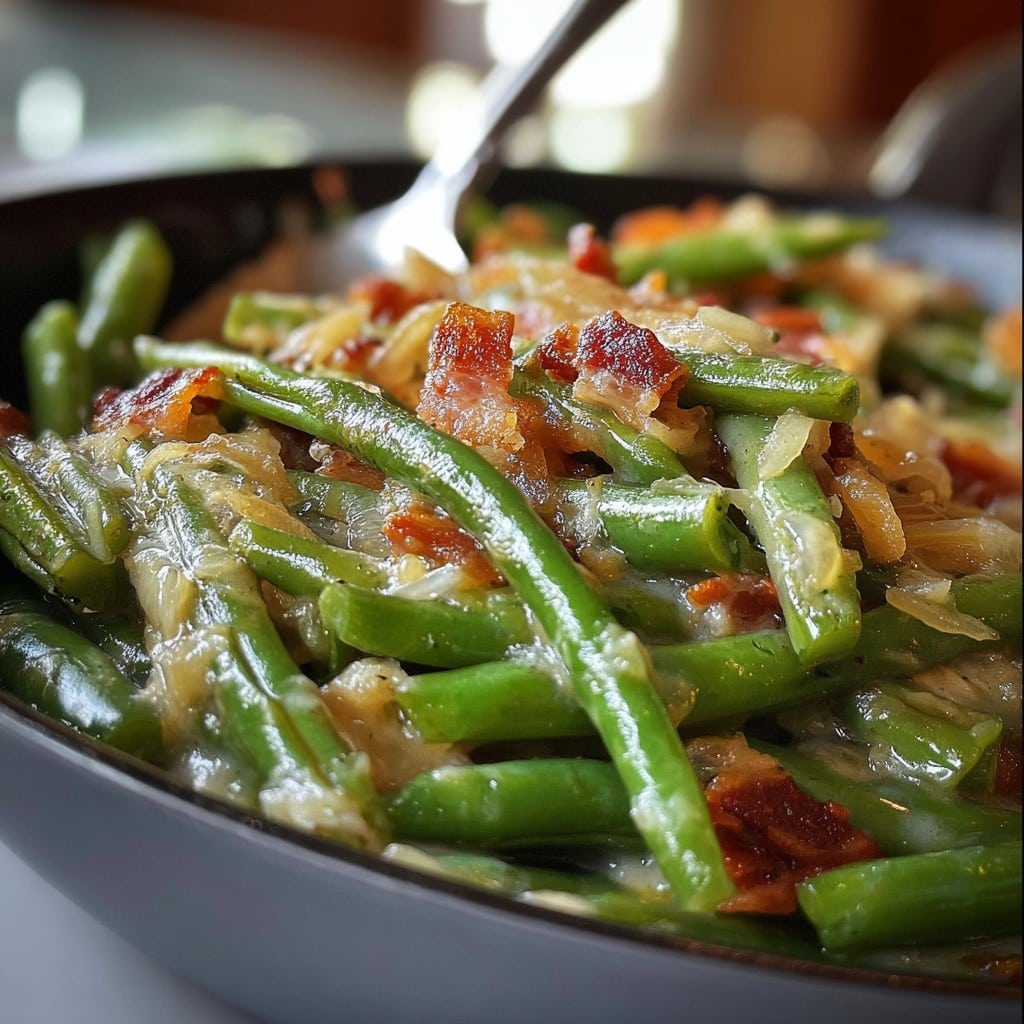
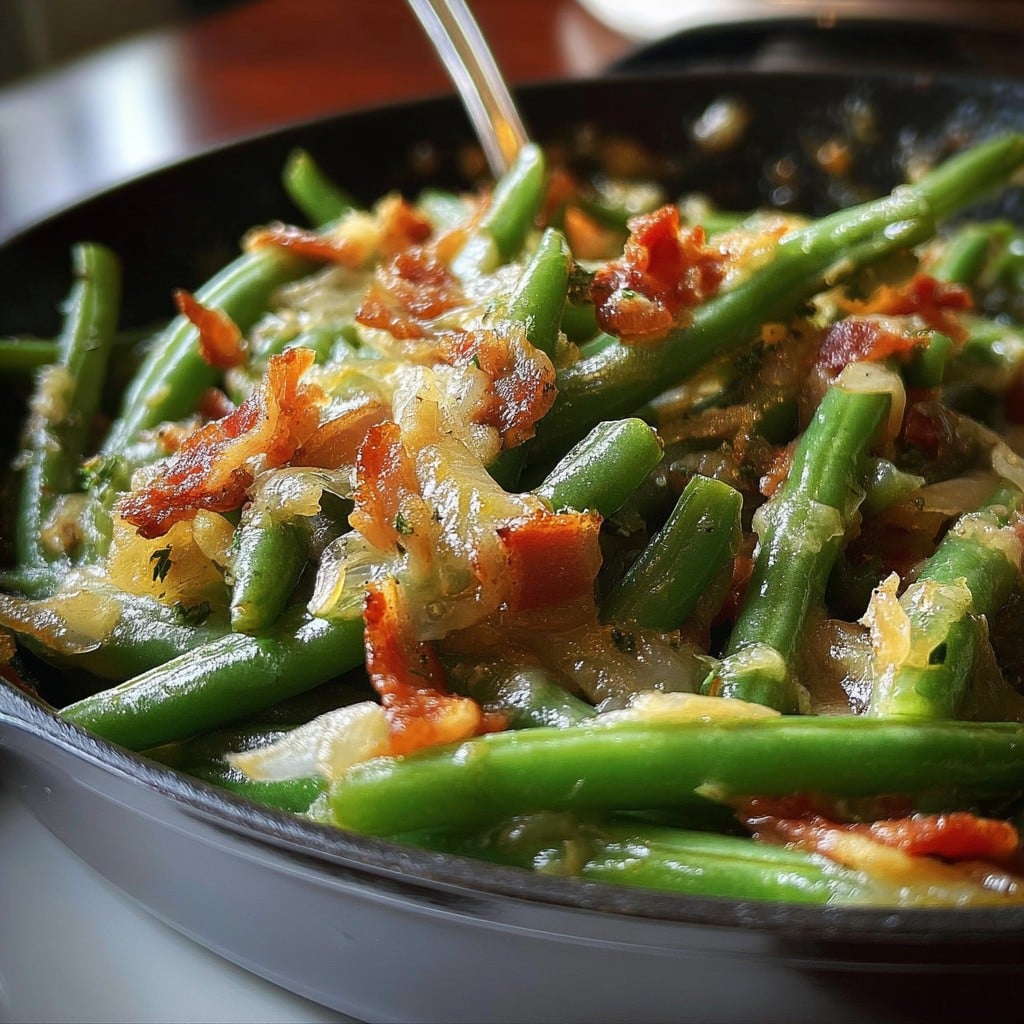
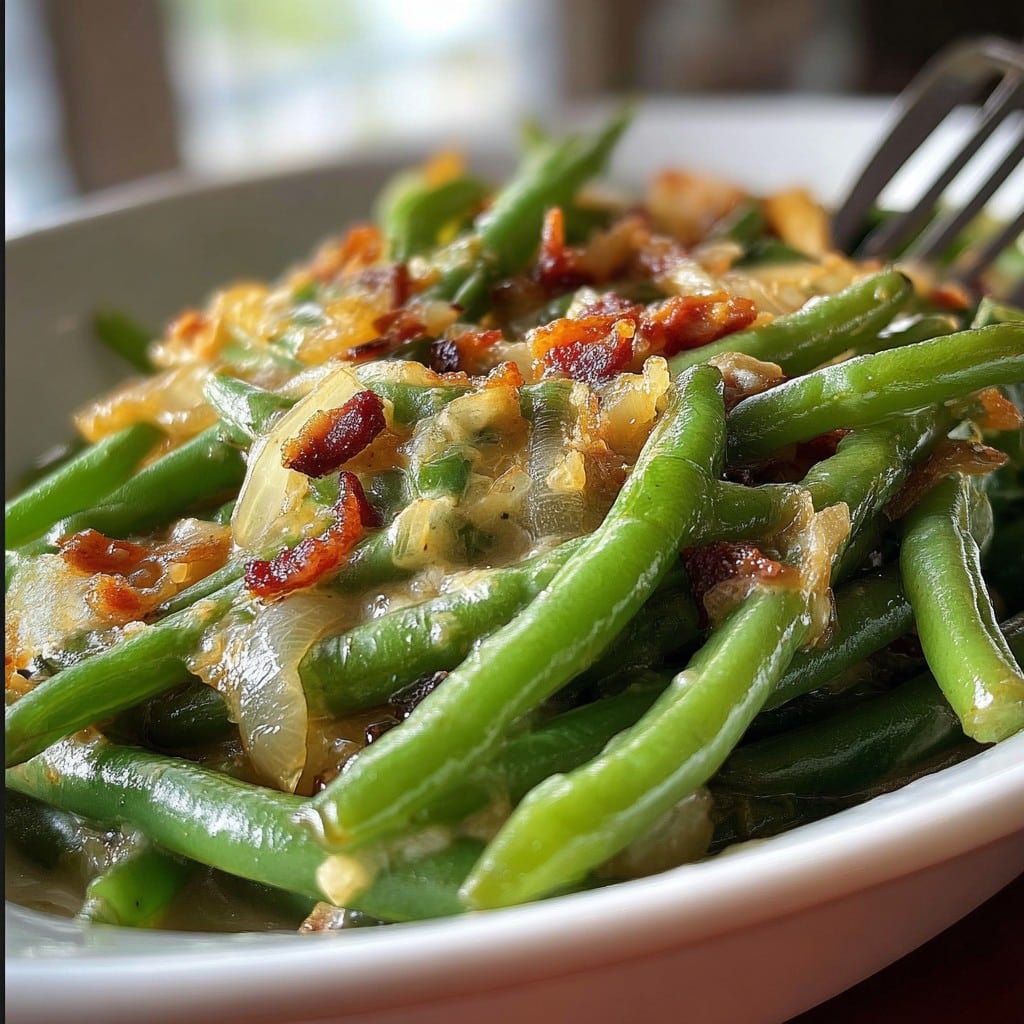
Easy Smothered Green Beans with Bacon & Onions
Let Me Tell You How I Fell for Smothered Green Beans…
You ever hear a dish described as “smothered” and it just sounds irresistibly cozy? I remember the first time I made smothered green beans with bacon and onions—it was Thanksgiving, everyone was bustling about, and I, being the slightly scatterbrained relative, volunteered to handle “just the green beans.” (Little did I know, they’d end up overshadowing the turkey! My uncle still jokes about it.) I was low on fancy ingredients, high on chaos, and kinda just winged it. Ever since then, this recipe’s been the ace up my sleeve. Not to brag, but even the veggie skeptics in my family pile their plates. If that’s not a win, what is?
Why I Keep Coming Back to This Recipe
I make these green beans when I want people to actually eat their vegetables (and then some). My sister-in-law practically begs for leftovers—I mean, what leftovers? They vanish quicker than a cold pint on a hot day. There was a time when I tried skimping on the bacon (healthier, right?) and, let’s just say, I got a few pointed looks. Really, it’s the flavor that hooks you in—the smoky bacon, sweet onions, a hint of garlic, and somehow that all soaks right into the beans. Plus, the one-pan thing saves my sanity (less washing up, more time eating). If you’re tired of bland boiled beans (who isn’t?), this’ll be your new jam.
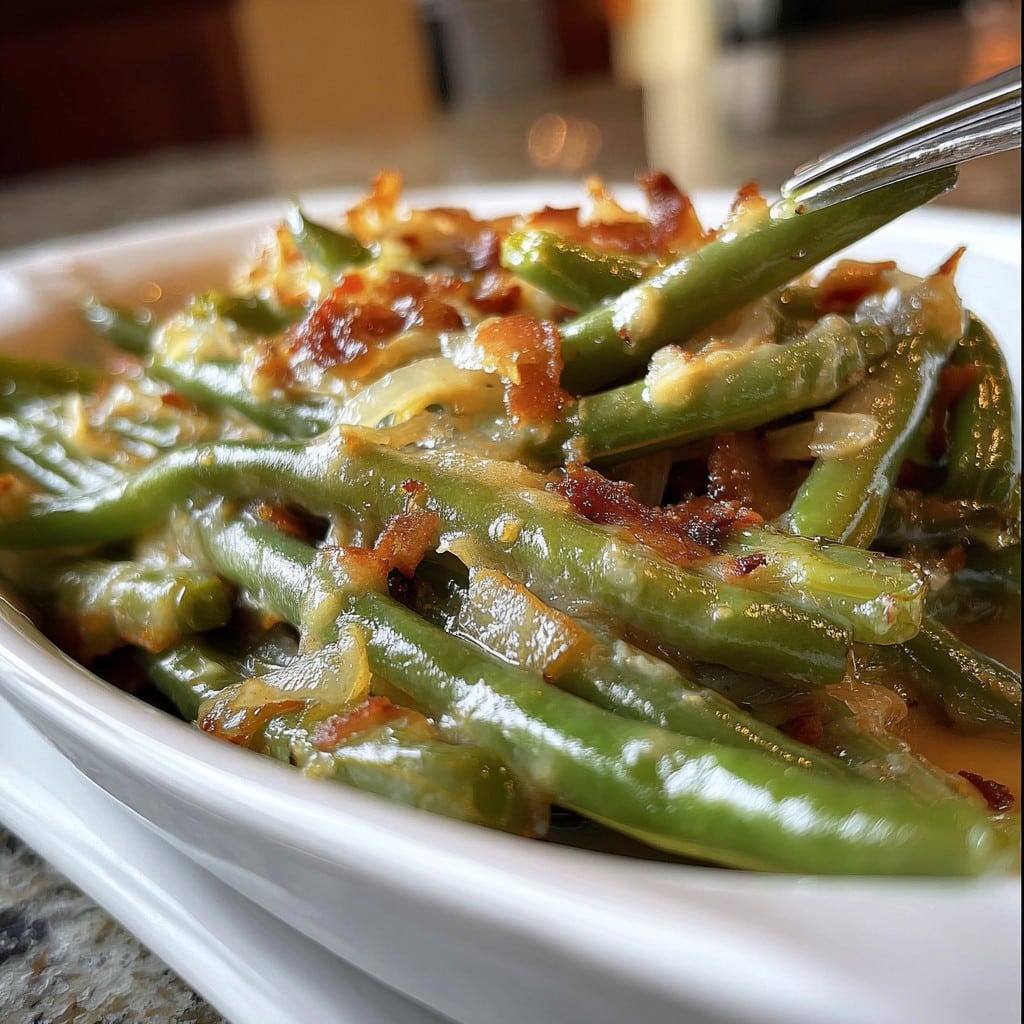
What You’ll Need—And Some Swaps That Work
- Green beans – About a pound (450g). I’ve used frozen in a pinch (just don’t tell my mother-in-law).
- Bacon – 7-8 strips. I usually go with thick cut, but thin works too. If you’re fancy, pancetta is great. (Turkey bacon? It’s okay, but not the same, honestly.)
- Onions – 1 big yellow or 2 smallish ones, sliced kinda thin. Red onions can work, though it’s sweeter.
- Garlic – 2 cloves, minced. Sometimes I just throw in a spoon of the jarred stuff…
- Chicken broth – About half a cup. Veggie stock is fine; I even used water once, and the world didn’t end.
- Butter – A tablespoon or so. Grandmother always insisted on real butter. I’ve snuck in margarine and, frankly, it gets the job done.
- Salt and pepper – To taste. I go a little heavy on the pepper.
- Optional: A pinch of cayenne or smoked paprika for some pep.
How I Put It All Together (with a Few Wanders Aside)
- Slice up your bacon into little lardons (strips, if you wanna get all technical). Throw ’em in a big skillet on medium heat. Let ‘em get nice and crispy, maybe 6 minutes? Stir so they don’t stick. This is when I start buzzing around and forgetting what I was doing.
- Scoop out the bacon bits onto a plate, but LEAVE that glorious grease in the pan. Don’t mop it up! (I once did. Regretted it instantly; all the flavor just, poof, disappeared.)
- Toss in your onions and sauté for a few minutes until they go all soft and golden. This is usually where I sneak a taste and burn my tongue. Classic.
- Add the garlic and cook just until it smells amazing (about 30 seconds, maybe). If you want spice, cayenne or paprika goes in now.
- Stir in the green beans. If they’re fresh, I trim ‘em (you can snap off the ends, or buy the ones that are already prepped if you want to save time). If you’re using frozen, toss them straight in—no need to thaw first, just give it an extra minute or two.
- Shake a little salt and pepper all over. Pour in the broth, then drop in the butter. Give the whole thing a gentle toss. Put the lid on if you have one (or, a baking tray on top works in a pinch—have done it plenty).
- Let it all hang out for around 12-15 minutes. Peek in and give it a stir every so often. (If it’s looking parched, splash in more broth or a smidge of water.) By the end, the beans will be tender but not mushy and coated with all those great flavors.
- Toss the crispy bacon back in, give it one last stir, and serve right from the pan if you want. Rustic-style.
Lumpy Notes (Learned the Messy Way)
- If you ever overcook the green beans and they start to slump, don’t panic; just call it “Southern-style” and everyone’s happy.
- Once, I tried tossing in too much broth. Result: a green bean soup (not recommended, ha!).
- Actually, I find it works better if you let the beans sit for about 5 minutes with the heat off—soaks up flavors better.
Variations I’ve Tried (and One Fail)
- Added a handful of slivered almonds for a crunch once—surprisingly tasty!
- Used leeks instead of onions. A bit milder, nice in spring.
- Throwing in cherry tomatoes at the end. Meh… got soggy. Wouldn’t recommend.
- For a smoky kick, a dab of chipotle paste is really something—if you’re into that.
What If You Don’t Have the Right Pan?
I always say you need a big ol’ skillet for this. But truthfully, I’ve cobbled this together in a sauté pan or even a deep saucepan. If you don’t have a lid, just balance a plate on top or cover with foil. Don’t let equipment be the boss of you.
Storing and Reheating (If You Somehow Have Leftovers)
Pop any leftovers in a sealed container; they keep in the fridge for 2-3 days. Warm in the microwave or back in the skillet with a splash of broth. Though honestly, in my house, it never lasts more than a day—and sometimes not even past dinner! I think the flavors get even deeper by day two. If you ever freeze it (I did once), the beans aren’t quite as perky.
How I Like to Serve It (And a Tangent)
Makes a killer match for roast chicken or something simple like rice and fried eggs (don’t knock it; that’s my “midweek comfort weirdness”). We always have this at Sunday suppers—and my aunt insists on putting crispy onions on top for extra crunch. Oh, and if you want a fancier take, Serious Eats has a wild version too; I still vote for bacon though.
If You’re Like Me—Here’s What NOT To Do
- Don’t rush the bacon. I once cranked the heat and, well, had to open all the windows. Crispy is perfect; burnt is just sad.
- Let the pan cool for a few minutes before adding broth if it’s super hot, or you’ll get a face full of steam (speaking from experience!).
- Give it a taste before adding more salt—some broths and bacon are already salty. Learned the hard way…
FAQ—Questions That Actually Tripped Me Up
- Can I make this vegetarian? Yep! Skip the bacon, use a smoky smoked paprika, and double the onions. Still good, but (just being honest) you’ll miss a bit of richness.
- Can I use canned green beans? You could, but they’re softer and can go mushy fast. Just cook less—like, maybe 5 minutes. Or try fresh or frozen; tastes miles better in my opinion.
- Is this spicy? Only if you want! Sometimes I add a little cayenne, or none at all when I’m making it for picky kiddos.
- Can I prep ahead? Oh, totally. I sometimes cook the bacon and onions early then just toss everything together right before serving.
- I need a dairy-free swap? Use olive oil in place of butter. Works a charm.
- Would smoked sausage work instead of bacon? Actually, yes. Andouille or kielbasa both bring good flavor—just change up the vibe a bit! Oh, and here’s a funny link I stumbled on: Cooking Classy’s beans go all in on the bacon if that’s your jam.
Phew, that’s probably way more about green beans than you bargained for. But hey, next time you’re staring at that lonely produce drawer, now you know what to do—smother ‘em, bacon ‘em, and don’t forget to sneak a taste.
Ingredients
- 1 lb fresh green beans, trimmed
- 6 slices bacon, chopped
- 1 medium yellow onion, thinly sliced
- 3 cloves garlic, minced
- 2 tbsp unsalted butter
- 1/2 cup chicken broth
- 1/2 tsp black pepper
- 1/4 tsp salt
Instructions
-
1In a large skillet over medium heat, cook the chopped bacon until crispy. Use a slotted spoon to transfer the bacon to a paper towel-lined plate, leaving the bacon fat in the skillet.
-
2Add the sliced onions to the skillet and sauté until translucent and soft, about 5 minutes.
-
3Stir in the minced garlic and cook for 1 minute, until fragrant.
-
4Add the green beans and butter, tossing to coat. Pour in the chicken broth, then season with black pepper and salt.
-
5Cover and simmer for 15-18 minutes, stirring occasionally, until beans are tender but not mushy.
-
6Remove the lid, sprinkle the cooked bacon over the green beans, stir gently, and serve hot.
Approximate Information for One Serving
Nutrition Disclaimers
Number of total servings shown is approximate. Actual number of servings will depend on your preferred portion sizes.
Nutritional values shown are general guidelines and reflect information for 1 serving using the ingredients listed, not including any optional ingredients. Actual macros may vary slightly depending on specific brands and types of ingredients used.
To determine the weight of one serving, prepare the recipe as instructed. Weigh the finished recipe, then divide the weight of the finished recipe (not including the weight of the container the food is in) by the desired number of servings. Result will be the weight of one serving.
Did you make this recipe?
Please consider Pinning it!!