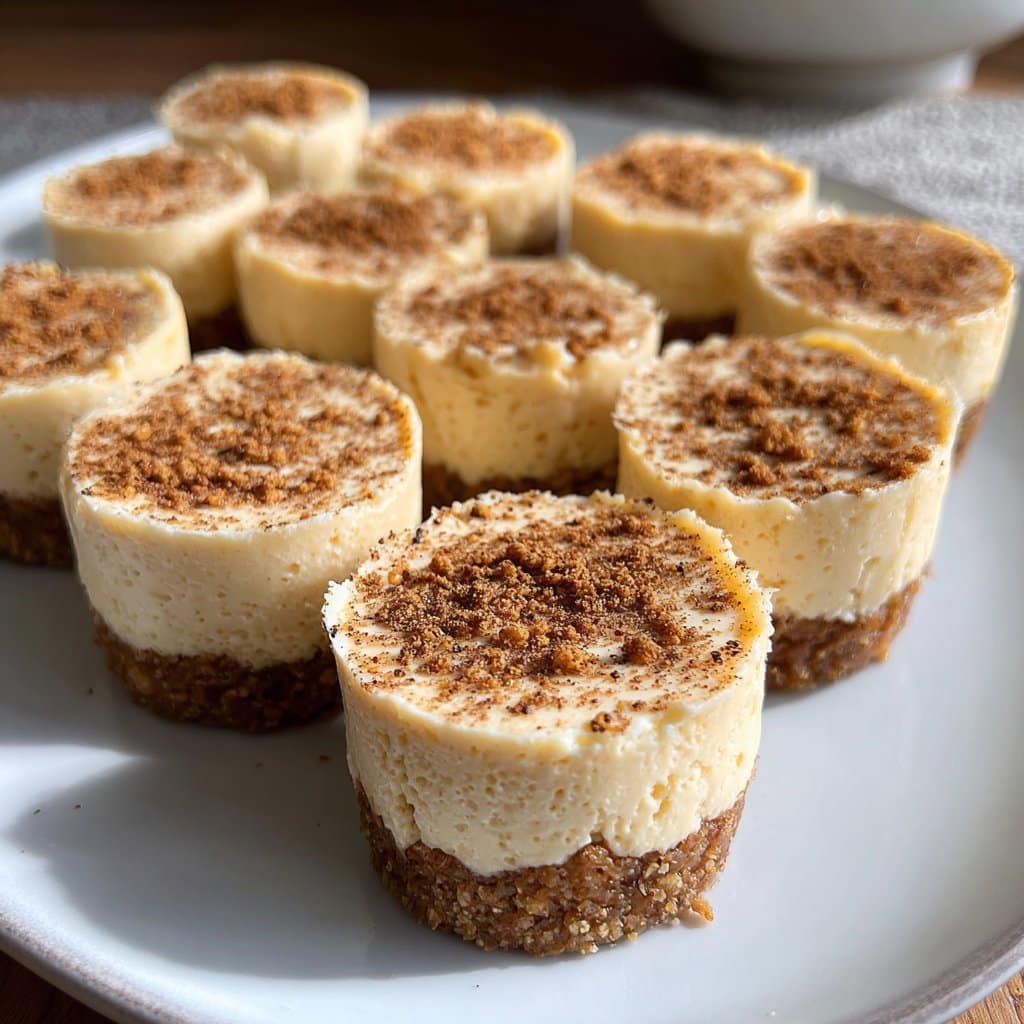
Keto Pumpkin Cheesecake Bites – The Perfect Fall Fat Bomb
Let Me Tell You About These Little Beauties
Okay, so here’s the thing: the very first time I made these keto pumpkin cheesecake bites, I managed to mix in baking soda instead of the sweetener. Not my proudest moment; the kitchen smelled… interesting, let’s say. Fast forward a year (and a very messy countertop later), and now these are pretty much the unofficial snack of every autumn gathering at my place—my cousin even tried to hide a batch behind the oat milk, which, honestly, was bold but not subtle. You know that feeling when the leaves start to change and everyone suddenly wants pumpkin in literally everything? That’s exactly when I whip these up—partly for the bragging rights, mostly because, well, they taste like fall in snack form. Plus, nobody ever realizes they’re keto until it’s too late—mwahaha.
Why You’ll Kinda Fall in Love With This Recipe
I make these pretty much anytime I’m craving something rich but can’t be bothered with six pans and 300 steps (I’m looking at you, layer cakes). My family goes nuts for them; sometimes even the dog tries his luck. I love that you get the classic pumpkin spice thing without the whole sugar crash—it actually satisfies that nibble urge when the weather turns chilly (or just when you’ve got one of those days where you keep walking back to the fridge, hoping snacks will manifest). Honestly, I think this is one of those recipes you keep for a rainy Sunday, when you’re wearing fuzzy socks and don’t really want to leave the house. Plus, if you’ve ever been weirded out by clumpy pumpkin in dessert, trust me, this one’s smooth like jazz on a Sunday morning.
Gather Your Stuff—Here’s What You’ll Need (With a Few Wildcards)
- 1 cup cream cheese, softened (room temp is best, but I’ve microwaved it for 15 seconds in a pinch—just don’t tell)
- 1/2 cup canned pumpkin puree (not that premade pie goo; I sometimes roast my own, but let’s be honest—Libby’s works great)
- 1/4 cup powdered erythritol or monk fruit (Grandma swore by Swerve, but anything fine and not too weird aftertaste-y works)
- 1 teaspoon pumpkin pie spice (I’ve just thrown in extra cinnamon and nutmeg when I run low—nobody’s caught me yet)
- 1/4 teaspoon vanilla extract (sometimes I glug a little more in… measuring spoons are a state of mind)
- Pinch of salt (I confess I’ve forgotten this before and honestly—still pretty great)
- Optional: 1 tablespoon coconut flour for added structure if you like them a bit more cakey (not always necessary)

Let’s Get Messy—Directions (Sort Of)
- First things first: dump the cream cheese in a mixing bowl. If it’s not soft yet, you can kind of squish it with the back of a spoon (or use elbows, like I do when impatient). Something about the messier start makes them taste better—unproven, but deeply believed.
- Add your pumpkin puree, sweetener, pumpkin pie spice, vanilla, and that pinch of salt. Use a hand mixer to blend until the mixture turns creamy and orange (here’s where I usually taste a tiny bit—shh, don’t tell my dentist). If you’re sans electric mixer, a fork and some determination will get the job done, though your arm will ask for hazard pay.
- If your mixture seems a bit loose (like, will-not-hold-shape loose), stir in the coconut flour. But don’t stress if it’s a little sticky, they’ll set in the fridge.
- Chill the batter in the fridge for at least 30 minutes. Honestly, I take a coffee break here. It’s crucial—though sometimes I forget and check every 10 minutes (doesn’t help; it’s like watching paint dry).
- Once it’s firm, use a cookie scoop (or two spoons… or just your fingers if you live dangerously) to make bite-sized balls. Place them on a parchment-lined tray.
- You can roll them in a little cinnamon sweetener mix if you want—totally optional, but makes ‘em prettier.
- Pop ‘em back in the fridge for another 30 mins if you can wait. Or just eat one now; I won’t judge.
Bite-Sized Notes (From Someone Who’s Tried and Failed)
- If your cream cheese is a bit clumpy, don’t panic! It’ll smooth out as you mix, but I sometimes have given up and called it a “rustic” texture.
- I tried skipping the chilling step once. Don’t. Unless you love pumpkin cheese soup.
- Actually, adding just a half teaspoon of lemon juice is surprisingly good if you want that tang—found that by accident once!

If You’re Feeling Adventurous—Variations that Somewhat Worked
- Chopped pecans mixed in for crunch—huge hit
- A swirl of sugar-free chocolate—yum, but maybe I went a bit overboard once; less is more
- Once tried swapping coconut flour with almond flour—worked but a bit gritty. Wouldn’t recommend unless you’re out of options
What to Use (Or MacGyver it If You Need To)
- Mixing bowl (even a large saucepan in a pinch—it’s just a vessel, right?)
- Hand mixer is nice, but honest, I’ve done it with a sturdy fork and a surprisingly strong arm
- Baking tray or plate lined with parchment paper, if you don’t have parchment, a silicone mat is grand, or foil, although they can stick a bit
- Cookie scoop or just two teaspoons, good old hands work too (wash ‘em first!)

How To Store (If They Make It This Far)
Keep these in a covered container in the fridge for up to four days—though honestly, in my house it never lasts more than a day! They’re not bad frozen either; just thaw for 5–10 minutes before eating, if you’ve got that sort of patience. Oh, and there’s a nice guide on freezing fat bombs over at Wholesome Yum if you want backup details.
How I Like to Serve ‘Em
I tend to pile these on a plate with an extra shake of cinnamon on top, sometimes with a mug of strong coffee (ok, or mulled wine if it’s chilly and I’m feeling ~fancy~). Once in a blue moon, my niece will ask for some whipped cream on the side; so, go wild. They’re good as is—or as a sidekick to your other autumn snacks. Here’s some ideas for a full-on keto snack tray: their snack list is massive.
What I Wish I’d Known (aka Pro Tips)
- I once rushed the chilling step because I was running late for a movie night—don’t be me. They were squishy and everyone just sort of poked them suspiciously.
- If you’re doubling the batch, work in smaller batches for mixing—otherwise things get lumpy and weird fast.
- On second thought, don’t skip tasting before chilling; sometimes my spice ratios are off, and this is much easier to fix early.
FAQ—Questions My Friends Actually Text Me
- Can I use homemade pumpkin?
Oh for sure—makes you sound fancy, but it does have more water, so blot with a towel or you might get mush! - Do they taste like real cheesecake?
Honestly, yes, but kind of like pumpkin pie and cheesecake had a baby. Very autumn-forward (and no crust to worry about). - How can I make them sweeter?
Add a touch more sweetener, but go slow; too much and it’ll get chalky. Actually, I find the flavor develops overnight, so wait and see. - Help! I don’t have pumpkin pie spice!
No worries—just mix cinnamon, nutmeg, and maybe a pinch of cloves or allspice. I once threw in ginger by mistake and, not bad! - Is coconut flour really necessary?
Nah, most days I skip it. Just helps if you want a sturdier bite or it’s a super-hot day (or your fridge is packed and you need quick-setting stuff).
Ingredients
- 8 oz cream cheese, softened
- 1/2 cup canned pumpkin puree
- 1/4 cup powdered erythritol or sweetener of choice
- 1/4 cup coconut flour
- 2 tbsp unsalted butter, melted
- 1 tsp pumpkin pie spice
- 1/2 tsp pure vanilla extract
- Pinch of sea salt
Instructions
-
1In a medium mixing bowl, beat the softened cream cheese until smooth.
-
2Add the pumpkin puree, powdered erythritol, melted butter, pumpkin pie spice, vanilla extract, and sea salt. Mix until well combined and creamy.
-
3Gradually add the coconut flour to the mixture and mix until a thick dough forms.
-
4Scoop the mixture into 12 equal portions and roll each portion into a bite-sized ball.
-
5Place the bites on a parchment-lined tray and refrigerate for at least 30 minutes before serving.
Approximate Information for One Serving
Nutrition Disclaimers
Number of total servings shown is approximate. Actual number of servings will depend on your preferred portion sizes.
Nutritional values shown are general guidelines and reflect information for 1 serving using the ingredients listed, not including any optional ingredients. Actual macros may vary slightly depending on specific brands and types of ingredients used.
To determine the weight of one serving, prepare the recipe as instructed. Weigh the finished recipe, then divide the weight of the finished recipe (not including the weight of the container the food is in) by the desired number of servings. Result will be the weight of one serving.
Did you make this recipe?
Please consider Pinning it!!