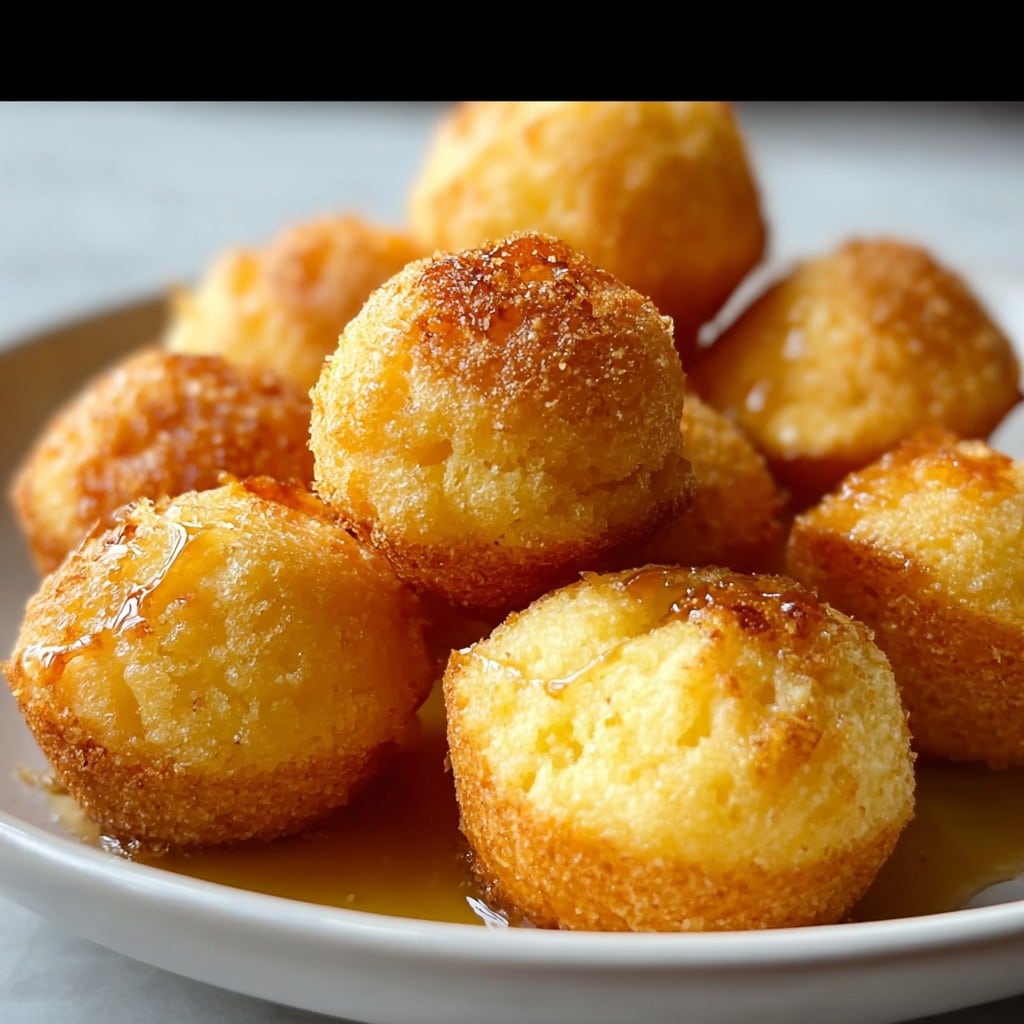
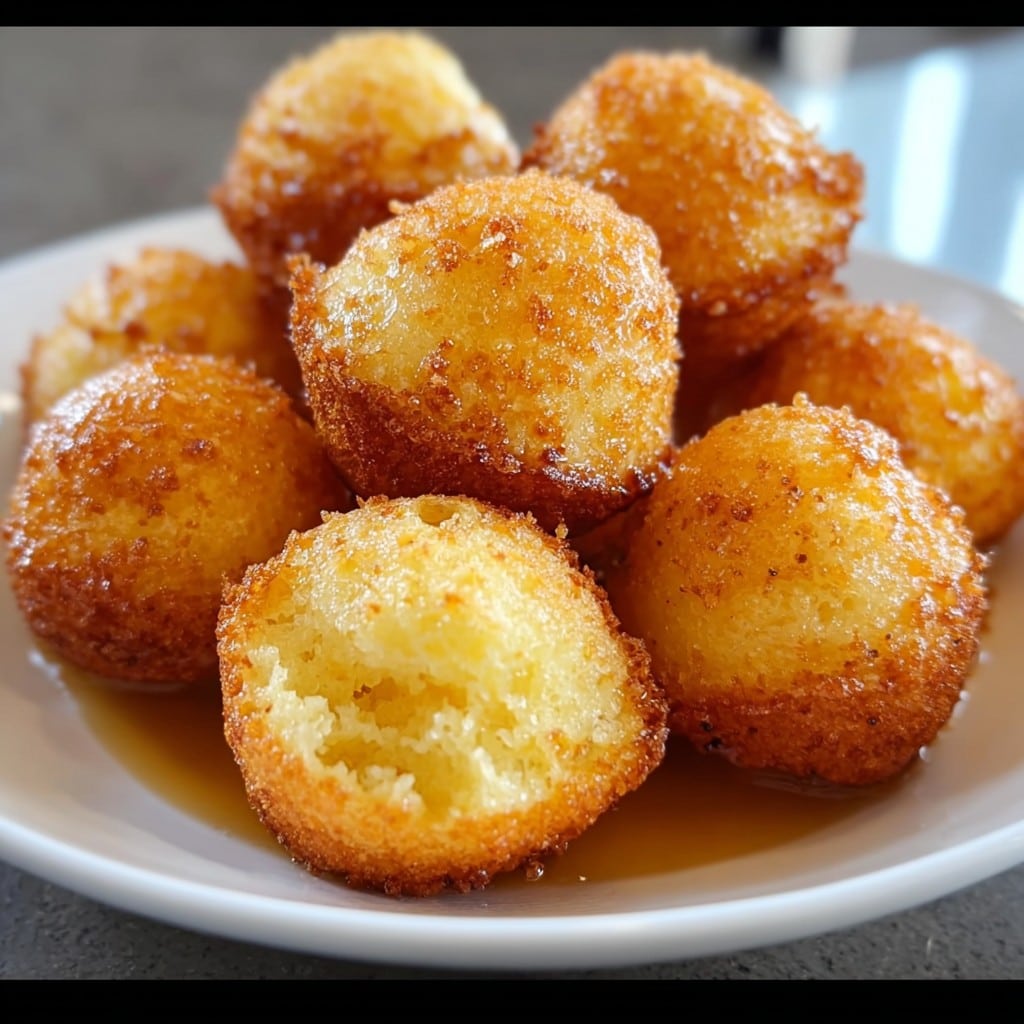
Honey Butter Cornbread Poppers
So, Why Honey Butter Cornbread Poppers?
Alright, real talk: these Honey Butter Cornbread Poppers are always the first thing to vanish at any of my get-togethers. I’m not kidding—my cousin once tried to sneak extra from the platter before anyone saw (busted, obviously). I just love how they bring everyone to the kitchen, even the so-called “not hungry” people. The combo of sweet honey and melty butter with that golden crisp on the outside? Well, it’s honestly kinda irresistible. Plus, the smell… fills the whole house—one of the few things my teenage son will actually come out of his room for without bribes.
Why You’ll Probably Want to Make These Too
I make these when I don’t want to stress about fancy plating but still wanna see empty trays by the end of the night. My family goes crazy for them because they’re sweet, slightly salty, buttery, and bite-sized (and you don’t need a fork or anything fancy, thank goodness). Someone always tries to drizzle on extra honey—after I said they’re sweet enough—but hey, live your dreams. The batter’s forgiving, even if you accidentally use a little too much butter. (Been there. Still ate every one.)
Here’s the Ingredient Lowdown (With Some Swaps, Because Life)
- 1 cup cornmeal (I like yellow, but I’ve used white cornmeal in a pinch—color’s just slightly different)
- 1 cup all-purpose flour (My grandma swore by Gold Medal, but honestly, store brand also works)
- 1/4 cup sugar (I’ve done half brown, half white sugar. Kinda nice!)
- 1 tablespoon baking powder
- 1/2 teaspoon salt (Or a good pinch—no need for fancy stuff)
- 2/3 cup whole milk (Almond milk works too, or even buttermilk if you’ve got it taking up space)
- 2 eggs (Sometimes I swear the recipe needs 3, but 2 works—trust me)
- 1/4 cup melted unsalted butter (Okay, I’ve used salted; they come out fine, just skip a bit of salt)
- 1/4 cup honey (I prefer local, but squeeze bottle works when I’m rushing)
- (Optional) pinch of cinnamon or chili powder for a little kick
- Extra butter + honey for topping
How I Actually Make These
- Preheat and prep: So, oven at 400°F (200°C). I always forget to do this until halfway, so maybe start now. Line a baking sheet with parchment, or honestly, grease it if you’re out of paper—just not foil unless you like picking bits off later.
- Dry stuff: Get a big bowl, dump in the cornmeal, flour, sugar, baking powder, salt. Whisk or fork it. Doesn’t need to be fancy.
- Wet stuff: In a second bowl, whisk the milk, eggs, melted butter, and honey together. Sometimes the eggs are cold and the butter gets weird and clumpy; don’t panic, just keep mixing. Or let butter cool a bit first? Actually, that helps a lot.
- Combine: Pour the wet into the dry, stir till just mixed. Lumps are your friend here—seriously, if it’s too smooth, sometimes they’re a tad dense. At this point, I sneak a taste (just a little, it’s raw eggs but… yolo?)
- Shape: Use a small cookie scoop or even two teaspoons to form little golf ball-sized blobs. They spread just a bit, so leave a little space—you don’t wanna merge them into a mutant super-popper.
- Bake: 10 to 12 minutes. You want pale gold, maybe some browning on the edges. (If you’re not sure, poke one—should feel just firm enough and not mushy inside.)
- Gloss & toss: While warm, brush with extra melted butter and a drizzle more honey—or, if you’re like my Aunt Lynn—totally douse them and call them breakfast.
- Eat. Or, you know, let them cool a minute so you don’t torch your tongue (spoken from experience).
Notes I’ve Jotted Down After Making These…A Lot
- Batter too thick? Add a splash more milk; it should plop, not pour. If it’s runny, you’ll get pancakes. Didn’t hate it, but wasn’t what I was going for.
- If you make these ahead, pop back in the oven for like 2 minutes to get the crust back. Microwaving is fine but they lose their snap.
- I always think I’ll use fancy honey—but honestly, store brand was just as good last time. Learned that the hard way after spending $8 on something called “artisan wildflower” honey. Oof, my wallet.
Fun Variations (and a Fail, for Honesty’s Sake)
- Mini jalapeño bits tossed in for a spicy-sweet vibe—my favorite, actually.
- Shredded cheddar plus a sprinkle of cayenne for a cheesy version. Not bad!
- Once tried tossing blueberries in. That… didn’t really do it for me; they got kinda soggy. But maybe someone else’ll have better luck!
What If I Don’t Have a Cookie Scoop?
Honestly, two spoons work fine—just dollop and go. I do have a scoop now, but for years I didn’t and nobody seemed to mind (not even picky eaters). If you use your hands, yeah, they get sticky; just keep a wet dish towel nearby.

How I Store Them (If There’s Any Left)
Toss leftovers in a zip bag or airtight container. They’re best same day, but okay for 2 days on the counter; fridge makes them a bit chewy. Though, if I’m being real, these never last more than a day in my house—someone always surreptitiously nabs the last one by midnight. I guess technically you can freeze them, but that’s never happened here.
Serving Thoughts—You Do You
I love these with chili—especially after a long, cold walk when you need something warm (and, yeah, a bit carby). My kids dunk ‘em in soup or just eat them straight with more honey. Once, we set up a DIY popper bar at a family BBQ—tiny bowls of jam, maple butter, even hot sauce. Absolute chaos, but fun.
Pro Tips (Mainly, Don’t Be Like Me)
- Once, I rushed that cooling step—burnt tongue. Just let ‘em rest a minute. You’ll thank yourself.
- Don’t overmix the batter. I went ham on it once (was watching TV and wasn’t paying attention) and they were like little cornbread rocks. Still tasty, but not the popper experience.
- Actually, I find it works better if you let the batter sit 5 minutes before scooping.
FAQ (Because People Always Ask Me These!)
- Can I double this? Oh yeah—you’ll just want two trays. Rotate them halfway so they bake up even.
- Gluten free? Swap in a cup-for-cup GF blend. I’ve done it (for my friend Sam); still tasty.
- Can I skip the honey? Sure, but it’s really not the same. Maybe try agave or maple syrup?
- Can I use muffin tins? Sometimes I do, but cut the baking time a bit—mini muffin tins work great.
- What if I don’t have cornmeal? Hmm. Polenta works in a pinch but the texture’s rougher (not my favorite, but better than nothing).
Quick Digression…
Oh! Before I forget—if you’re looking for a really good chili recipe to pair these with, Serious Eats’ chili is amazing. I also use King Arthur’s base cornbread recipe sometimes when I want to play around with different add-ins. Highly recommend peeking at their tips.
And that’s basically it: Honey Butter Cornbread Poppers. Not fancy, but they’ve rescued many a potluck for me. If you try ‘em, let me know how you tweak yours—I’m always looking for new spins!
Ingredients
- 1 cup yellow cornmeal
- 3/4 cup all-purpose flour
- 2 tablespoons granulated sugar
- 2 teaspoons baking powder
- 1/2 teaspoon salt
- 3/4 cup whole milk
- 1 large egg
- 1/4 cup unsalted butter, melted (plus more for brushing)
- 2 tablespoons honey
Instructions
-
1Preheat your oven to 400°F (200°C). Grease a mini muffin pan with nonstick spray or butter.
-
2In a large bowl, whisk together cornmeal, flour, sugar, baking powder, and salt.
-
3In a separate bowl, whisk together the milk, egg, melted butter, and honey until well combined.
-
4Pour the wet mixture into the dry ingredients and stir just until combined (do not overmix).
-
5Spoon batter evenly into the prepared mini muffin pan, filling each cup about 3/4 full.
-
6Bake for 16-18 minutes or until the poppers are golden and a toothpick inserted comes out clean. Brush the tops with a little extra melted butter and drizzle with honey while warm, if desired. Serve warm.
Approximate Information for One Serving
Nutrition Disclaimers
Number of total servings shown is approximate. Actual number of servings will depend on your preferred portion sizes.
Nutritional values shown are general guidelines and reflect information for 1 serving using the ingredients listed, not including any optional ingredients. Actual macros may vary slightly depending on specific brands and types of ingredients used.
To determine the weight of one serving, prepare the recipe as instructed. Weigh the finished recipe, then divide the weight of the finished recipe (not including the weight of the container the food is in) by the desired number of servings. Result will be the weight of one serving.
Did you make this recipe?
Please consider Pinning it!!