Santa Cheese & Charcuterie Board – Easy Christmas Appetizer
So, You Want to Wow Folks With a Santa Cheese & Charcuterie Board?
Alright, friend, confession time: I invented this particular board out of sheer panic two Christmases ago. Picture this—kids running laps around the kitchen table, my partner absolutely convinced we had to have something “festive” (but not sweet, because apparently Christmas isn’t enough sugar already?). Next thing I know, we’re both elbow-deep in cheese and salami, desperately trying to turn a round of brie into, you guessed it, the jolliest Santa you’ve ever seen on a snack plate. Not gonna lie, our first attempt looked more like a jolly potato. But it tasted good! The point is: this appetizer has now become tradition, potato-shaped Santas and all. There’s something heartwarming (and slightly ridiculous) about people pointing out if your Santa’s hat is a bit crooked. Oh and if your family is as snacky as mine, it will get devoured before dinner is even a thought.
Why You’ll Actually Love Making This (and Eating It)
I am not usually the Pinterest-y type, but I make this when I want people to feel like I tried harder than I really did. My family goes a bit bonkers for it – mostly because it’s an excuse to eat with fingers and break into the cheese before dinner. Kids love making the face (though it has, on at least one occasion, turned into a cheese zombie and not Santa at all). Also, there’s absolutely no actual cooking involved; you’re just, sort of, constructing snacks with a little festive flair. Oddly, this appetizer seems to vanish faster than any of my fancy party dips. Oh, and if you’re worried about creative burnout, don’t. Santa’s face can absolutely be lopsided. In fact, mine always is.
What You’ll Need to Build Your Festive (but Chill) Board
- 1 wheel of brie (soft cheese is easiest to work with, but I’ve made do with camembert in a pinch)
- Red bell peppers (for the hat & probably some face details—honestly, tomatoes work too but they get a bit slippery!)
- Salami slices (or pepperoni; sometimes when I’m out, I sub prosciutto, just layer a lot of it)
- White cheddar or mozzarella pearls (for Santa’s beard and fuzzy hat bit; Grandma always swore by sharp cheddar but I think anything neutral and white-ish does the trick)
- Olives (black for eyes and mouth; green if you don’t mind a slightly more, uh, Grinchy Santa look)
- Crackers or sliced baguette (if you’ve only got pita chips, use those! No one has ever complained)
- Optional: Cherry tomatoes, cucumbers, baby carrots—honestly, sometimes I just use what’s about to go off in the veggie drawer
- Handful of nuts (pecans or walnuts look Christmassy, but I admit to tossing in whatever is open in my pantry…one time it was roasted peanuts, and nobody seemed to notice)
- Honey or fig jam (not essential, but this Bon Appétit fig jam recipe is divine)
Here’s How I (Usually) Put it Together
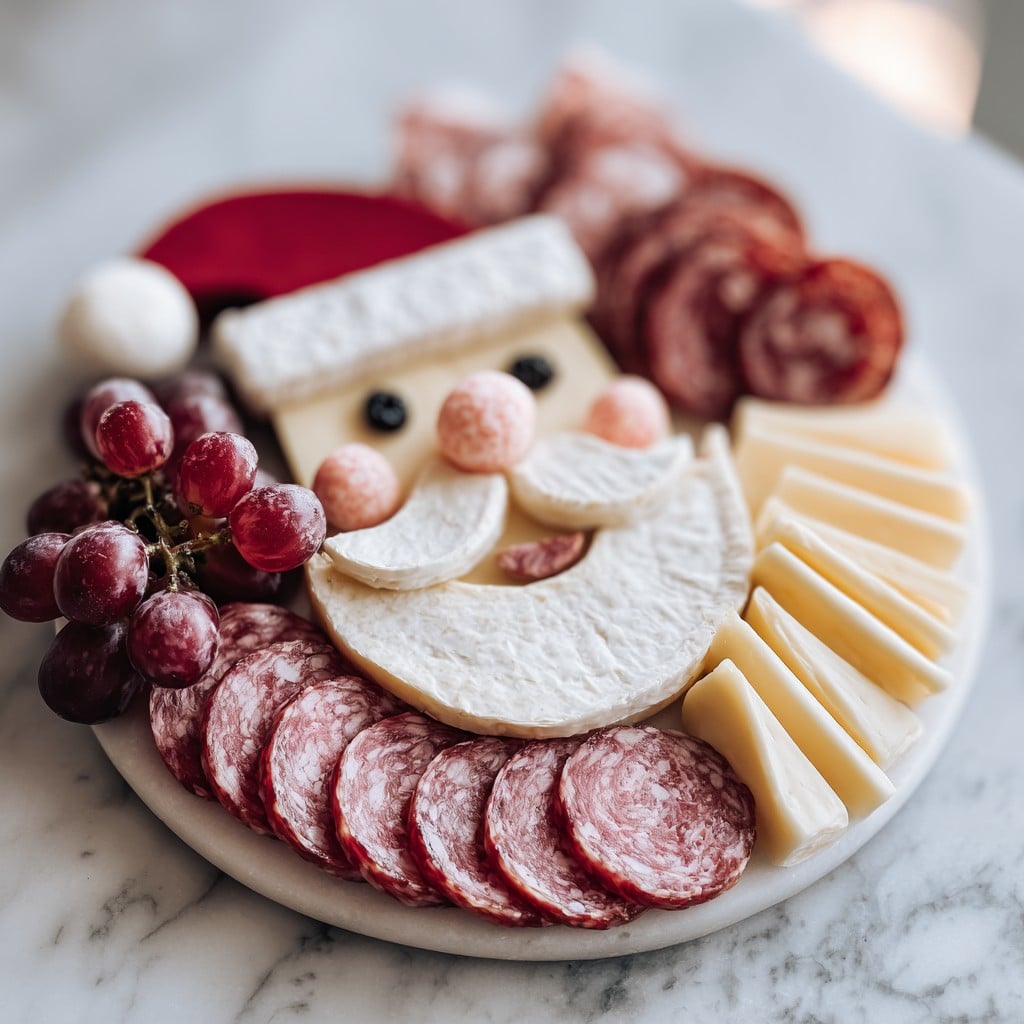
- Start by putting the brie smack-dab in the center of a big board or round platter. If you’re using parchment, great, less clean up. If not, eh, character-building messes.
- Slice red peppers (or use salami, both work) and arrange them above the brie to make Santa’s signature hat. Sometimes I tuck the slices in just a bit under the cheese so it looks less like he’s wearing a traffic cone.
- Line up your mozzarella pearls or small squares of white cheddar under the brie in a shaggy sort of beard. Don’t stress if it’s wonky! This is the moment I usually sneak a taste test, you know, for quality control.
- Use black olives for eyes and slice up a little red bell pepper for the nose. Or, if you’re feeling cheeky, try a grape tomato—sometimes it rolls off and vanishes, so grab an extra.
- Arrange remaining meats (salami, pepperoni, whatever you’ve got going) for the hat trim and pom-pom and, optionally, along the sides for snacks. Or, actually, you can get wild and make the hat from all cheese—looks a little like Santa after a snowstorm; it has its charm.
- Fill in the board gaps with whatever crunchy bits, veggies, or nuts you like. If there are little ones around, I sometimes cut stars from cheddar with mini cookie cutters (got a set like these and use them for everything—they once turned up in my soup).
- Drizzle honey or place a bowl of jam nearby: a touch of sweetness is always a hit (unless you’re my cousin Dave, who claims he’s “allergic” to mixing sweet and savory—more for the rest of us).
Honestly Useful Notes That I Learned the Hard Way
- Don’t use tomatoes for the hat if the board needs to sit for a while or the juices make everything look like Santa’s melting.
- Chill the brie before starting; if it’s warm, it’s a mess to maneuver (trust me, I’ve tried to build a Santa on a floppy brie. Didn’t end well. Still tastes good though.)
- If you want crisp cheese edges, freeze your cheddar for 10 minutes before slicing—otherwise it goes all squishy.
If You Want to Mix It Up, Try These (or, Er, Maybe Not All of Them)
- Swap meats for veggie slices and fruit for a vegetarian board. Grapes for pom-poms? Actually not bad!
- I once tried blue cheese for the face. Do not recommend. Santa looked haunted and the kids ran for cover.
- Pretzels for the beard—tasty, but weirdly pokey to eat. But hey, you might like it!
What If You Don’t Have the Right Platter? (And Other Tools)
You really don’t need a fancy cheese board, though I said it was “essential” earlier (I was feeling dramatic). A big cutting board, pizza pan, or even a baking sheet does the job in a pinch. For slicing cheese, a good sharp knife is all you need; though, honestly, a clean pair of kitchen scissors works for cutting out little cheese shapes if you’re impatient.
Storing Leftovers (If That’s Even A Thing)
Pop extra cheese and meat into an airtight container—should last a couple of days in the fridge. Though honestly, in my house, it never lasts more than a day. If by some Christmas miracle you’ve got crackers left, keep them separate, or they’ll end up soggy (learnt that the hard way, ugh).
How I Serve It Up—And My Slightly Weird Family Tradition
I plop this down right in the middle of the coffee table with tiny forks and napkins (or, sometimes, paper towels—who are we kidding). We blast Christmas tunes and debate whose turn it is to cut into Santa’s face. Sometimes, if I’m feeling extra, I surround the board with fairy lights. Makes up for the lopsided eyes!
The Best Tips I’ve Picked Up From (Slight) Fiascos
- Don’t try to build the board with warm cheese; it turns into a cheese landslide. I once tried rushing this step and had to start over—learned my lesson!
- If in doubt, give yourself more time for the slicing than you expect. Cheddar cubes aren’t as fast to make as you’d think (how come nobody mentions this in recipes?)
Real-Life FAQ – Questions People Actually Ask Me
- Can I make it ahead? Yes! Actually, I think it tastes better the next day if you save the crackers and veggies to add last minute. Or maybe that’s just me?
- Help, my Santa face melted! What did I do wrong? Haha; join the club. Probably your brie was too warm, or the tomatoes got juicy. Next time, chill the cheese for a bit before assembling and use peppers instead of tomatoes—it’s more forgiving.
- My board is messy—does it really matter? Not at all. No one’s ever stopped eating because Santa’s beard isn’t perfectly fluffy. If anything, messy boards disappear quicker in my experience.
- Is it okay if my kids use their fingers? Honestly, that’s half the fun. Family, friends, everyone’s relaxed—it’s Christmas, not Downton Abbey.
- Can I use all store-bought cheese? Absolutely. I do, like, 90 percent of the time. Nobody’s judging—except maybe my neighbor, but she’s still eating it.
Quick aside—if you’re looking for more festive board inspiration, The BakerMama’s holiday boards are a riot of color and great for ideas when you just can’t think straight during the rush. Or scroll Instagram for #cheeseboards and be comforted that nobody’s ingredients list is ever as neat as it looks in professional photos!
Ingredients
- 150g cheddar cheese cubes
- 150g mozzarella cheese balls
- 100g salami slices
- 100g prosciutto slices
- 50g black olives
- 1 red bell pepper (for Santa’s hat & nose)
- 120g fresh strawberries (quartered)
- 100g buttery crackers
- Fresh rosemary sprigs (for garnish)
Instructions
-
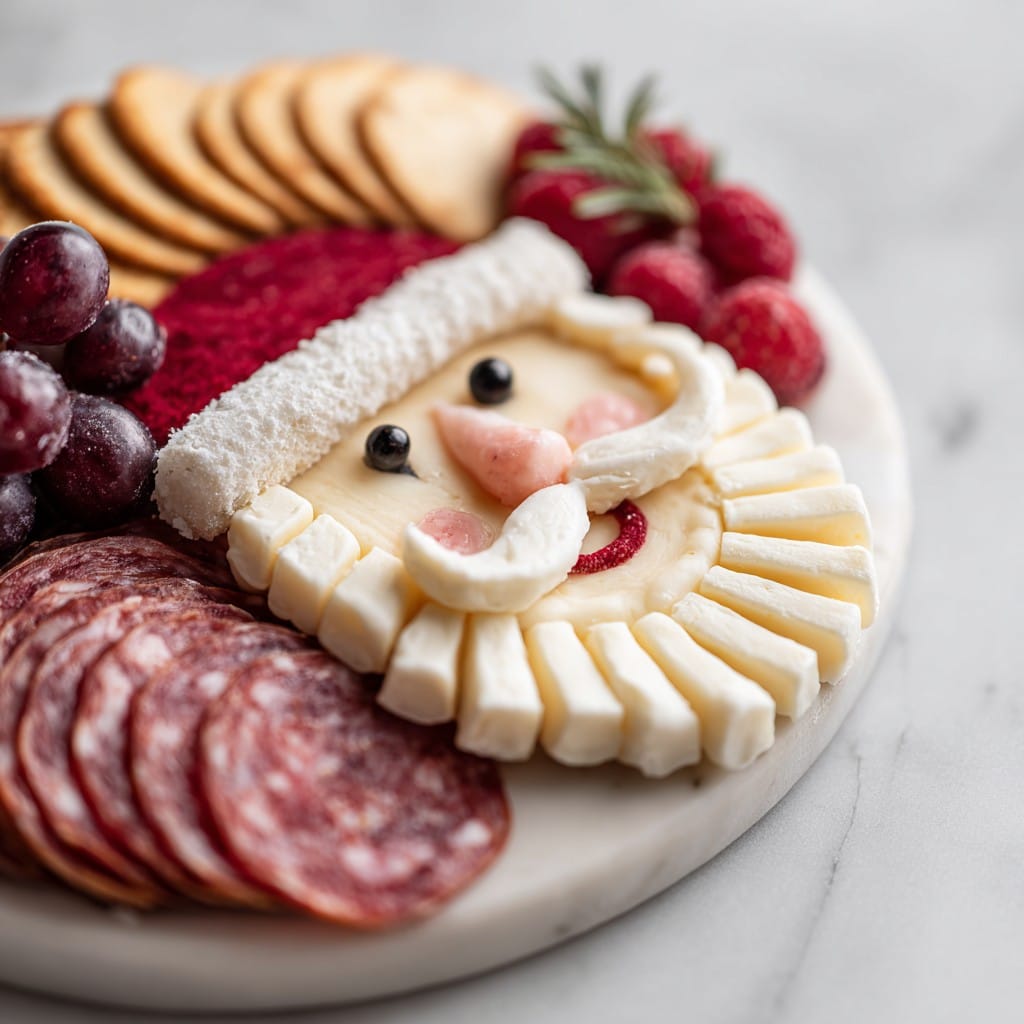
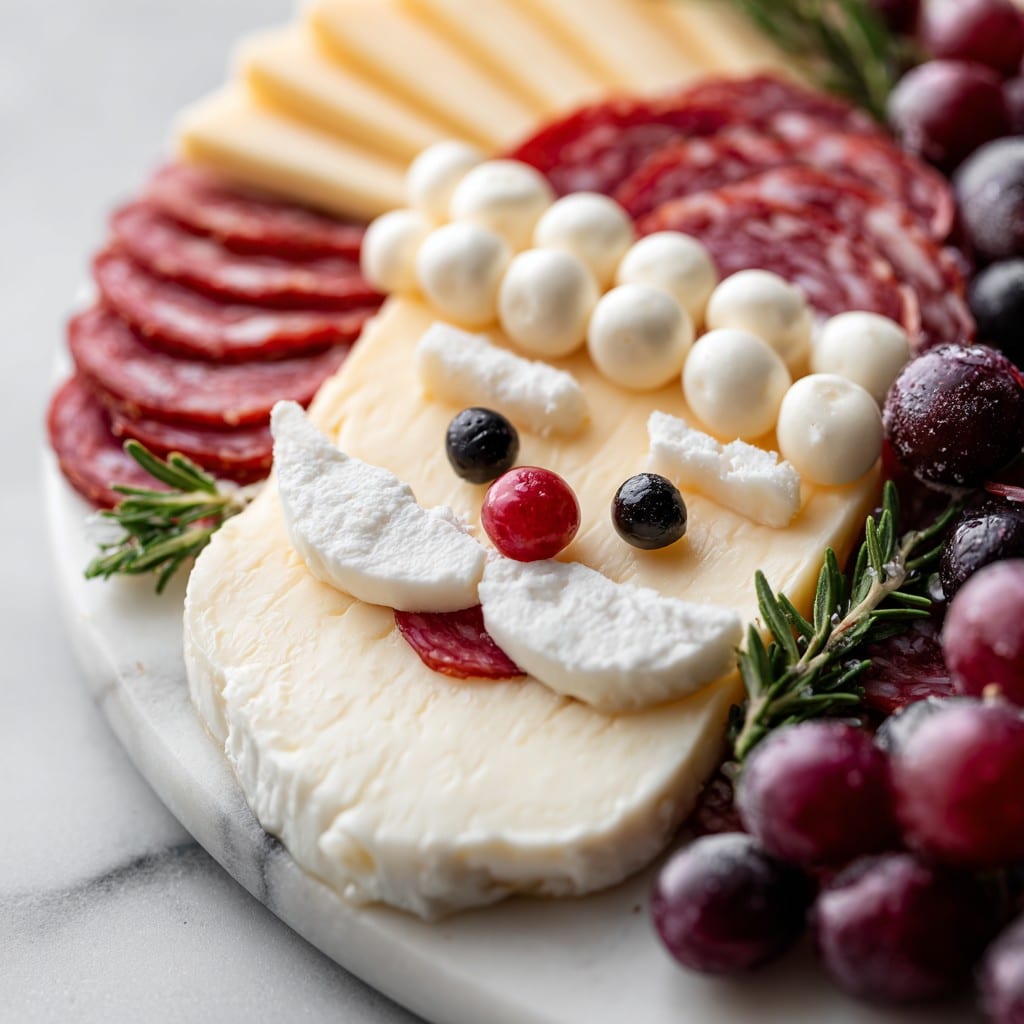
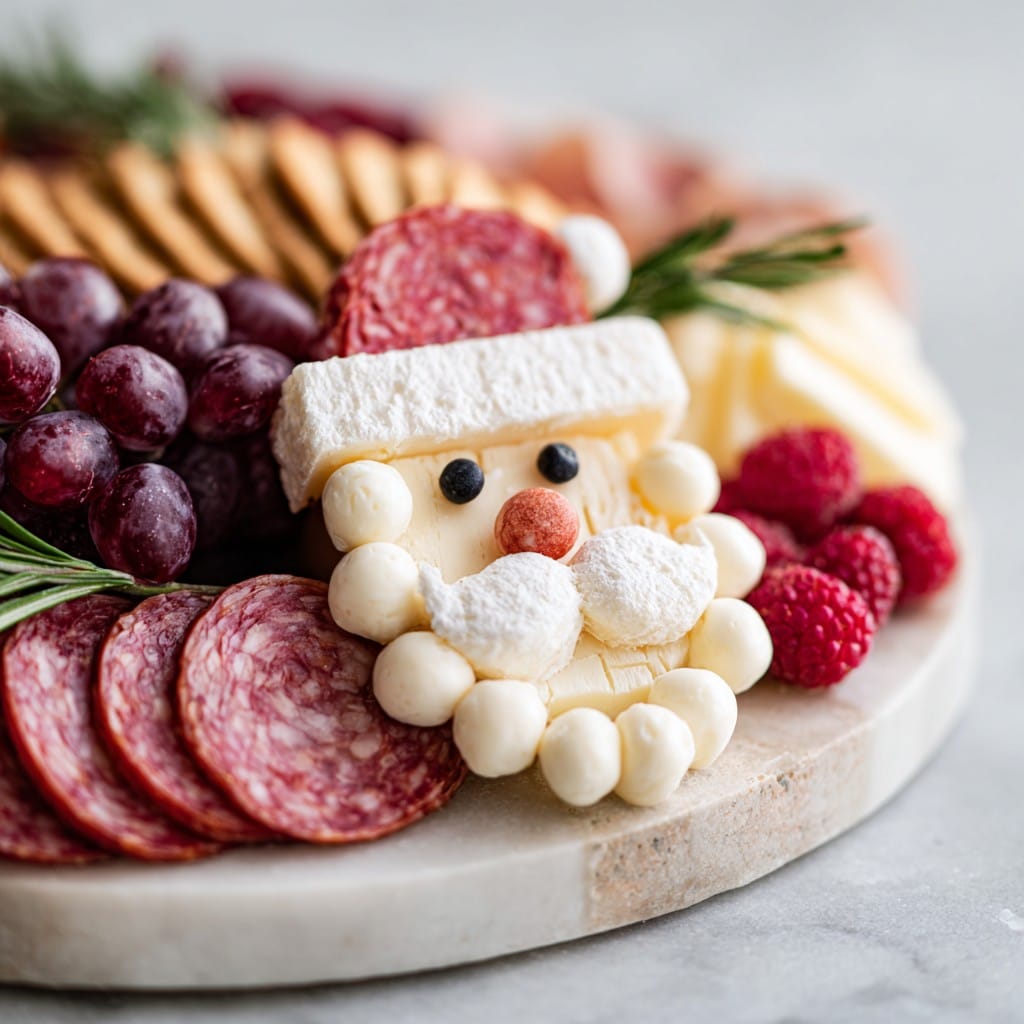
1On a large serving board, outline the general shape of Santa’s face and hat using strawberries and red bell pepper strips for the hat section.
-
2Arrange cheddar cubes and mozzarella balls in the face area to create Santa’s skin and beard. Use mozzarella balls for the beard and chin.
-
3Layer salami slices and prosciutto on the sides to create Santa’s hat brim and accents.
-
4Use black olives for Santa’s eyes and a small round piece of red bell pepper for his nose.
-
5Fill in empty spaces with crackers and garnish with fresh rosemary sprigs for a festive touch. Serve immediately.
Approximate Information for One Serving
Nutrition Disclaimers
Number of total servings shown is approximate. Actual number of servings will depend on your preferred portion sizes.
Nutritional values shown are general guidelines and reflect information for 1 serving using the ingredients listed, not including any optional ingredients. Actual macros may vary slightly depending on specific brands and types of ingredients used.
To determine the weight of one serving, prepare the recipe as instructed. Weigh the finished recipe, then divide the weight of the finished recipe (not including the weight of the container the food is in) by the desired number of servings. Result will be the weight of one serving.
Did you make this recipe?
Please consider Pinning it!!